
How to Stain Alder for a Guitar Body (Without Blotching It)
Alder blotches under a straight liquid stain. Here is the conditioner, stain choice, and technique that gets even color on an alder guitar body.

Alder does not take a liquid pigment stain evenly straight out of the can. It is a closed-grain wood with patches of different density, so a plain wipe-on stain soaks in unevenly and leaves dark blotches, especially around the grain near the neck pocket and edges. The fix is a wood conditioner (or a wash coat) applied before the stain, a stain chosen for how blotch-prone the wood is (gel stain or dye rather than straight liquid pigment), and a wiping technique that lays color on evenly with the grain. Do those three things in order and an alder body colors up as cleanly as it does on a factory Stratocaster or Telecaster. Skip any one of them and you get the mottled, patchy look that sends people back to the forums asking what went wrong.
This is the full process, start to finish: prepping the body, why alder behaves the way it does, choosing between dye and stain, the wipe-on technique, fixing a blotch you already have, and what to put over the stain once the color is right.
Why Guitar Makers Use Alder in the First Place
Before getting into finishing, it helps to know why alder ends up under a guitar finish so often. Fender has used it on Stratocaster and Telecaster bodies for decades, alongside ash, because it is light, machines and sands cleanly with hand tools or a router, and gives a balanced tone that does not push hard toward either the bright end or the dark end. It is also widely available and grows straight enough that builders can get a body-sized blank without much waste.
None of that has anything to do with how it takes a stain. Alder's tonal and structural reputation is earned on the workbench and on the strap, its reputation with finishers is a separate, less flattering story, and the two are not related. A wood can be an excellent guitar body and a genuinely difficult wood to stain evenly at the same time, and alder is exactly that combination.
Why Alder Blotches When Other Woods Don't
Alder has one property that makes it a pain to stain: its density is inconsistent from one patch to the next.
Uneven density across the same board
Some areas of a single alder board are more porous and soak up liquid stain fast, other areas are tighter and barely take any. A liquid pigment stain follows that variation exactly, so you end up with dark blotches over the porous patches and pale streaks over the tight ones, on the same board, with the same stain, applied the same way. This is not something you can see by eye on bare wood, which is exactly why it catches people by surprise the first time.
It shares this trait with a specific group of woods
This is a known behavior of a handful of common woods, alder, pine, birch, cherry, and maple all blotch for the same underlying reason: uneven density. It is not a sign you did something wrong on your first pass. It is the wood's default behavior with a plain liquid stain, and every fix in this guide exists specifically to work around it.
Closed pores change what the wood needs
Alder is also a closed-pore wood, similar to basswood and maple, unlike open-pore woods such as ash or mahogany. That distinction matters later, because it changes what kind of prep the wood needs and what it does not, closed-pore woods do not need grain filler, but they do need a conditioning step that open-pore woods can sometimes skip.
Over-sanding closes the surface further
Sanding alder too fine before staining, beyond roughly 320 grit, burnishes the surface and makes it harder for any stain or dye to soak in at all, which compounds the unevenness rather than smoothing it out. This is covered in more detail in the sanding section below, but it is worth flagging here as a direct cause of blotching, not just a separate topic.
How Alder Compares to Ash, Mahogany, and Basswood for Staining
Alder is not the only wood a guitar builder stains, and knowing how it stacks up against the other common options explains why the process here looks different from a generic "how to stain wood" guide.
| Wood | Pore type | Blotch risk with plain liquid stain | Needs grain filler? |
|---|---|---|---|
| Alder | Closed | High | No |
| Basswood | Closed | High | No |
| Ash | Open | Low to moderate | Often, for a glass-smooth gloss |
| Mahogany | Open | Low to moderate | Often, for a glass-smooth gloss |
| Maple | Closed (tight, hard) | Moderate | No |
Open-pore woods like ash and mahogany have visible grain lines that run deep enough to need filling if you want a perfectly flat, glossy surface, but their stain generally goes on more predictably because the wood's density is more consistent from patch to patch. Closed-pore woods like alder and basswood never need a filler, but they need the conditioning step this guide spends so much time on, because their blotching comes from density variation, not from open channels in the grain.
If you have stained an ash body before and are staining alder for the first time, expect the opposite problem from what you are used to: less concern about visible open grain, more concern about even color.
Reading the Wood Before You Start: Spotting Blotch-Prone Areas
You can get a rough preview of where an alder body is likely to blotch before you ever open a can of stain. Wipe a small section with a bit of water or mineral spirits (mineral spirits evaporate without raising the grain, which makes them a slightly better test than water) and watch how it darkens. Patches that darken faster and deeper are the more porous areas, the ones a stain would hit hardest without conditioning. Patches that stay lighter longer are the tighter, denser areas.
This is not a step you need to act on individually, patch by patch, since the wood conditioner in the next section is designed to handle the whole surface at once. But seeing the variation before you stain builds a realistic expectation of what a completely uncontrolled result would look like, and it is a useful check on a test piece specifically, to confirm your scrap wood is a reasonable stand-in for the actual body.
What You Need Before You Start
| Item | What it's for | Optional? |
|---|---|---|
| Sandpaper, 150 to 320 grit | Final surface prep before stain | No |
| Wood conditioner or a wash coat (thinned sealer, or denatured alcohol for alcohol-based dyes) | Prevents blotching by pre-limiting how much stain the wood absorbs | No |
| Stain (gel stain, or a dye if you want brighter, more saturated color) | The color itself | No |
| Clean, lint-free rags (old cotton t-shirts work) | Wiping conditioner and stain on and off | No |
| A bowl or wide, shallow container | Holding stain so you can load a rag without dipping straight from the can | No |
| Nitrile gloves | Keeping stain off your hands | Optional, but you will want them |
| A well-ventilated space or a respirator rated for organic vapors | Stains and thinners give off solvent fumes | No |
| Sanding sealer or a spray-on sealer | Locks in the color before the topcoat | No |
| A topcoat (nitrocellulose lacquer, wipe-on poly, or an oil finish like Tru-Oil) | Protects the finished color | No |
| A metal container with a lid, or a bucket of water | Safely storing or disposing of oily rags | No |
Work somewhere you can leave the body hanging or resting undisturbed for hours at a stretch, staining and finishing both need drying time you cannot rush. A garage with the door open, or a covered porch, both work better than an enclosed room, because you need airflow, not just space.
Wood conditioners, dyes, and stains are sold under a handful of common product families you will see repeated across guitar-building forums: oil-based pre-stain conditioners meant to sit under an oil-based stain, alcohol-soluble aniline dyes meant to be mixed and applied with denatured alcohol, and water-soluble dyes mixed with plain water. Each family has its own compatible conditioner, an oil-based conditioner under a water-based dye, or the reverse, tends to fight the stain rather than help it, so match the conditioner type to the stain type before you buy either one.
One safety note that gets skipped constantly: rags soaked in oil-based stain or oil finish generate heat as they dry, and a balled-up pile of them can genuinely catch fire on its own with no spark involved. Lay used rags flat and separated on a non-combustible surface like concrete until they are fully dry, or submerge them in a sealed metal container of water. Never leave a pile of stain rags in a trash can, a closed room, or a hamper.
Refinishing an Old or Faded Alder Body
Everything above assumes bare, unfinished alder, but a lot of people staining alder are refinishing a used guitar, not building a new one, and that starts with getting the old finish off first.
For a body with an existing lacquer or poly finish, you have three practical ways to strip it: a chemical stripper, sanding, or a heat gun. A chemical stripper spread with the grain, then covered with plastic wrap and left to sit for the time the product recommends (commonly 15 to 20 minutes, sometimes longer), softens the old finish enough to lift with a plastic or wooden scraper, metal scrapers gouge bare wood underneath far too easily. Sanding, either by hand with a coarse pad or with an orbital sander, works without chemicals but takes longer and generates a lot of fine dust, wear a mask regardless of which stripping method you choose. A heat gun with a flexible putty knife lifts poly finishes cleanly in sections without chemicals or heavy sanding, but it takes practice to use enough heat to soften the finish without scorching the wood underneath.
Whichever method you use, get all the way back to bare wood before conditioning or staining, any old finish, stain, or filler left behind will block the new conditioner and stain from doing their job evenly, which defeats the entire point of this process. Once you are back to bare alder, follow the same sanding progression, 150 through 320, described below, and treat the rest of the job exactly like a new, unfinished body.
Sanding the Body: Grit Progression and Raising the Grain
Start with whatever grit got the body flat and free of tool marks (often 150 to 180 if you are working from a rough blank, skip this if you bought a pre-sanded body), then work up through the grits in order: 150, then 220, then 320. Do not skip grits, each one is there to remove the scratch pattern the previous one left.
Stop at 320. Sanding an alder body finer than that, to 400 or beyond, burnishes the surface and makes the wood too smooth to accept stain evenly, which works against everything you are about to do to get color into it.
After your last sanding pass, raise the grain on purpose before you stain: wipe the whole body down with a barely damp cloth (water, not stain), let it dry completely, then lightly sand off the fuzzy, raised fibers that pop up with a fine grit, 320 or so. Repeat that once or twice. This matters because if you skip it, that same raised grain pops up the first time your stain or any water-based product touches the wood, and now it is happening after you have color on the surface, which is a much bigger problem to fix.

Do You Need to Grain Filler on Alder?
No. Grain filler exists to fill large, open pores in woods like ash, mahogany, and oak so the surface goes glass-smooth under a gloss finish. Alder is a closed-pore wood, in the same family as basswood and maple, so there are no significant open pores for a filler to fill. If you grain-fill an alder body anyway, you are adding a step and a product with nothing for it to actually do.
Where alder gloss finishes fall short of glass-smooth, it is usually the finish build (how many coats of sealer and topcoat went on and how much was leveled by sanding) rather than the wood's pores. More coats of sanding sealer, not grain filler, is the right answer if you want a deeper gloss.
Wood Conditioner: The Step That Actually Prevents Blotching
This is the step that fixes the blotching problem described above, and it is also the step people skip most often because it feels like it is delaying the "real" work.
A wood conditioner is a thin, mostly-clear product (sold as pre-stain wood conditioner, or you can use a wash coat of very thinned sanding sealer or shellac) that soaks into the wood first and partially fills the more porous patches. That way, when the stain goes on next, it cannot pool disproportionately in those spots, because the conditioner already used up some of the wood's capacity to absorb it there. The tighter patches were never going to over-absorb stain anyway, so the conditioner does not need to do much there, and the result is color that lands close to even across the whole body.
Apply the conditioner with a rag, let it sit for the time on the product's label (commonly 5 to 15 minutes), then wipe off any that has not soaked in before it dries to a film. Stain over conditioner that has fully dried, not one that is still wet or tacky.
If you are using an alcohol-soluble dye rather than a pigment stain, the equivalent conditioning step is a wipe-down with clear denatured alcohol before the dye goes on, alcohol has much lower surface tension than water or oil, so it soaks in evenly rather than beading on the surface, which pre-conditions the wood in the same way.
One combination worth knowing specifically: applying a dark stain (ebony is a common choice) right after the conditioner, wiping it off immediately, then sanding and repeating that a few times, saturates the grain lines with dark color while the surrounding wood sands back to clear. That is what makes the grain pop under a lighter stain applied afterward, rather than just tinting the whole surface one flat color.

Choosing Your Stain: Dye, Gel Stain, or Liquid Pigment Stain
These three behave differently on blotch-prone wood like alder, and picking the wrong one is a bigger source of trouble than any application mistake.
Liquid pigment stain is the traditional can-of-stain product, and it is the one most likely to blotch on alder even with a conditioner underneath it, because the pigment particles are large enough to still collect unevenly in the more porous patches. It can work fine on alder in lighter colors or with a very thorough conditioning step, but it is the least forgiving option of the three.
Gel stain does not penetrate the wood the way liquid stain does. It sits closer to the surface and levels itself out, which limits both kinds of blotching (the light-patch, dark-patch kind and the streaky kind). The tradeoff is that gel stain does not make the grain pop the way an oil-based liquid stain or a dye does, so the result can look slightly flatter or muddier if you are after a lot of figure and depth.
Dye (commonly sold as a concentrated liquid or powder, mixed with water, alcohol, or a specific solvent depending on the product) penetrates evenly with very little blotching, and it produces noticeably more vivid, saturated color than a pigment stain. Dye is also the better choice if you want a lighter tone that still shows off the wood's natural luster and shimmer, rather than just darkening it uniformly.
For most people staining an alder body for the first time, gel stain is the safest choice, it forgives an imperfect conditioning step. If you already have the conditioning step dialed in (tested on scrap first, see below) and want more vivid, richer color, a dye applied over a proper alcohol or water wash coat gets you there.
Color depth is also worth planning around rather than chasing after the fact. A dye or thin gel stain lets you build color gradually across two or three coats, each one a little darker than the last, which is far easier to control than trying to hit a deep, dark target color in a single pass. If you are unsure how dark to go, start lighter than you think you want. It is a much smaller job to darken a body with another coat than to lighten one that came out darker than planned, since lightening a stained body means sanding color back out again.
How to Apply Stain to an Alder Body
Whichever stain you chose, the application technique is the same:
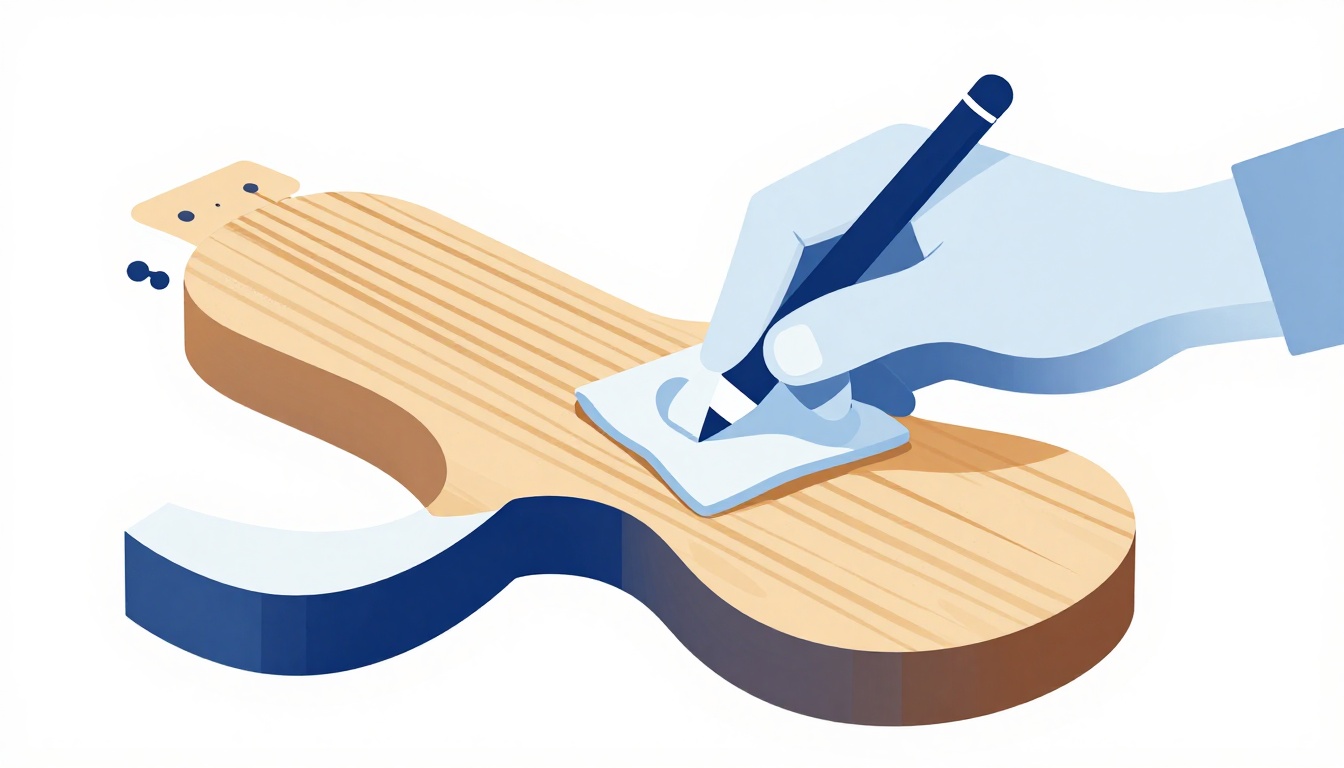
- Pour stain into a bowl or wide shallow container rather than working straight out of the can. This lets you load a rag fully and squeeze out the excess, rather than dipping a rag straight into a narrow can opening.
- Dampen a clean rag with stain, then wring it out so it is wet but not dripping.
- Wipe the stain on in long strokes that follow the direction of the wood grain, not across it and not in circles. Cross-grain wiping leaves visible scratch-like streaks once the stain dries.
- Stain the body cavities (pickup routes, control cavity, neck pocket) as well as the visible surfaces, especially if any of that wood might show once the guitar is assembled, and so the color reads consistently if light ever catches an edge.
- Let the stain sit and dry fully, commonly an hour or two, before deciding whether you need a second coat.
Work in a section at a time rather than trying to stain the whole body in one continuous pass. A body's curves and contours mean some areas dry faster than others, and wiping stain onto an area that is already tacky creates lap marks.
Building Color With a Second Coat
If the first coat dried lighter than you want, or you want the grain to stand out more, a second coat is the way to get there, but not by just wiping more stain straight on top.
Block-sand the first, dried coat lightly first. This removes most of the surface color while leaving the color that has actually soaked into the grain lines, which is what makes those lines look darker and more defined once you apply the second coat. Then apply the second coat the same way as the first: rag, bowl, lengthwise strokes.
This is also the point where masking tape and paper matter if you are staining a body that will have a different color binding, edge, or a two-tone design, mask off whatever needs to stay a different color before this second pass, since it is easy to forget once you are focused on getting the coverage even.
Two coats is usually enough. Going beyond that starts to build up surface color rather than depth, and it increases the odds of the stain not drying evenly between coats, which reintroduces the streaking problem you were trying to avoid.
Fixing a Blotchy Stain Job
If you already have a patchy result, you have a few real options, in order of how much work they take.
Sand it back and restart. If the blotching is bad enough that it bothers you, sanding the stained area down to bare wood again and starting over with a proper conditioner is the most reliable fix, especially if your new color is the same or similar to what you had. This is more realistic than it sounds, alder does not hold onto stain so deep that a thorough re-sand won't remove it.
Apply a toner over the blotches. A spray-on toner (a translucent color suspended in a clear finish, not a raw stain) can visually even out blotching without stripping back to bare wood. Multiple thin, medium coats read as more even and controllable than one heavy dark coat, which tends to look muddy and can still show blotches through it.
Shift to a tinted-clear build. Once the body is sealed, you can apply a few clear coats tinted slightly lighter than your target color, then keep adding tinted coats until you reach the depth you want, followed by clear coats with no tint to protect the color. This approach effectively lets the finish do more of the coloring work than the raw stain, which reduces how much the wood's own blotching shows through.
None of these are quick fixes measured in minutes, they are all a return trip through part of the process. That is the actual argument for conditioning properly the first time: it is faster than any of the three fixes above.
Choosing a Stain Color That Suits Alder
Alder's own color, pale, slightly pinkish tan, sits underneath whatever stain or dye you put on it, and that base color shifts the outcome more than it does on a naturally darker wood like walnut or mahogany.
Ambers, honey tones, and light natural stains tend to look warm and lively on alder, since they let the wood's own pale color mix with the stain's tint rather than fighting it. Very dark stains, black, deep espresso, near-ebony, cover alder's own color almost entirely, which means the result depends far more on how even your application was than on the wood's natural look at all, since none of that natural look survives to be seen. Reds and blues, the colors most associated with classic solid-body sunbursts and see-through finishes, read differently on alder than on ash specifically because alder has less visible grain figure for the color to interact with, the color itself carries more of the visual interest than the wood grain does.
None of this changes the process above, conditioner, stain choice, application technique, all still apply the same way regardless of the color you pick. But it is worth deciding early whether you want the wood's own character to show through the color or whether you are aiming for a color that stands on its own, since that decision affects how thin you keep your coats and how much you lean toward dye over a denser gel stain.
Staining for a Solid Color vs. a Natural, See-Through Finish
The prep changes depending on whether you want the wood grain visible under the final color or you are aiming for full opaque coverage.
For a natural or see-through finish, where the point is showing off the alder's grain and figure, stick with a lighter stain or dye, keep coats thin, and lean toward dye over pigment stain, since dye keeps more of that natural luster visible rather than sitting on top of the wood like a film. A wash coat (thinned sealer or shellac) instead of a full wood conditioner can also work here, since you want just enough evening-out to prevent blotching without muting the wood's own character.
For a solid, opaque color, the stain step matters far less, because a solid-color paint job (like the classic Fender solid colors) is built with primer and color coats over a sealed surface, not with a wood stain at all. If your end goal is a fully opaque solid color, a sanding sealer over bare, sanded wood, followed by primer, is the correct path, and everything above about stain, dye, and conditioner does not apply, because none of it will be visible in the finished guitar.
Temperature and Humidity While You Work
Stain and finish behave differently depending on the conditions you apply them in, and alder's tendency to blotch makes it less forgiving of bad conditions than a more even-grained wood.
The workable range for staining is roughly 55 to 90 degrees Fahrenheit, with 70 to 80 degrees and moderate humidity, around 50 to 70 percent, giving the most predictable results. Above 90 degrees, stain can dry too fast to soak in evenly before it sets, which on alder means the conditioner and stain do not get the time they need to even out the wood's absorption before the surface skins over. Humidity above 70 percent slows drying across every stage, conditioner, stain, sealer, and topcoat, which extends how long you need to wait between steps without changing the numbers on the product label.
Cold, dry garages in winter and hot, humid rooms in summer are the two conditions worth actively working around, if you can only stain and finish in one of those, plan for longer dry times between every step than the product label suggests, and check that each layer is genuinely dry, not just past the label's minimum time, before moving to the next one.
Sunburst and Two-Tone Staining on Alder
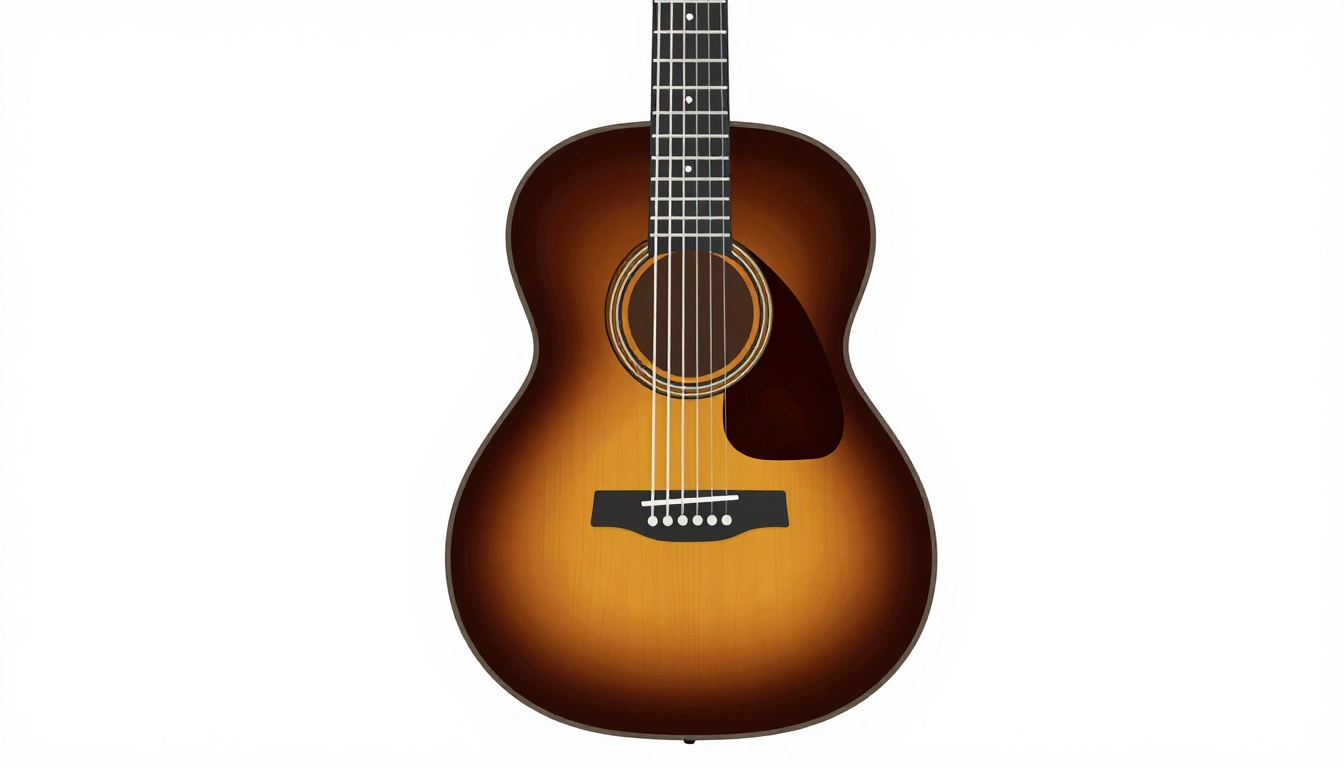
A sunburst, dark at the edges fading into a lighter center, is one of the more common reasons people specifically want to stain (rather than paint) an alder body, since the whole point of a sunburst is letting the wood grain show through the color transition.
The order that works reliably: apply your lightest color first as a base coat over the entire body, then apply progressively darker stain or toner only at the edges, blending inward with a rag or a spray gun set to a tight pattern, working in from the perimeter rather than trying to paint a dark ring and blend it inward afterward. Let each color step dry before adding the next, and always test the transition on a scrap piece of the same wood first, since how far a stain feathers out changes depending on how wet your rag is and how fast you move.
Because alder blotches unpredictably, a sunburst on alder benefits even more from the wood conditioner step than a solid stain does. Blotching under a sunburst reads as uneven color exactly where the eye is drawn, the gradient itself, so an unconditioned sunburst looks patchier than an unconditioned solid color does.
Sealing the Stain: Sanding Sealer and Wash Coats
Once your stain is dry and you are happy with the color, seal it before any topcoat goes on. A sanding sealer locks the color in, gives you a surface you can sand flat without cutting back into the color underneath, and creates a surface the topcoat can bond to properly.
Apply the sanding sealer in thin coats, following the product's instructions for dry time between coats. Once it is fully dry, sand it back lightly and evenly with a fine grit, this is what levels out any texture in the sealer and gets the surface ready for the topcoat, not what you use to try to further even out the stain color underneath.
If you are working with a stain that is easy to disturb (dye especially can lift or streak if a solvent-heavy sealer hits it directly), a thin wash coat first, meaning a heavily thinned first pass of the sealer, gives the color a light protective layer before the full-strength sanding sealer goes on top of that.
Choosing a Topcoat: Nitrocellulose Lacquer, Tru-Oil, or Wipe-On Poly
The stain sets the color, the topcoat sets how the finished guitar looks, feels, and holds up.
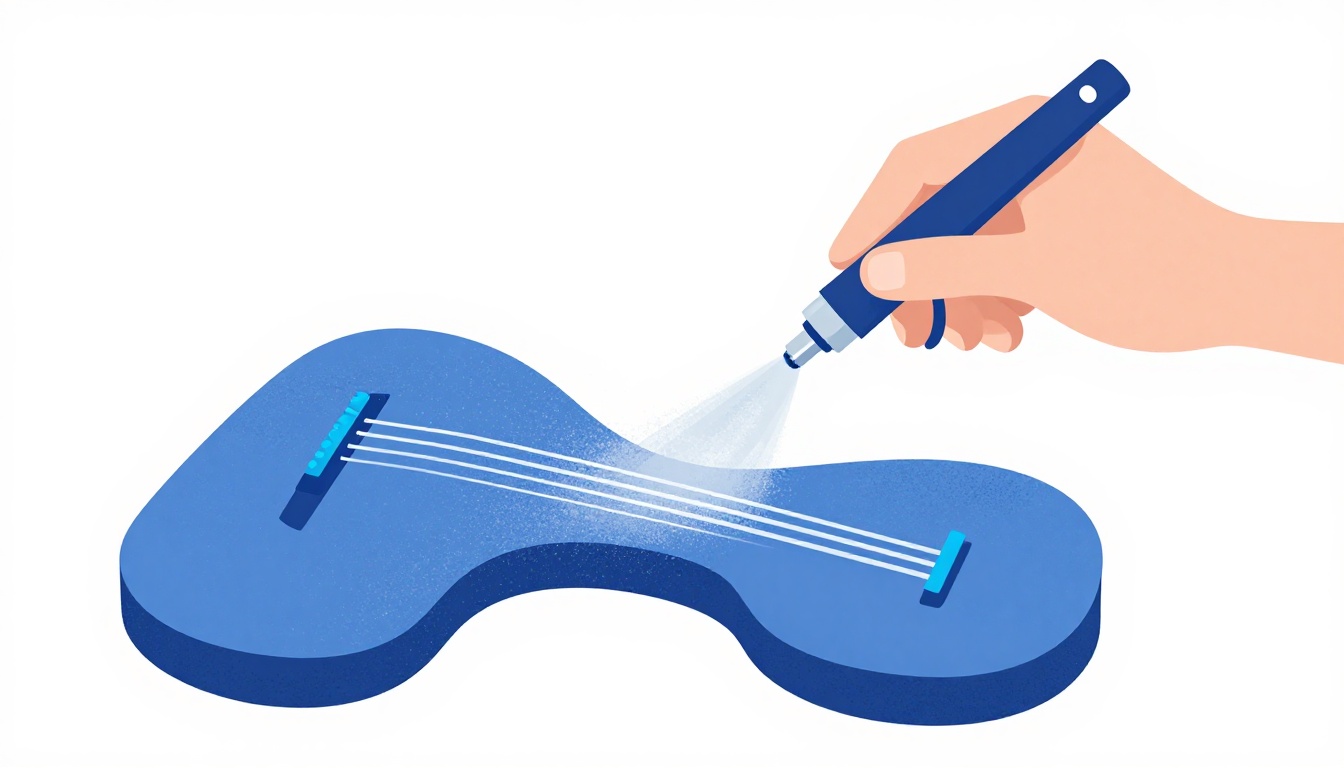
Nitrocellulose lacquer is the traditional choice on Fender-style bodies and gives the deepest, glossiest look of the three. It is more durable than an oil finish, and it is genuinely repairable: dings and small cracks can be spot-repaired because new lacquer melts into old lacquer. The tradeoff is that spraying lacquer well takes either rattle cans and patience, or an HVLP spray setup, and it produces strong solvent fumes, so ventilation and a respirator matter here more than with any other step in this process.
Tru-Oil (and similar oil finishes) is the easier finish for a first-time builder to apply by hand with no spray equipment, using thin coats wiped or rubbed on and allowed to cure fully between each one. It leaves a thin, semi-penetrating film rather than a thick surface coat, which some players prefer because it lets more of the wood's natural resonance through, but it will never build to the same deep, glassy gloss that sprayed lacquer does, even after many coats and wet-sanding between them.
Wipe-on polyurethane sits between the two in terms of effort, but it does not play well with some of the techniques used earlier in this process. A slurry-sanding technique (sanding while the finish is still wet to fill texture with its own dust) works with lacquer, because fresh lacquer melts into itself, but it does not work with poly, since cured poly does not remelt the way lacquer does. If you are planning to slurry-sand for a glass-smooth result, lacquer is the finish that technique is built for.
Whichever you choose, apply thin coats over thick ones. A single heavy coat of any of these three, oil finish especially, tends to stay tacky, trap dust, and take far longer to fully cure than several thin coats applied over the following days.

Buffing and Leveling a Lacquer Finish to a High Gloss
If you went with sprayed nitrocellulose lacquer and want the deep, glass-like gloss it is known for, the color and the topcoat coats are only half the job. The gloss itself comes from a leveling and buffing process that happens after the lacquer has cured, not from how the lacquer was sprayed.
Once the lacquer has cured for the length of time the product recommends, commonly a couple of weeks at minimum for a build of several coats, wet-sand the surface with progressively finer grits, working up from somewhere around 600 through 1500 or higher, using water as a lubricant and keeping the surface wet throughout. This levels out the very slight texture that even a well-sprayed lacquer finish has, the same way a wet-sanded car clear coat gets leveled before polishing.
After wet-sanding, buff the surface with a rubbing compound first, then a finer polishing compound, using a buffer or by hand with patience. This is what turns a level but dull-looking sanded surface into a deep, reflective gloss. Skipping straight to buffing without wet-sanding first tends to leave the underlying texture visible even after the surface is shiny, since buffing polishes what is already there rather than leveling it.
This step is specific to lacquer. Tru-Oil and other oil finishes are not built to be wet-sanded and buffed to the same kind of gloss, their thin, semi-penetrating nature is part of what makes them easy to apply, and it is also why they top out at a lower gloss level than a leveled and buffed lacquer finish.
Drying and Cure Times Before You Reassemble
Every stage in this process has its own drying window, and none of them are safe to compress just because you are eager to put the guitar back together.
| Stage | Typical dry time | What happens if you rush it |
|---|---|---|
| Wood conditioner | 5 to 15 minutes before staining | Stain sits on top unevenly instead of soaking in |
| Stain, between coats | 1 to 2 hours | Second coat lifts or streaks the first |
| Sanding sealer, between coats | Per product label, often 30 minutes to a few hours | Sanding cuts through into a still-soft layer |
| Nitrocellulose lacquer, before final buffing | Commonly several days to a few weeks depending on coat thickness and climate | Buffing burns through a finish that has not fully hardened |
| Tru-Oil or similar oil finish, full cure | Commonly a week or more after the last coat | Assembly hardware presses marks into a finish that is still soft underneath |
These ranges vary by product, humidity, and temperature, check your specific stain and topcoat's label rather than treating the numbers above as fixed. The safe habit either way is to wait longer than you think you need to before reattaching hardware, a neck, or pickups, since pressing screws or a neck plate into a finish that looks dry on the surface but is still soft underneath leaves marks that are much harder to fix than an extra few days of waiting.
Common Mistakes When Staining Alder
Skipping the conditioner because the body "looks fine" dry. Bare, sanded alder often looks visually uniform before any stain touches it, which is exactly why people skip conditioning and are then surprised by blotches. The uneven density that causes blotching is not visible until stain reveals it.
Sanding past 320 grit before staining. Finer sanding burnishes the wood's surface, closing it off and making it harder for stain, conditioner, or dye to soak in evenly, which works directly against getting good color.
Wiping stain across the grain instead of with it. This leaves visible streaks that read clearly once the stain dries, even if they were not obvious while the stain was still wet.
Not testing on scrap first. Every variable in this process, your specific conditioner, your specific stain, how long you leave it before wiping, how many coats, changes the result. A test piece of the same wood (an offcut, or the underside of the body if nothing else is available) tells you what your actual combination looks like before you commit the visible face of the guitar to it.
Using a wood conditioner that is oil- or wax-based under a lacquer topcoat. Some conditioners are oil- or wax-based, and those do not play well under nitrocellulose lacquer or many polyurethane topcoats. Check that your conditioner is compatible with the specific topcoat you are planning to use before you start, not after the stain is already down.
Balling up stain rags and leaving them in a pile. Covered above, but worth repeating separately: this is a genuine fire risk, not just tidiness advice.
Mixing product families across steps. Using an oil-based conditioner under a water-based dye, or spraying lacquer over a wax-based conditioner that never fully left the surface, causes adhesion and blotching problems that look like a staining mistake but are actually a compatibility mistake. Keep conditioner, stain, sealer, and topcoat within the same compatible family, and check the label of each one against the others before you start.
Rushing from stain straight to topcoat. Even a stain that looks dry to the touch can still be releasing solvent underneath the surface. Sealing or top-coating too soon traps that solvent, which commonly shows up later as a soft spot, a cloudy patch, or a finish that never fully hardens in that area.
Try It: Run the Whole Process on a Test Piece First
Before you touch the actual guitar body, get a scrap piece of alder, or at minimum a piece of similar closed-grain wood, and run the entire process on it in miniature: sand it to 320, raise the grain and knock it back, apply your conditioner, wait the label time, apply your chosen stain with the rag-and-bowl technique, and let it dry.
This single test tells you three things you cannot know in advance: whether your specific stain color reads the way you expect on this wood, how long your conditioner actually needs before it stops helping and starts blocking too much stain, and whether your rag technique leaves streaks before you have practiced it on wood that matters. It costs you an hour and a scrap of wood. Skipping it costs you a re-sand of the actual body if any of those three go wrong.
If you can get an offcut from the same board or blank the body itself came from, use that specifically, since density and grain pattern vary enough between different pieces of alder that a mismatched test piece can still mislead you.
FAQ
Does alder need to be grain-filled before staining?
No. Alder is a closed-pore wood like basswood and maple, so there are no significant open pores for a grain filler to fill. Sanding sealer, not grain filler, is what gets you a smoother, glossier build if that is the goal.
What is the difference between a wood conditioner and a sanding sealer?
A wood conditioner goes on before the stain, to limit blotching by pre-limiting how much stain the wood can absorb unevenly. A sanding sealer goes on after the stain, to lock in the color and prep the surface for a topcoat. They are not interchangeable, and using a sealer where a conditioner belongs will block the stain from taking at all.
Can I use a water-based stain on alder?
Yes, and water-based dye in particular can produce very even, richly colored results on alder with little blotching, though the wood still needs its grain raised and knocked back first, since water-based products raise the grain more than oil-based ones do.
How long should I wait between the stain and the topcoat?
Let the stain dry fully, commonly an hour or two for a single coat, longer if you have applied more than one coat, then apply a sanding sealer before any topcoat. Rushing straight from wet stain to topcoat traps solvents and can cause the finish to fail later.
Is gel stain or dye better for a first-time build?
Gel stain is more forgiving of an imperfect conditioning step, since it sits on the surface rather than penetrating unevenly. Dye gives more vivid, saturated color and shows off the wood's natural luster better, but rewards a properly conditioned surface more than gel stain does.
Can I put nitrocellulose lacquer over Tru-Oil, or the other way around?
This combination is debated in guitar-building circles and depends heavily on how fully the oil finish has cured before lacquer goes over it, since lacquer's solvents can react badly with oil that has not fully hardened. If you are not certain, pick one topcoat system and stay with it for the whole build rather than mixing them.
Why did my second stain coat look patchy even though the first one was even?
Most often this comes from applying the second coat before the first was fully dry, or skipping the light block-sanding step between coats, which is what makes a second coat sit evenly rather than lifting or smearing the first one.
Do I need to stain the parts of the body that will not be visible, like the control cavity?
It is worth doing if any of that wood might catch light or become visible from an angle once the guitar is assembled, and it keeps the color consistent if you ever route the body further or the pickguard is removed. It is not strictly required for a cavity that stays fully covered.
Why does alder look fine when it's bare but blotchy the moment I stain it?
Because the density variation that causes blotching is inside the wood's structure, not visible on the sanded surface. A stain reveals differences in how much liquid each patch absorbs, which bare wood gives no visual clue about at all. This is exactly why testing on scrap and conditioning before staining matter more on alder than on a wood where you can see the problem coming.
Can I skip the wood conditioner if I only want a light color?
You can get away with skipping it more often on a very light color, since there is less pigment or dye involved for the wood's density variation to exaggerate. But it is still a gamble specific to your body's grain, and the only way to know your particular piece of alder will behave is to test that light color on scrap first rather than assuming light automatically means safe.
Is it better to spray stain instead of wiping it on with a rag?
Spraying gives you more control over how thin and even each coat is, especially for a sunburst or a toner pass, but it requires spray equipment and more setup than a rag and a bowl of stain. For a first solid-color or natural-finish stain job, wiping by hand is the more forgiving and more accessible method, spraying becomes more valuable once you are doing color transitions like a sunburst.
Do I really need a respirator, or is good ventilation enough?
Open windows and a fan move fumes out of the room, but they do not stop you from breathing solvent vapor while you are actively wiping stain or spraying lacquer at close range. A respirator rated for organic vapors, not a basic dust mask, is the only thing that protects you directly while you work, ventilation reduces how much builds up in the room around you. Use both together rather than treating one as a substitute for the other, especially during any step that involves lacquer or a chemical stripper.
GuitarLowKey
Ready for fifteen focused minutes?
Open the web app and train the change that is blocking your song.