
Dust in the Wind Guitar Chords and Fingerpicking Pattern
The C, Cmaj7, Cadd9, Am, G/B and D/F# chords for Kansas' 'Dust in the Wind,' the fingerpicking pattern that drives it, and a strummed version if you're not there yet.

"Dust in the Wind" by Kansas is played in C major (with A minor as its emotional center) using C, Cmaj7, Cadd9, Asus2, Asus4, Am, G/B, G, Dm and D/F#. There's no capo on the original. The whole song runs on one repeating fingerpicking pattern, not strumming, which is what makes it sound so much fuller than ten chords should. If fingerpicking isn't there yet, a plain strummed version using the same chords works too, and is covered further down.
This post walks through every chord shape in a table, the fingerpicking pattern that ties them together, the full verse and chorus progressions in order, why the pattern falls apart at speed and how to fix that, an easier strummed alternative, and the story of how a fingerpicking exercise turned into Kansas's only top-ten single.
Dust in the Wind at a Glance
| Detail | Value |
|---|---|
| Written by | Kerry Livgren |
| Recorded by | Kansas |
| Album | Point of Know Return (1977) |
| Key | A minor, relative to C major |
| Capo | None |
| Chords | C, Cmaj7, Cadd9, Asus2, Asus4, Am, G/B, G, Dm, D/F# |
| Technique | Fingerpicking (Travis-style), not strumming |
| Time feel | 4/4, built from continuous 16th notes |
Everything in that table gets its own section below, chord by chord and part by part.
Why This Song Isn't Strummed
Ten chords is a lot for one song, but "Dust in the Wind" doesn't sound busy because almost every chord change is really just one finger moving while the others hold still. C, Cmaj7 and Cadd9 share the same basic shape with one finger added or lifted each time. Asus2 and Asus4 are the same relationship a fret apart. The fingerpicking pattern is what turns those small, subtle shape changes into a constant, rolling sound instead of a series of separate chord hits, which is why the song is built around picking rather than strumming from the start. Learn the pattern first, on a single chord, before worrying about the chord changes at all.
The Fingerpicking Pattern
The picking hand plays continuous 16th notes in 4/4 time, counted "1 e & a, 2 e & a, 3 e & a, 4 e & a." Each two-beat cell starts with a pinch, meaning the thumb and a finger pluck two strings at the same instant, and the rest of the cell fills in with single notes rolling across the top three strings.
In practice: your thumb anchors on a bass string (usually the 5th or 6th string, whichever one the current chord's root sits on) and alternates between that bass note and a neighboring bass string on the strong beats, the same way it would in any Travis-picking pattern. Your index, middle and ring fingers stay parked over the 3rd, 2nd and 1st strings and pick through them in a steady rolling order underneath the thumb. Nothing about the pattern changes when the chord does. You're not learning a new pattern for C versus Am versus G/B, you're playing the same right-hand motion over a new left-hand shape, which is exactly what makes the song learnable once the pattern itself is solid.
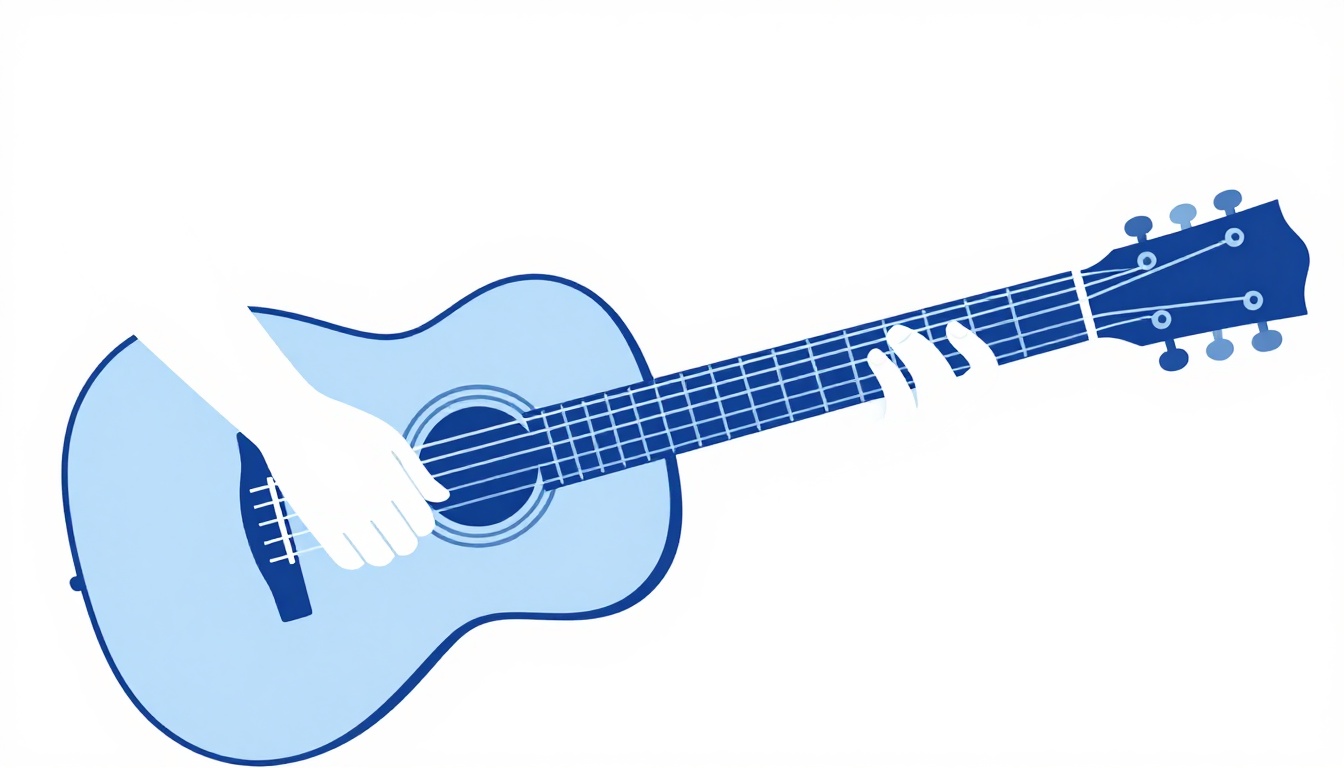
Before adding any chord changes, practice the pattern on a plain open C chord alone, slowly, until your thumb and fingers stop needing to think about which string comes next. This is the single most useful thing you can do before opening the rest of this post, because every chord below sits inside the exact same right-hand shape.
Counting out loud while you play the pattern for the first several sessions helps more than it might seem like it should. Say "1 e & a" on every beat, even quietly under your breath, so your picking hand has an external anchor to lock onto rather than relying purely on feel before that feel has had time to develop. Most players can drop the counting within a week or two once the pattern starts to feel automatic, but skipping it early on is one of the more common reasons the pattern ends up uneven later.
The C Chord
C major opens the song and is the shape every other intro chord grows out of.
| String | Fret | Finger |
|---|---|---|
| 6 (low E) | Muted | - |
| 5 (A) | 3 | 3 (ring) |
| 4 (D) | 2 | 2 (middle) |
| 3 (G) | Open | - |
| 2 (B) | 1 | 1 (index) |
| 1 (high E) | Open | - |
Ring finger on the 5th string (A) at the 3rd fret, middle finger on the 4th string (D) at the 2nd fret, index finger on the 2nd string (B) at the 1st fret. Leave the 3rd string (G) and 1st string (high E) open, and mute or simply avoid picking the 6th string, since it isn't part of the chord. For a deeper breakdown of this shape, including the buzzing that trips up a lot of players, see the full C chord guide.
The Cmaj7 Chord
Cmaj7 is what C becomes when you lift the index finger off the 2nd string entirely, letting it ring open.
| String | Fret | Finger |
|---|---|---|
| 6 (low E) | Muted | - |
| 5 (A) | 3 | 3 (ring) |
| 4 (D) | 2 | 2 (middle) |
| 3 (G) | Open | - |
| 2 (B) | Open | - |
| 1 (high E) | Open | - |
That open 2nd string is a B note, the major 7th of C, which is the note that gives Cmaj7 its softer, more open color compared to plain C. The move from C to Cmaj7 is literally one finger lifting off the fretboard and nothing else, which is why the intro can shift between them without the picking pattern ever breaking stride. The Cmaj7 chord guide covers this shape and its other common voicings in more depth.
The Cadd9 Chord
Cadd9 adds one more finger back onto that same open 2nd string, this time two frets up.
| String | Fret | Finger |
|---|---|---|
| 6 (low E) | Muted | - |
| 5 (A) | 3 | 3 (ring) |
| 4 (D) | 2 | 2 (middle) |
| 3 (G) | Open | - |
| 2 (B) | 3 | 4 (pinky) |
| 1 (high E) | Open | - |
Keep the ring and middle fingers exactly where they were for C and Cmaj7, and add your pinky to the 2nd string (B) at the 3rd fret. That note is a D, the 9th of the C chord, and it's what gives the intro its shimmering, almost 12-string-guitar quality. Kerry Livgren built these extended voicings specifically to make a single six-string acoustic ring out more fully, closer to what a 12-string would produce, which is a big part of why the intro sounds as full as it does with only one guitar playing it.
The Asus2 and Asus4 Chords
The second half of the intro moves to the A-minor family, alternating between two suspended shapes before landing on Am itself.
| Chord | 6 | 5 | 4 | 3 | 2 | 1 |
|---|---|---|---|---|---|---|
| Asus2 | Muted | 0 | 2 | 2 | 0 | 0 |
| Asus4 | Muted | 0 | 2 | 2 | 3 | 0 |
For Asus2, mute the 6th string, leave the 5th string (A) open as the root, index finger on the 4th string (D) at the 2nd fret, middle finger on the 3rd string (G) at the 2nd fret, and leave the 2nd and 1st strings open. For Asus4, keep that same shape and add your ring finger to the 2nd string (B) at the 3rd fret. Just like Cmaj7 and Cadd9, the move between these two is a single finger going down and coming back up, not a full hand reshape, which keeps the picking pattern uninterrupted through the whole intro.
The Am Chord
Am is where both halves of the intro resolve, and it's the chord the verse keeps returning to as its home base.
| String | Fret | Finger |
|---|---|---|
| 6 (low E) | Muted | - |
| 5 (A) | Open | - |
| 4 (D) | 2 | 2 (middle) |
| 3 (G) | 2 | 3 (ring) |
| 2 (B) | 1 | 1 (index) |
| 1 (high E) | Open | - |
Index finger on the 2nd string (B) at the 1st fret, middle finger on the 4th string (D) at the 2nd fret, ring finger on the 3rd string (G) at the 2nd fret. The 5th string (A) rings open as the root and the 1st string (high E) rings open on top. Even though the song's chord letters spell out C major, Am is the chord almost every phrase settles onto, which is the main reason the song feels minor and unresolved rather than bright, despite technically living in the key of C.
The Intro, Start to Finish
Here's the full intro with every chord in order. Each chord gets roughly one full pass of the fingerpicking pattern before moving to the next.
Intro C - Cmaj7 - Cadd9 - C Asus2 - Asus4 - Am - Asus2 Cadd9 - C - Cmaj7 - Cadd9 Am - Asus2 - Asus4 - Am
Play through this slowly with a metronome before trying to match the recording's tempo. Notice that the intro never leaves either the C-chord family or the A-minor-chord family for more than four bars at a time, which is part of why it's learnable even though it looks like a lot of chords on paper: you're really only ever moving one finger within one of two shapes.
The G/B Chord
The verse introduces G/B, a G chord voiced with B in the bass instead of G. It looks unusual on paper but is simple to fret.
| String | Fret | Finger |
|---|---|---|
| 6 (low E) | Muted | - |
| 5 (A) | 2 | 1 (index) |
| 4 (D) | Open | - |
| 3 (G) | Open | - |
| 2 (B) | Open | - |
| 1 (high E) | 3 | 3 (ring) |
Only two fingers are actually needed: index finger on the 5th string (A) at the 2nd fret, ring finger on the 1st string (high E) at the 3rd fret, with the 4th, 3rd and 2nd strings left open. Because the bass note is B rather than G, this chord functions as a smooth stepping stone between C (whose lowest note is C) and Am (whose lowest note is A), with B sitting exactly between them. Slash chords like this one are named for that reason: the letter after the slash is the bass note, not a separate chord layered on top.
The G and Dm Chords
The verse's second half brings in a full open G and a Dm, the two chords the song borrows from outside its core C/Am pairing.
| Chord | 6 | 5 | 4 | 3 | 2 | 1 |
|---|---|---|---|---|---|---|
| G | 3 | 2 | 0 | 0 | 0 | 3 |
| Dm | Muted | Muted | 0 | 2 | 3 | 1 |
For G, middle finger on the 6th string (low E) at the 3rd fret, index finger on the 5th string (A) at the 2nd fret, ring finger on the 1st string (high E) at the 3rd fret, with the 4th, 3rd and 2nd strings ringing open. For Dm, mute the 6th and 5th strings, leave the 4th string (D) open as the root, index finger on the 1st string (high E) at the 1st fret, middle finger on the 3rd string (G) at the 2nd fret, ring finger on the 2nd string (B) at the 3rd fret. Dm is the only minor chord borrowed from outside the C/Am pairing that shapes the rest of the song, and it's what gives the end of each verse line its slightly darker turn before Am pulls it back.
The Verse, Start to Finish
The verse repeats this progression, holding two full measures on each Am.
Verse C - G/B - Am (2 measures) G - Dm - Am (2 measures)
The chord letters spell out a descending bass line if you play just the lowest note of each chord in order: C, B, A, then G, then D, back to A. That stepwise movement in the bass is a large part of why the verse feels like it's gently walking downward even while the melody above it does something else entirely. If C to G/B to Am feels awkward at first, remember that only your index finger is actually doing something different between G/B and Am. Everything else about your hand shape barely changes.
The D/F# Chord
The chorus introduces D/F#, a D chord voiced with F# in the bass, the same slash-chord idea as G/B but a step up.
| String | Fret | Finger |
|---|---|---|
| 6 (low E) | 2 | 2 (middle) |
| 5 (A) | Muted | - |
| 4 (D) | Open | - |
| 3 (G) | 2 | 3 (ring) |
| 2 (B) | 3 | 4 (pinky) |
| 1 (high E) | 2 | 1 (index) |
Middle finger on the 6th string (low E) at the 2nd fret, ring finger on the 3rd string (G) at the 2nd fret, pinky on the 2nd string (B) at the 3rd fret, index finger on the 1st string (high E) at the 2nd fret, with the 5th string muted and the 4th string (D) open. This is a real stretch the first several times you form it, since it uses all four fingers with no barre to anchor them. Play each string alone first and check that all six ring cleanly before trying it inside the picking pattern.
The Chorus, Start to Finish
The chorus leans on D/F# and G resolving into Am, the same C-to-Am gravitational pull as the verse but approached from a different direction.
Chorus D/F# - G - Am (2 measures) D/F# - G - Am (2 measures)
Some transcriptions insert a brief Am7/G, essentially Am with the bass note swapped to G, as a passing chord between the second Am and the D/F# that follows it going into the next section. It's optional and mainly useful as a smoother way to walk the bass line back up toward D/F#, not a chord you need to add for the chorus to sound complete.
The Instrumental Section
Most transcriptions of the break between the second and third verses show it largely reusing the same C-family and A-minor-family chords covered in the intro, rather than introducing new harmony. A few charts add a brief F major as a passing chord here, moving through Am, G, F and Dm before returning to the verse's C-G/B-Am cadence.
| String | Fret | Finger |
|---|---|---|
| 6 (low E) | 1 | 1 (barre) |
| 5 (A) | 3 | 3 |
| 4 (D) | 3 | 4 |
| 3 (G) | 2 | 2 |
| 2 (B) | 1 | 1 (barre) |
| 1 (high E) | 1 | 1 (barre) |
That's the standard small barre version of F, index finger flat across the 1st fret covering the 6th, 2nd and 1st strings, ring finger on the 5th string at the 3rd fret, pinky on the 4th string at the 3rd fret, middle finger on the 3rd string at the 2nd fret. If you come across a chart that includes it, treat it as a brief passing color between Am and Dm rather than a chord you need to hunt for elsewhere in the song, since the intro, verse and chorus covered above never call for it.
The Outro
The song winds down the way it opens, returning to the Am-based intro material and fading or resolving on Am itself rather than closing on a bright C major. Landing the ending on the vi chord rather than the tonic is consistent with how the whole song leans on Am throughout, and it's part of why the song feels like it trails off rather than concludes.
Why It Sits in A Minor Even Though It's Written in C
C, Cmaj7 and Cadd9 spell out C major clearly enough that a lead sheet would likely mark the song's key signature as C major with no sharps or flats. But almost every phrase in the song, in both the intro and the verse, resolves onto Am rather than C. Am is the vi chord of C major, the relative minor built on the sixth degree of the C major scale, and it's common for a song built in a major key to spend most of its actual weight on that relative minor chord instead of the tonic. That's exactly what gives "Dust in the Wind" its wistful, unresolved character despite technically living in a bright major key. G and Dm are the IV and ii chords borrowed briefly in the verse, and D/F# is a first-inversion D major, the II chord, an unusual but effective harmonic reach in the chorus that briefly steps outside the key before G pulls everything back toward Am.
Why It's Not Working
If you have the chord shapes down but the song still doesn't sound right, it's almost always one of these.
The Pattern Falls Apart When the Chord Changes
This is the single most common problem with this song. Players who can play the fingerpicking pattern cleanly on one chord often lose it entirely the instant their fretting hand needs to move. The fix is to practice chord changes with your picking hand still moving through the pattern, even sloppily, rather than pausing your right hand while your left hand repositions. Slow the whole thing down with a metronome until both hands can move at the same time without either one stopping.
G/B or D/F# Sounds Muted on the Bass String
Both of these slash chords depend on a single fretted bass note ringing clearly, and if that note is muted, the whole point of the voicing disappears. Check that the fretting finger on the bass string, index for G/B, middle for D/F#, is pressing close to the fret wire rather than in the middle of the fret space, and that no other finger is accidentally resting against that string further up the neck.
Cadd9 or Asus4 Sounds Like Nothing Changed
If adding the extra finger for Cadd9 or Asus4 doesn't audibly shift the chord's color, the added finger likely isn't pressing hard enough to fully stop the string, letting the note underneath bleed through. Pluck that string by itself before strumming the full chord and confirm you hear a clean, distinct pitch.
D/F# Buzzes on the High E String
Because D/F# uses all four fingers with none of them barring, it's easy for the pinky reaching to the 2nd string to accidentally lean against the 1st string next to it and deaden it. Arch your pinky slightly so only its tip makes contact, and check the 1st string alone to confirm it's ringing clean.
The Thumb and Fingers Fight Each Other
A common beginner habit is letting the picking-hand fingers wait for the thumb, or the thumb wait for the fingers, instead of both moving independently and simultaneously. Practice the thumb's bass-note pattern completely alone first, tapping it against your leg if needed, then the finger pattern alone, before combining them. Trying to learn both halves together from the start is usually what causes the whole thing to feel uncoordinated.
The Pattern Speeds Up or Slows Down Without You Noticing
Because the picking pattern is a repeating, almost hypnotic loop, it's easy for your internal sense of tempo to drift, usually speeding up during easier chords like Am and dragging during harder ones like D/F#. Play along with a metronome click on every beat, not just occasionally to check yourself, until the pattern's speed stays constant regardless of which chord your fretting hand is dealing with underneath it.
Common Mistakes That Aren't About the Chords
Some of what makes this song sound off has nothing to do with fretting any individual shape correctly and everything to do with habits around the picking hand and the arrangement as a whole.
Picking Too Close to the Bridge or the Neck
Where your picking hand sits along the strings changes the tone significantly on a fingerpicked part like this one. Picking too close to the bridge produces a thin, brittle sound that can make the extended chords, Cmaj7 and Cadd9 especially, sound harsh rather than shimmering. Picking closer to the sound hole, roughly where a strumming hand would naturally rest, gives a warmer, fuller tone that suits the song's arpeggiated chords better.
Letting Fret-Hand Tension Build Up
The D/F# chord's four-finger stretch is the most likely spot for this, but tension can creep into any shape in this song if you're gripping the neck harder than the chord actually requires. Check periodically that your thumb isn't clamping down on the back of the neck and that your fretting fingers are pressing only as hard as needed for a clean note, no harder. Excess tension tires your hand out faster and makes chord changes slower, not more accurate.
Rushing Through the Intro to Get to the Verse
Because the intro repeats the same handful of chords for sixteen bars before the verse begins, it's tempting to treat it as a warm-up and rush through it. The intro is the part of this song most listeners recognize first, and it deserves the same steady, unhurried tempo as the rest of the song rather than being played as filler before the "real" part starts.
Stopping Completely When a Chord Change Goes Wrong
A missed change during practice is normal and expected, especially in a song built around continuous 16th notes where there's no natural pause to recover in. Stopping entirely to fix a mistake, rather than continuing forward and catching the next repetition, trains your hands to expect an interruption every time a difficult change comes up, which slows down learning the song as a whole. Keep the pattern moving even through an imperfect change, and let the next pass through the progression be where the correction actually happens.
Easier Versions and Where You Can Simplify
None of these are lesser ways to play the song. They use the same chords and land in the same places, just with fewer moving parts.
For D/F#, if the four-finger stretch isn't there yet, a plain open D chord (xx0232) works as a stand-in. You lose the smooth stepwise bass line into the chorus, but the harmony above it is otherwise identical, since D/F# and D share every note except the bass.
For G/B, a plain open G chord in its place is a reasonable simplification for the verse, at the cost of the same smooth bass-line effect the slash chord provides. Since G/B only asks for two fingers to begin with, though, most players find it's actually no harder than full G once they've tried both.
For the intro's Cmaj7 and Cadd9, if lifting and adding that one finger while keeping the picking pattern going feels like too much at once, playing plain C through the entire intro is a legitimate simplification while you build coordination. You'll lose some of the intro's shimmer, but every chord change in the song will still land on the correct beat.
Reading This Song's Chord Chart
If you're working from a printed or online chart rather than this post, a couple of notation habits are worth knowing so nothing catches you off guard. A chord written with a slash, like G/B or D/F#, means play the chord named before the slash while using the note named after the slash as the bass note instead of the chord's usual root. It's not a separate chord layered on top of G or D, just the same chord with a different note underneath it, which is exactly what both slash chords in this song do.
Repeat marks, a colon followed by two dots facing a set of bars, tell you to play that section again before moving on, which is how most charts notate the intro's four-bar phrases without writing each one out separately. A number in parentheses after a section, like "(x2)," tells you exactly how many times to repeat it. Where charts disagree, as they do on whether the verse uses G/B or plain G, or whether the instrumental section adds an F chord, that's normal. Different transcribers hear the recording slightly differently, and either version covered in this post will sit correctly under the song.
A Strummed Version, If Fingerpicking Isn't There Yet
The fingerpicking pattern is what makes this song recognizable, but it isn't a requirement for playing the chords correctly while that technique develops. A simple down-down-up-up-down-up strum, or even a plain steady down-strum on each chord, works over exactly the same progressions covered above: C-Cmaj7-Cadd9-C-Asus2-Asus4-Am-Asus2 for the intro, C-G/B-Am-G-Dm-Am for the verse, D/F#-G-Am for the chorus. Nothing about the chord shapes or the order they fall in changes. What changes is only the right hand. Use this version to get the chord changes themselves solid and in tempo, then layer the fingerpicking pattern back in once your fretting hand isn't the bottleneck anymore.
Naming the Picking Pattern With P-I-M-A
If you've studied classical or fingerstyle guitar before, you may know the picking-hand fingers by their Spanish-derived letters rather than T, I, M and R: P for pulgar (thumb), I for indice (index), M for medio (middle) and A for anular (ring). The pattern described earlier in this post maps directly onto that system. The thumb (P) handles the alternating bass notes, while the index, middle and ring fingers (I, M, A) roll through the 3rd, 2nd and 1st strings in the pattern's rolling section. Neither labeling system changes what your hand actually does. Use whichever set of letters is already familiar to you, or skip labels entirely and think of it as thumb-and-three-fingers, which is how most rock and folk players who never studied classical technique describe it.
One habit worth building either way: keep each finger assigned to the same string throughout the song rather than letting fingers wander between strings as chords change. Your thumb stays on the bass strings, your index on the 3rd string, your middle on the 2nd string, your ring on the 1st string, for every chord in this post. That consistency is a large part of why the pattern can stay identical across ten different chords. The strings a finger is responsible for don't change even when the notes on those strings do.
Building Up to Tempo
The full recording moves briskly, and trying to match that speed before the pattern and the chord changes are both individually solid is the most common way players stall out on this song. Set a metronome well below the recording's tempo, slow enough that you can play the fingerpicking pattern cleanly through at least one full verse without a single dropped note, and stay there for several days before increasing the tempo. Raise the metronome in small increments, five beats per minute at a time, and only move up once the current tempo has been clean for multiple passes in a row, not just once. For more on structuring this kind of practice, the guide to practicing guitar with a metronome covers the same incremental approach in more detail.
Playing It on Electric or Nylon-String Guitar
The recording is a steel-string acoustic part, played on a borrowed Martin D-28, but every chord and every note in the picking pattern works identically on an electric or a nylon-string classical guitar. Nothing about the shapes changes based on what you're holding.
What changes is feel and right-hand technique. A nylon-string guitar's wider neck spacing can make the tighter voicings, Cadd9 and D/F# especially, feel a little more spread out under your fretting hand at first, though the shapes themselves are unchanged. An electric guitar played clean, with a touch of reverb, captures a reasonable amount of the recording's atmosphere, but electric strings respond more sensitively to picking-hand dynamics than acoustic strings do, so a picking pattern that sounds fine on acoustic can sound uneven or clattery on electric until your touch evens out. Either instrument is a legitimate way to learn this song. Neither one is a shortcut around learning the picking pattern itself.
Singing and Playing at the Same Time
Once the chords and the fingerpicking pattern are solid on their own, singing while playing is usually the next wall most players hit on this song, largely because the vocal melody doesn't sit rhythmically on top of the picking pattern the way it would over a simple strum. Two things make this easier.
First, get the guitar part to the point where it runs close to automatically, with your picking hand maintaining the pattern even if your attention drifts elsewhere for a moment. Trying to sing while still consciously counting "1 e & a" splits your attention in a way that usually causes both halves to suffer. Second, learn the vocal melody on its own, without the guitar, until you know exactly where each line falls against a steady beat you can tap or count out loud. Once both halves are separately automatic, combining them becomes a matter of doing both slowly at first and gradually building the tempo back up, the same way you'd build any other new skill on the instrument.
How Long It Takes to Learn This Song
For a player who already has some fingerpicking experience and a handful of open chords under their fingers, a clean run-through of the intro and verse is realistic within two to three weeks of short daily practice. The chord shapes themselves aren't unusually hard individually. What takes the time is the coordination between both hands, specifically keeping the picking pattern moving smoothly through chord changes rather than pausing it while your fretting hand repositions.
For a newer player who hasn't done sustained fingerpicking before, expect the timeline to stretch closer to six to eight weeks, with the coordination between hands as the long pole rather than any single chord shape. D/F# will likely be the slowest individual shape to feel natural, since it's the only chord in the song built entirely from separate fingers with no barre to anchor it. The strummed version covered above is worth using in the meantime so you're playing the whole song, chords and structure included, well before the fingerpicking technique itself catches up.
Playing Along With the Recording
Because the original recording uses no capo and stays in the chord shapes covered in this post throughout, you can play along with it directly once your tempo is close to the record's. Start with just the intro, matching your C-Cmaj7-Cadd9 alternation to what you hear, and use the recording's steady picking pattern as your reference for how even and unhurried the whole thing should sound, rather than for raw speed.
If you're still building up to the recording's tempo, resist the urge to play along at full speed before you're ready. A metronome set to your own practice tempo will teach the pattern more reliably than fighting to keep pace with a recording that's faster than your hands currently allow. Save playing along with the actual track for once your slow, metronome-paced version is already clean.
Why This Song Gets Taught So Often
"Dust in the Wind" shows up constantly in fingerstyle guitar lessons, and it's not just because of the song's popularity. The pattern covered in this post is close to a textbook introduction to Travis-style picking: a steady, independent thumb, a small set of treble-string fingers, and a chord vocabulary built mostly from small, one-finger-at-a-time changes rather than big hand reshapes. Once the pattern is solid on this song, it transfers directly to a large amount of folk, country and singer-songwriter material that uses the same basic right-hand approach over different chords.
That's also why it's worth resisting the urge to rush past the pattern itself to get to the "real" song. The coordination you build getting the thumb and fingers moving independently here is the actual skill being learned, not a means to an end you discard once you can play this one song. Players who treat the picking pattern as the destination, rather than an obstacle between them and the chords, tend to progress faster on everything they learn afterward.
Practice Routine
Fifteen minutes is enough to make real progress if it's spent deliberately rather than running the song from the top every time.
Spend the first five minutes on the picking pattern alone, on a single held chord, focusing only on your thumb and fingers moving independently and evenly. Spend the next five minutes on the intro's chord changes, C to Cmaj7 to Cadd9 and Asus2 to Asus4, without worrying yet about keeping the picking pattern perfectly smooth through them. Spend the final five minutes combining both, slowly, on just the first four bars of the intro. Only once that much is solid should you attempt the full intro, and it's fine to stay well under tempo while every hand is still finding its footing.
Where This Song Came From
Kerry Livgren wrote "Dust in the Wind" almost by accident. He was working through a fingerpicking exercise at home between tours when his wife, Vicci, heard him playing and told him it sounded like a real song, not just practice. He initially dismissed the idea. Around the same time, he was reading a book of American Indian poetry and came across a line built on the phrase "all we are is dust in the wind." He hummed that line over the fingerpicking exercise he'd already been playing, and had a complete song within about fifteen minutes. He recorded a rough version on a four-track tape recorder and brought it to a Kansas rehearsal in 1976.
Guitarist Rich Williams later recalled hearing that rough recording, Livgren "mumbling the lyrics" over the guitar part, and the band responding with what Livgren has described as stunned silence before someone asked where the song had been hiding. It was an unusual fit for a band known at the time for dense progressive rock arrangements, which is part of why the band's reaction mattered: they recognized it as something worth recording essentially as written, sparse guitar part and all.
The Recording
"Dust in the Wind" was recorded in 1977 at Woodland Sound Studios in Nashville for the album Point of Know Return. Livgren played the guitar part on a borrowed Martin D-28 acoustic. Robby Steinhardt added electric violin, and Steve Walsh sang lead vocal. Released as a single in 1978, it reached number 6 on the Billboard Hot 100, the week of April 22, 1978, becoming Kansas's only top-ten single in the US, and has since been certified triple platinum. (For more on the recording and its chart history, see the song's Wikipedia entry.)
None of that history changes a single chord shape, but it explains why the arrangement stays so spare. This was built from one guitar part written before it was even meant to be a song, and the extended chord voicings, Cmaj7 and Cadd9 especially, exist specifically to make that one guitar ring out fuller, closer to a 12-string, since there was never meant to be much else layered on top of it.
The Electric Violin Part You're Hearing
The sustained, string-section-like sound woven through the recording underneath the vocal is Robby Steinhardt's electric violin, not a studio overdub of a string section and not a synthesizer. Kansas built much of its sound around Steinhardt's violin and viola parts, which made the band unusual among its rock contemporaries, and "Dust in the Wind" uses it sparingly, as a sustained backdrop rather than a lead melodic voice, which is part of why the arrangement still reads as an acoustic guitar song first rather than a full-band production.
You don't need a violin, or any second instrument, to play this song well. Every chord and every note in the picking pattern covered in this post works as a complete solo acoustic guitar piece on its own, exactly as Kerry Livgren first played it before the rest of the band, or any violin, was ever involved.
Changing Between Chords Is the Real Skill
Every shape in this post is, on its own, something a player with a few months of open-chord and basic barre-chord experience can already form. What actually determines whether this song sounds right is whether your fretting hand can move between those shapes while your picking hand keeps the pattern going underneath it without stalling. Treat the chords as the easy part and the combination of movement and pattern as the thing worth most of your practice time, and the rest of the song follows from there.
Frequently Asked Questions
What key is "Dust in the Wind" in?
The chords spell out C major, but the song resolves onto Am, the relative minor, far more often than onto C itself, which is why it's commonly described as being in A minor even though a lead sheet would likely notate it in C.
Is "Dust in the Wind" strummed or fingerpicked?
Fingerpicked on the original recording, using a Travis-style pattern of continuous 16th notes with the thumb alternating bass notes underneath a rolling pattern on the top three strings. A strummed version using the same chords is a legitimate simplification while that technique develops.
Does the song use a capo?
No. The original recording has no capo, and every chord in this post is played at its stated open position.
What is the hardest chord in the song?
D/F# in the chorus, since it's a four-finger shape with no barre to anchor it and a real stretch for most hands the first several times. A plain open D chord is a reasonable substitute while that stretch develops.
Why does the song use slash chords like G/B and D/F#?
Both create a smoother, stepwise bass line connecting the surrounding chords, C down to Am through G/B, and D up toward G through D/F#. The chord above the slash stays the same; only the lowest note changes.
Who wrote "Dust in the Wind," and how long did it take?
Kerry Livgren wrote it, starting from a fingerpicking exercise he'd already been playing. After finding the lyric's key phrase in a book of American Indian poetry, he finished the song in around fifteen minutes.
What guitar was used on the recording?
Kerry Livgren played a borrowed Martin D-28 acoustic guitar on the 1977 recording at Woodland Sound Studios in Nashville.
Do I need to play all ten chords to play this song?
Not exactly as written. Plain C through the intro, open G instead of G/B, and open D instead of D/F# all work as legitimate simplified substitutes without changing the song's overall shape or harmony, at the cost of some of the smoother bass-line movement the original voicings provide.
What does "Travis picking" mean?
It's a fingerstyle technique named after guitarist Merle Travis, built around the picking-hand thumb keeping a steady, alternating bass-note pulse on the lower strings while the fingers pick out a separate pattern on the higher strings at the same time. "Dust in the Wind" is one of the most commonly cited examples of the style in rock and pop guitar, alongside songs by artists like Simon & Garfunkel and James Taylor.
Is this a good song to learn as a beginner?
It's a reasonable stretch goal rather than a first-week song. The chord shapes are approachable, several of them are variations on the same basic hand position, but the fingerpicking pattern assumes some prior comfort moving your thumb and fingers independently. Players who already know a handful of open chords and have done at least basic fingerpicking elsewhere tend to have the smoothest path through it.
GuitarLowKey
Ready for fifteen focused minutes?
Open the web app and train the change that is blocking your song.