
Hey Jude Guitar Chords: Every Shape From Verse to Coda
Every chord in The Beatles' 'Hey Jude': the F-C-Bb verse, the Dm-Gm7 bridge, the Eb coda, and an easier capo-3 version using D shapes instead.

"Hey Jude" is built almost entirely on four chords, F, C, C7, and Bb, played in the key of F major. The verse runs F - C - C7 - F - Bb - F - C7 - F, the bridge moves through F7, Bb, Dm, Gm7 and C7, and the long "na na na" outro loops F - Eb - Bb - F for as long as you want to keep singing it. None of the shapes are exotic. The two that trip people up are Bb and the barre version of F, and both have easier substitutes covered below.
This post walks through every chord the song actually uses, the full verse-to-coda structure, an easier way to play the whole thing with a capo if the F-key barre chords are still out of reach, and the specific reasons a chord change stops sounding clean. It also covers where the song came from and why it was recorded the way it was, since a surprising amount of that history explains choices guitarists still argue about on this song, like why George Harrison and Paul McCartney disagreed over the guitar part in the first place.
Song Basics at a Glance
| Detail | Value |
|---|---|
| Key | F major |
| Tempo | Around 74 BPM, slow and unhurried |
| Capo | None in the original key; capo 3 with D shapes is a common easier alternative |
| Time signature | 4/4 |
| Verse chords | F, C, C7, Bb |
| Bridge chords (easy) | F7, Bb, Dm, Gm7, C7 |
| Bridge chords (walkdown) | F7, Bb, Bb/A, Gm, Bb/F, C, C7 |
| Coda ("na na na") chords | F, Eb, Bb |
Everything in this song comes from the key of F major and its close neighbors. The verse and bridge chords are all diatonic, meaning they belong naturally to the key. The one outlier is the Eb chord in the coda, which is not part of F major at all and is one of the more interesting harmonic choices in any Beatles single. That gets its own section further down, because it is worth understanding rather than just memorizing.
Where "Hey Jude" Came From
Paul McCartney wrote this song in June 1968 while driving to visit Cynthia Lennon and her young son Julian. John Lennon had recently left the family for Yoko Ono, and McCartney wrote the song as a way of comforting Julian, working title "Hey Jules." He later said he changed "Jules" to "Jude" because he thought it sounded better, and the song was eventually credited, as all Beatles songs were at the time, to Lennon-McCartney.
None of that changes a single chord shape, but it explains the tone the arrangement is reaching for. This is a song written to comfort a child, and the slow build from a bare piano-and-vocal verse into a massive, communal singalong outro mirrors that arc directly: start small and quiet, end with as many voices as possible joining in.
Recording It at Trident Studios
The Beatles recorded "Hey Jude" on July 31 and August 1, 1968, not at their usual Abbey Road Studios but at Trident Studios in central London. The reason was technical rather than creative: Trident had eight-track recording equipment at a time when Abbey Road was still limited to four tracks, and a song built around a full band plus a 36-piece orchestra needed the extra headroom.
That orchestra, arranged by George Martin, included strings, brass, woodwinds, and percussion, and it is largely responsible for the size of the outro. On the guitar side, John Lennon played acoustic guitar, George Harrison played electric, Paul McCartney played piano and bass, and Ringo Starr played drums and tambourine. During rehearsals, Harrison and McCartney disagreed over the electric guitar part: Harrison wanted to answer each vocal line with a short guitar phrase, in the call-and-response style common to a lot of the band's earlier work, while McCartney felt it clashed with the arrangement he had in mind and pushed back on it. The friction was real enough that it is often cited as an early sign of the tension that would eventually contribute to the band's breakup less than two years later, though none of that changes how approachable the finished song is on a single acoustic guitar.
The single was released on August 26, 1968, the first release on the Beatles' own Apple Records label. It spent nine weeks at number one on the US Billboard chart, the longest run at the top for any Beatles single, and reached number one in the UK the following month. At 7 minutes and 11 seconds, it was also, at the time, the longest single ever to top the British charts, almost entirely because of how long the outro is allowed to run.
During the session, the Beatles asked the orchestra players, who had been booked to record strings, brass, and woodwinds for the arrangement, whether they would also clap and sing along on the fadeout. Most agreed, and were reportedly paid double their usual rate for it. One musician refused outright, telling the band he had not signed up to clap and sing on "Paul McCartney's bloody song." That mix of professional orchestral musicians and an informal singalong is a large part of why the coda sounds like it is gradually being joined by more and more people the longer it runs, even though it was all recorded in one room on the same afternoon.
The Song's Structure, Start to Finish
Seeing the whole song laid out before you try to play it start to finish makes the chord changes easier to anticipate, especially since the outro repeats for a very long time compared to the rest of the song.
| Order | Section | Chords |
|---|---|---|
| 1 | Verse 1 | F - C - C7 - F - Bb - F - C7 - F |
| 2 | Verse 2 | F - C - C7 - F - Bb - F - C7 - F |
| 3 | Bridge 1 | F7 - Bb - Dm - Gm7 - C7 - F (repeated) |
| 4 | Verse 3 | F - C - C7 - F - Bb - F - C7 - F |
| 5 | Bridge 2 | F7 - Bb - Dm - Gm7 - C7 - F (repeated) |
| 6 | Verse 4 | F - C - C7 - F - Bb - F - C7 - F |
| 7 | Coda ("na na na") | F - Eb - Bb - F, repeated for several minutes and faded out |
Most recordings and live performances of this song follow that shape closely. What varies between transcriptions is almost never the chords themselves, it is how many times the bridge and coda repeat, since the studio recording fades the outro out gradually rather than ending it on a fixed number of repeats.
The Verse Chords: F, C, C7, and Bb
The verse is a short, four-chord loop that repeats with different lyrics across the first four verses of the song.
| Section | Chord 1 | Chord 2 | Chord 3 | Chord 4 | Chord 5 | Chord 6 | Chord 7 | Chord 8 |
|---|---|---|---|---|---|---|---|---|
| Verse | F | C | C7 | F | Bb | F | C7 | F |
Every chord in that loop is a chord most guitarists already half know. F and Bb are the two that ask more of a beginner's hand, since both are usually played as barre chords, and both have simplified, no-barre versions covered in their own sections below. C and C7 are standard open chords with no real difficulty once you already know open C.
A Note for Left-Handed Players
Every string and fret reference in this post assumes a right-handed guitar, fretting hand on the neck, strumming hand over the sound hole. If you play a left-handed, reverse-strung guitar, mirror the string numbers in every table here (string 6 becomes string 1, and so on). The fret numbers themselves do not change.
The F Chord
F opens the verse and closes it too, and it is the chord you will play more than any other in this song.
| String | Fret | Finger |
|---|---|---|
| 6 (low E) | 1 | 1 (barre) |
| 5 (A) | 3 | 3 |
| 4 (D) | 3 | 4 |
| 3 (G) | 2 | 2 |
| 2 (B) | 1 | 1 (barre) |
| 1 (high E) | 1 | 1 (barre) |
This is the full barre version of F, sometimes called the E-shape barre chord, with your index finger flattened across all six strings at the first fret and your ring, pinky, and middle fingers filling in the shape above it. If that full barre is not happening reliably yet, use this simplified, no-barre substitute instead, which drops the bottom two strings entirely.
| String | Fret | Finger |
|---|---|---|
| 6 (low E) | Muted | - |
| 5 (A) | Muted | - |
| 4 (D) | 3 | 3 |
| 3 (G) | 2 | 2 |
| 2 (B) | 1 | 1 |
| 1 (high E) | Muted or 1 (barred with finger 1) | 1 |
This four-string version keeps the notes that make the chord recognizably F while removing the strength and stretch a full six-string barre demands. It is a completely legitimate way to play this song, not a lesser version, and plenty of guitarists play "Hey Jude" this way permanently rather than switching to the full barre later.
The C and C7 Chords
C and C7 appear back to back in the verse, and the change between them is one note.
| String | Fret | Finger |
|---|---|---|
| 6 (low E) | Muted | - |
| 5 (A) | 3 | 3 |
| 4 (D) | 2 | 2 |
| 3 (G) | Open | - |
| 2 (B) | 1 | 1 |
| 1 (high E) | Open | - |
That is standard open C. C7 changes only the 3rd string, lifting it from open to the 3rd fret.
| String | Fret | Finger |
|---|---|---|
| 6 (low E) | Muted | - |
| 5 (A) | 3 | 3 |
| 4 (D) | 2 | 2 |
| 3 (G) | 3 | 4 |
| 2 (B) | 1 | 1 |
| 1 (high E) | Open | - |
Since your first, second, and third fingers do not move at all between C and C7, the whole change comes down to adding your pinky to the 3rd fret of the G string, then lifting it back off for the next C. It is one of the easier chord pairs in the entire song, and worth practicing on its own until it feels automatic before trying it inside the full verse.
The Bb Chord
Bb is the other barre chord in the verse, and along with F it is the shape most beginners spend the longest getting comfortable with on this song.
| String | Fret | Finger |
|---|---|---|
| 6 (low E) | Muted | - |
| 5 (A) | 1 | 1 (barre) |
| 4 (D) | 3 | 2 |
| 3 (G) | 3 | 3 |
| 2 (B) | 3 | 4 |
| 1 (high E) | 1 | 1 (barre) |
This is the A-shape barre chord, built by barring your index finger across the 1st fret and using your middle, ring, and pinky fingers to fill in the triangle shape on the middle strings. If the barre is not solid yet, this no-barre substitute drops the top string and only asks for a single fretted note plus a three-finger shape.
| String | Fret | Finger |
|---|---|---|
| 6 (low E) | Muted | - |
| 5 (A) | 1 | 1 |
| 4 (D) | 3 | 2 |
| 3 (G) | 3 | 3 |
| 2 (B) | 3 | 4 |
| 1 (high E) | Muted | - |
No barre is required for this version at all, since every finger is only responsible for its own string. The tradeoff is a slightly thinner top end, since you lose the high Bb note on the 1st string, but the chord is still fully identifiable and the change into and out of it is considerably easier while your hand builds the strength for the full barre.
An Easier Way In: Capo 3 with D Shapes
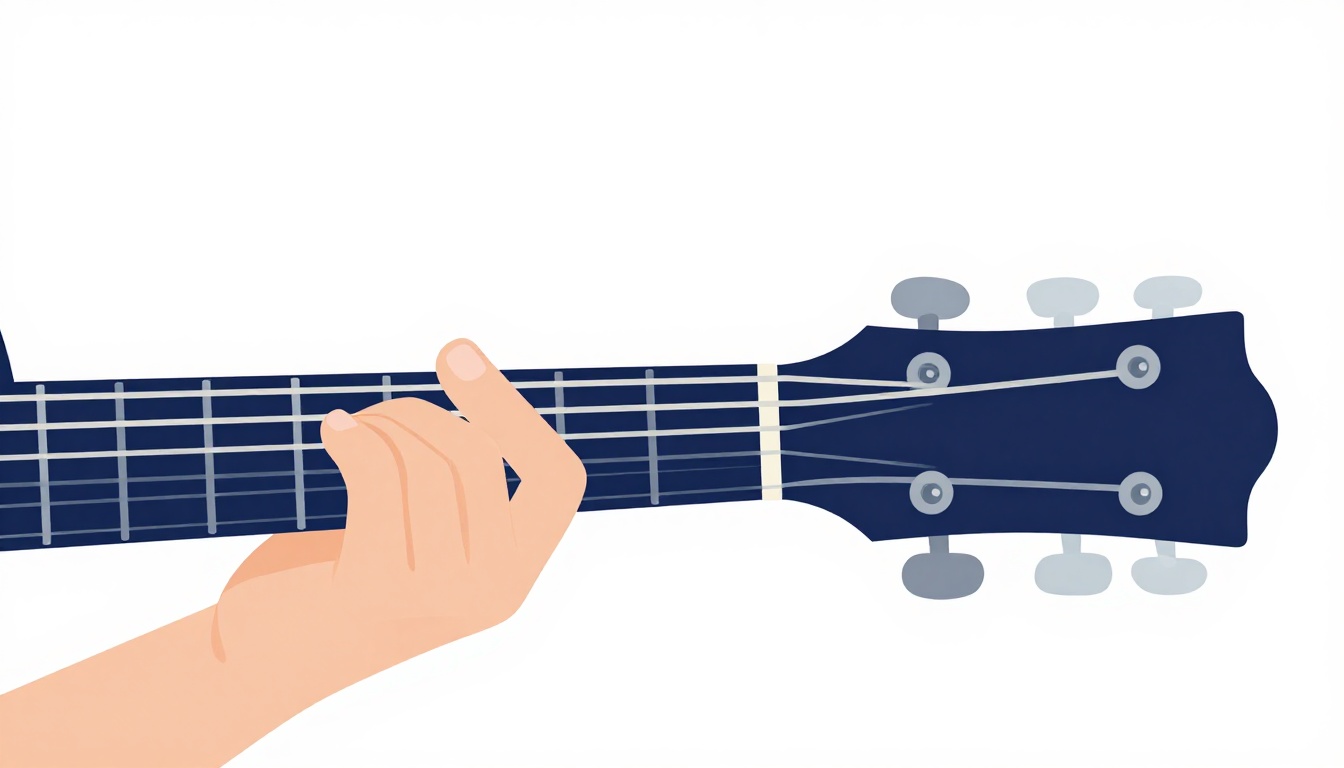
If F and Bb barre chords are still a real obstacle, there is a second, widely used way to play this entire song using only open chord shapes: a capo on the 3rd fret, playing the song as if it were in D major.
A capo shortens the vibrating length of every string equally, raising the pitch of the whole guitar without changing which frets you press relative to the capo. Clamp one on the 3rd fret, play an open D shape, and it rings out at the same pitch as F played with no capo at all. This trades two barre chords for four familiar open shapes, D, A, A7, and G, which is often the more forgiving way to learn the song for a first pass. For more on how capo positions map to actual chord names, the guitar capo chart on this site covers the full range of positions, not just this one.
| Section | Chord 1 | Chord 2 | Chord 3 | Chord 4 | Chord 5 | Chord 6 | Chord 7 | Chord 8 |
|---|---|---|---|---|---|---|---|---|
| Verse (capo 3) | D | A | A7 | D | G | D | A | D |
The shapes themselves are all standard open chords.
| String | D | A | A7 | G |
|---|---|---|---|---|
| 6 (low E) | Muted | Muted | Muted | 3 |
| 5 (A) | Muted | Open | Open | 2 |
| 4 (D) | Open | 2 | 2 | Open |
| 3 (G) | 2 | 2 | Open | Open |
| 2 (B) | 3 | 2 | 2 | Open |
| 1 (high E) | 2 | Open | Open | 3 |
Every note in that table sounds three semitones higher once the capo is on the 3rd fret, so a D shape rings out as F, an A shape as C, an A7 as C7, and a G as Bb. You are still playing the same song in the same key the band recorded it in, just with the pitch-raising done by the capo instead of your fretting hand.
The Bridge: "And Any Time You Feel the Pain"
The bridge, sometimes called the refrain or the middle eight, is the section beginning "And any time you feel the pain," and it introduces two chords the verse never uses.
| Section | Chord 1 | Chord 2 | Chord 3 | Chord 4 | Chord 5 | Chord 6 |
|---|---|---|---|---|---|---|
| Bridge (easy version) | F7 | Bb | Dm | Gm7 | C7 | F |
F7 is the same F barre shape you already know, with one note lifted. Take the full barre F chord and lift your ring finger off the 5th string, letting it drop to open.
| String | Fret | Finger |
|---|---|---|
| 6 (low E) | 1 | 1 (barre) |
| 5 (A) | Open | - |
| 4 (D) | 3 | 4 |
| 3 (G) | 2 | 2 |
| 2 (B) | 1 | 1 (barre) |
| 1 (high E) | 1 | 1 (barre) |
Bb here is identical to the Bb chord already covered in the verse section above, full barre or no-barre version, whichever you have been using.
The Dm and Gm7 Chords
Dm and Gm7 are the two chords unique to the bridge, and both are more approachable than they might look on a chart.
Dm is a standard open chord most guitarists already know from other songs.
| String | Fret | Finger |
|---|---|---|
| 6 (low E) | Muted | - |
| 5 (A) | Muted | - |
| 4 (D) | Open | - |
| 3 (G) | 2 | 2 |
| 2 (B) | 3 | 3 |
| 1 (high E) | 1 | 1 |
Gm7 is the one genuinely new shape in this song. It is played as a barre chord at the 3rd fret, and it needs only two things: a full barre and one extra finger.
| String | Fret | Finger |
|---|---|---|
| 6 (low E) | 3 | 1 (barre) |
| 5 (A) | 5 | 3 |
| 4 (D) | 3 | 1 (barre) |
| 3 (G) | 3 | 1 (barre) |
| 2 (B) | 3 | 1 (barre) |
| 1 (high E) | 3 | 1 (barre) |
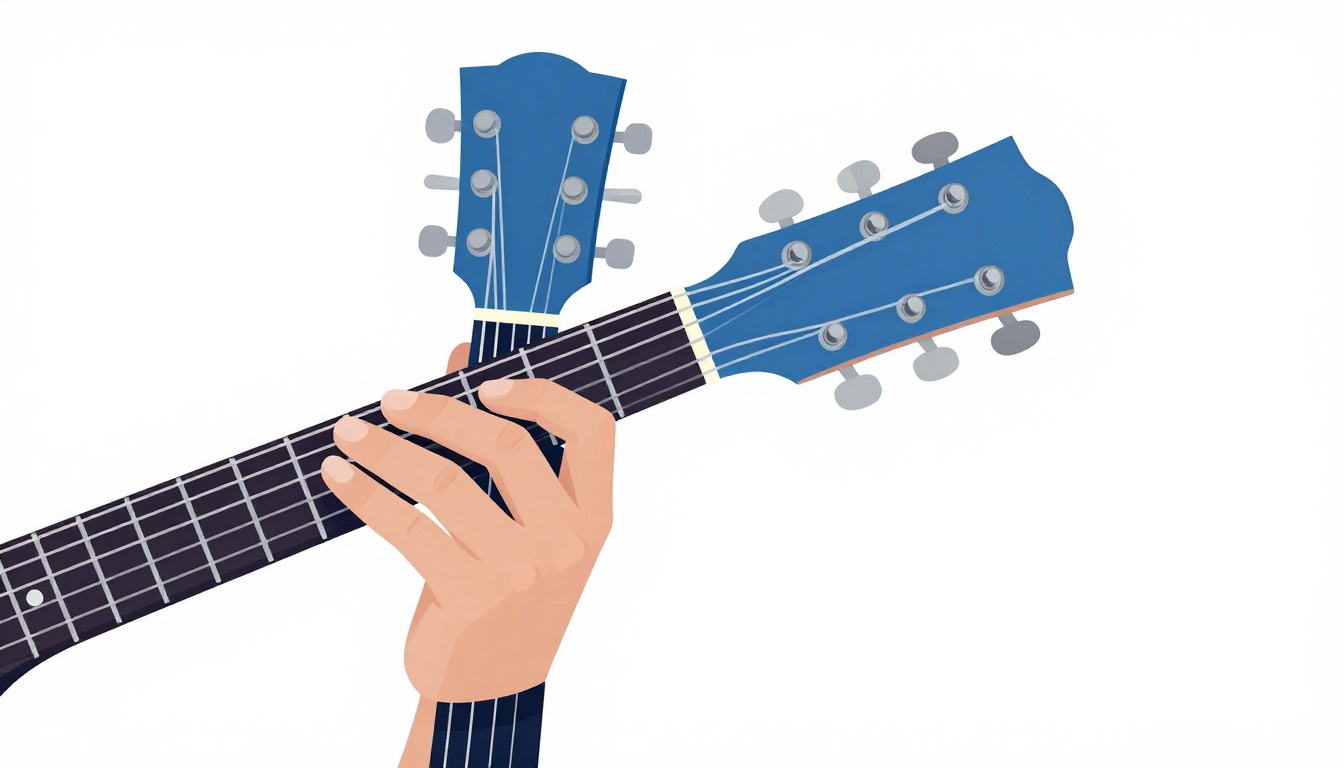
Barre your index finger flat across all six strings at the 3rd fret, then reach your ring finger up to the 5th fret of the 5th string. That is the entire chord. It sits a little higher up the neck than everything else in this song, so the jump from Bb, down near the nut, up to Gm7 at the 3rd fret is the biggest hand movement the bridge asks for. Practice that single jump on its own, back and forth, before trying to fold it into the full six-chord bridge.
The Record-Accurate Walkdown Bridge
Some transcriptions of this song, aiming closer at the actual recording, replace the Dm-Gm7 pair with a descending bass line under a sustained Bb chord, a common songwriting device where the chord above a bass note stays mostly still while the bass itself steps downward.
| Section | Chords |
|---|---|
| Bridge (walkdown version) | F7 - Bb - Bb/A - Gm - Bb/F - C - C7 - F |
The bass note walks Bb, then A, then G, then F, descending by step, while the chord shapes above it shift to match. Bb/A keeps the Bb triad ringing but swaps the bass note under it from Bb down to the open A string.
| String | Fret | Finger |
|---|---|---|
| 6 (low E) | Muted | - |
| 5 (A) | Open | - |
| 4 (D) | 3 | 2 |
| 3 (G) | 3 | 3 |
| 2 (B) | 3 | 4 |
| 1 (high E) | 1 | 1 |
Notice this is the same upper shape as the full Bb barre chord, just without the index finger barring the 5th string, since that string is left open instead. The rest of the walkdown, Gm, Bb/F, and C, follows the same idea: the chord tones stay close to where your hand already is, and only the bass note underneath actually moves. This version is genuinely harder to play cleanly than the Dm-Gm7 bridge above, since it asks for more precise finger independence, and it is not required to play the song correctly. Learn the easy bridge first, and come back to the walkdown once the rest of the song is solid.
The Coda: Why the "Na Na Na" Section Uses Eb
The outro is the part of "Hey Jude" most people can sing from memory, and harmonically it is the most unusual thing the song does. Both the verse and the bridge stay entirely inside the key of F major. The coda does not.
| Section | Chord 1 | Chord 2 | Chord 3 |
|---|---|---|---|
| Coda ("na na na") | F | Eb | Bb |
F and Bb both belong to F major, but Eb does not. In F major, the chord you would expect in that spot is Edim or nothing at all, not a full major chord built on the flattened seventh degree of the scale. Borrowing Eb from F Mixolydian, a closely related mode that flattens the 7th degree, is what gives the outro its lift, a slightly unresolved, open quality that keeps the four-bar loop from ever feeling like it needs to end, which suits a fade-out that runs for minutes rather than seconds.
The Eb Chord
The easiest way to learn Eb here is to recognize it as the same shape as Bb, just moved five frets higher up the neck.
| String | Fret | Finger |
|---|---|---|
| 6 (low E) | Muted | - |
| 5 (A) | 6 | 1 (barre) |
| 4 (D) | 8 | 2 |
| 3 (G) | 8 | 3 |
| 2 (B) | 8 | 4 |
| 1 (high E) | 6 | 1 (barre) |
Barre your index finger at the 6th fret and form the identical A-shape triangle with your other three fingers that you already use for Bb, just three strings further up the neck. If reaching that far up while also needing to jump back down to F and Bb for every repeat of the loop feels like too much, this no-barre substitute stays close to the open position instead.
| String | Fret | Finger |
|---|---|---|
| 6 (low E) | Muted | - |
| 5 (A) | Muted | - |
| 4 (D) | 1 | 1 |
| 3 (G) | 3 | 2 |
| 2 (B) | 4 | 4 |
| 1 (high E) | 3 | 3 |
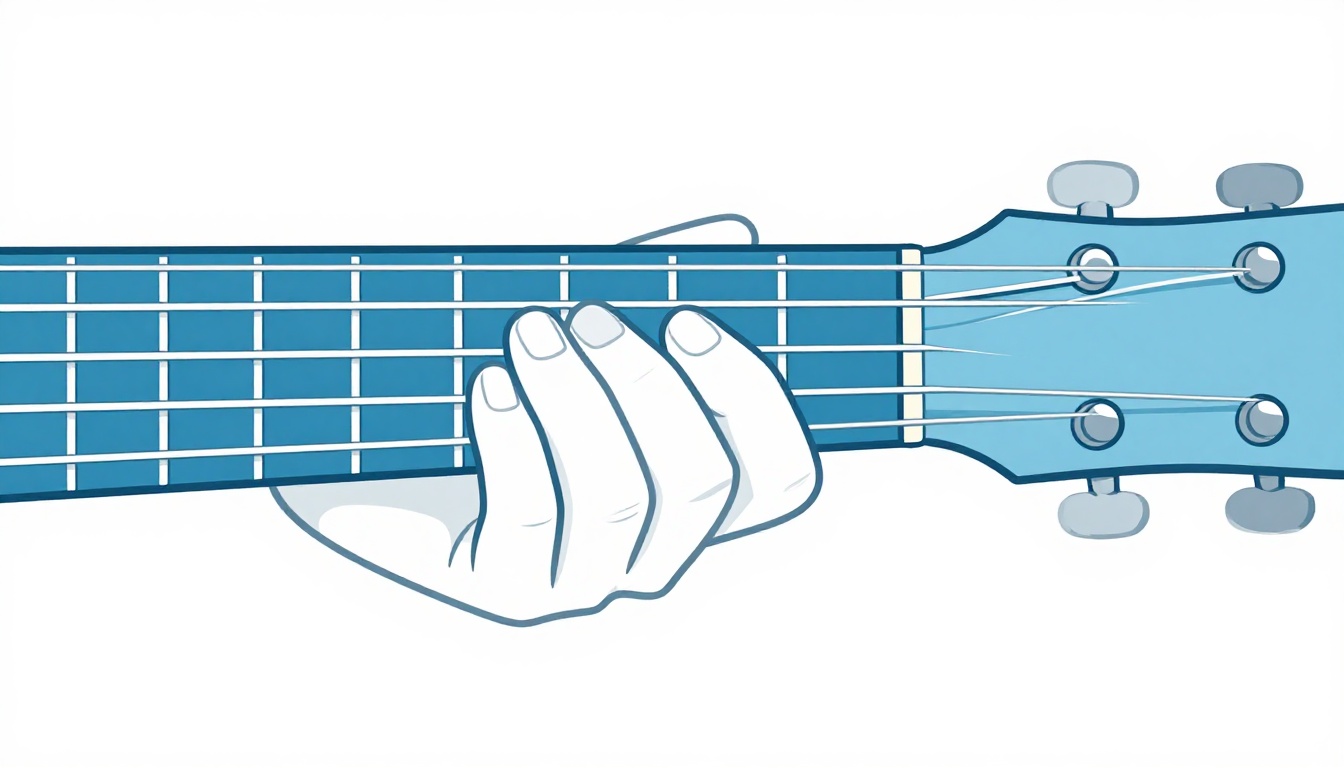
This version stays down near the first few frets, closer to where F and Bb already live, which makes the loop easier to keep moving through for the several minutes the coda tends to run.
Why It Is Not Sounding Right
If every chord shape checks out but the song still sounds muddy or off compared to the recording, the cause is almost always one of these, not a wrong shape.
The Bb or F Barre Is Buzzing
This is the single most common issue on this song specifically, since it has two full barre chords back to back in the verse. Buzzing on a barre chord almost always means your index finger is not pressing with even pressure across all six strings, often because your finger is rolled too flat or too far onto its pad rather than its side. Roll your index finger slightly onto its outer edge, keep your thumb centered on the back of the neck rather than creeping over the top, and press just behind the fret wire rather than in the middle of the fret space.
The C7 Sounds Muted on the Top String
If the high E string is not ringing on C7, check that your first finger, still fretting the B string at the 1st fret from the C shape underneath it, has not shifted position when your pinky reached for the G string. A finger that drifts even slightly can lean against the string next to it and deaden it.
The Change From F to C Loses a Note
If the C chord sounds thin or partially muted right after F, check that your barring index finger has fully released before your other fingers reset into the C shape. A finger lifting only halfway off a barre chord tends to hover just above the strings and catch one of them on the way past, muting it.
You Are Mixing Up C and C7 Timing
Because C and C7 differ by a single finger, it is easy to add or drop the pinky at the wrong moment, especially once you are trying to sing along at the same time. Practice the verse slowly with no singing first, saying "C" and "C-seven" out loud as you play each one, until the timing of adding and lifting that one finger is automatic.
The Gm7 Jump Feels Rushed
Gm7 sits at the 3rd fret, well above where the rest of the bridge lives near the nut. If the chord change into it sounds sloppy, you are very likely arriving late and rushing the barre into place instead of moving your whole hand there ahead of the beat. Practice the single jump from Dm to Gm7 in isolation, slowly, until your hand knows where the 3rd fret is without having to look.
The Coda Loop Sounds Flat and Repetitive
If the F-Eb-Bb-F loop feels lifeless after the first minute, the issue is usually dynamics rather than technique. Playing the loop at exactly the same volume on every pass is accurate but not what makes the recording work. Vary your strumming intensity slightly from repeat to repeat, and let a few passes ring out longer than others, the same unevenness a room full of people singing together would naturally produce.
Easier Versions for Beginners
If any part of this song is still out of reach, several substitutions keep it playable while your hand builds strength.
Use the no-barre versions of F and Bb covered in their own sections above for the entire verse. They carry the harmony correctly and only cost you a slightly thinner top end.
If Gm7 is still difficult even as a two-finger barre, substitute a plain Dm or an open Am wherever it appears in the bridge. It is not the exact chord the song calls for, but it keeps the progression moving while your hand develops the reach, and you can swap the correct chord back in later.
If reaching Eb at the 6th fret for the outro feels too far from the rest of the loop, use the no-barre, low-position Eb substitute covered in its own section above instead. It stays close to F and Bb, which makes the repeated loop easier to sustain.
If none of that is comfortable yet, the capo-3 version covered earlier replaces every barre chord in the song with an open shape. It is a completely valid way to learn "Hey Jude" for as long as you need it, not a permanent downgrade.
None of these substitutions are compromises you have to apologize for. They are a way to keep playing the whole song while the specific strength and independence the fuller voicings ask for continues to develop.
Strumming Pattern and Feel
"Hey Jude" is not a fast, syncopated strumming song. The verse and bridge call for a steady, mostly even down-and-up pattern with the emphasis on keeping time rather than adding flourishes, since the vocal melody is doing most of the rhythmic work.
A simple starting pattern for the verse: down, down, up, down, down, up, down, down-up, repeated once per chord. Keep your strumming hand loose and moving continuously, even over the beats you are not actually striking the strings on, since a strumming hand that only moves when it needs to tends to lose time.
The outro can open up more than the verse. Once the "na na na" section starts, a fuller, slightly louder strum across the F-Eb-Bb-F loop matches the size the arrangement grows into on the recording, especially since that section is meant to feel like a crowd joining in rather than a single quiet performance.
Fingerpicking the Verse as an Alternative
A full strumming pattern is not the only way to play the verse. On the original recording, the guitar sits well underneath the piano and vocal rather than driving the song, and a quieter, fingerpicked or hybrid picked verse can suit a solo acoustic performance better than a full strum, especially if you are singing at the same time.
A simple starting pattern: thumb on the lowest note of the chord (the 6th string for F, the 5th string for C, C7, and Bb), followed by your index, middle, and ring fingers picking the remaining strings in sequence, low to high. Played evenly and without rushing, this keeps the chord changes audible without the volume and attack of a strummed pattern, which can be useful if you are still building speed and confidence in the F and Bb barre chords and want the chord change itself to be less exposed.
Treat fingerpicking as an option for the verse specifically, not the whole song. Once the bridge and especially the coda arrive, a fuller strum matches the way the arrangement opens up on the recording far better than picking does, since that section is meant to grow rather than stay contained.
Getting the Build Right
More than most songs built on a small handful of chords, "Hey Jude" lives on contrast. The verse is comparatively restrained, the bridge lifts slightly, and the coda is meant to feel like it keeps growing the longer it goes, mirroring the way the actual recording gradually adds more voices and instruments to the fadeout rather than staying at one constant volume.
On a solo guitar, you cannot literally add more players, but you can recreate the shape of that build. Play the verse with a lighter touch, less wrist motion, strings barely struck. Let the bridge open up slightly as the chords move further from the tonic. Then let the coda be noticeably fuller and louder than everything before it, even if that feels like an exaggeration the first few times you try it. A song this well known loses very little from a guitarist emphasizing the shape of the arrangement over technical precision, and gains a lot from getting that contrast right.
Changing Between Chords Without Losing the Feel
The individual shapes in this song are not especially hard once each one is solid on its own. What actually makes "Hey Jude" difficult the first several times through is keeping a steady strum going while your fretting hand resets between barre chords, particularly the F to Bb change in the verse, where both hands are asking for a full barre within two beats of each other.
Two habits help more than anything else. First, practice each chord change in isolation, just two chords back and forth at a slow, even tempo, before attempting the full progression. Second, look for what stays still between chords rather than resetting your whole hand on every change. Between F and Bb, your index finger barres the same fret area on both chords, it is really only the other three fingers that need to move, and once you notice that, the change stops feeling like two unrelated hand positions.
A Practice Routine for This Song
A realistic first week spent on this song, assuming you already know basic open chords and have some barre chord experience, looks like this.
| Days | Focus |
|---|---|
| 1 to 2 | The verse loop (F-C-C7-F-Bb-F-C7-F), slow tempo, no-barre substitutes if needed |
| 3 | The F and Bb barre chords specifically, isolated from the rest of the song |
| 4 | The easy bridge (F7-Bb-Dm-Gm7-C7-F), focusing on the jump into Gm7 |
| 5 | The coda loop (F-Eb-Bb-F), both Eb versions, until the repeats feel automatic |
| 6 | Full song at a slow, steady tempo, verse into bridge into coda |
| 7 | Singing along while playing, starting with the verse alone before adding the rest |
Do not treat the seventh day as a finish line. It is the first time you are allowed to play the song slowly and imperfectly from start to finish, not the point where it should already sound like the recording. If you are building this into a short daily habit rather than one long session, the homepage has more on structuring focused fifteen-minute practice blocks that actually stick over time.
Common Mistakes With This Song
A few habits show up repeatedly with this particular song, separate from the buzzing and muted-string issues already covered above.
Rushing the Coda
Because the "na na na" section repeats the same three chords over and over, it is tempting to speed up slightly the longer it goes on, especially once you know the words by heart and stop paying close attention to your strumming hand. Keep a steady internal pulse through the entire outro, even on the fifteenth repeat, the same way you would through the first.
Skipping C7 for C
Since C and C7 sound similar at a glance, it is common for players to simplify the verse by playing C both times instead of alternating C and C7. It is a small difference, one note, but it is part of what gives the verse its gentle forward pull toward the next chord, and leaving it out flattens that motion.
Treating the Barre Chords as Optional Forever
The no-barre substitutes for F and Bb are genuinely useful early on, but if you stop there permanently, you lose access to a large share of songs beyond this one that use the same two barre shapes. Treat the substitutes as a stepping stone rather than the destination, and revisit the full barre versions every so often even after you have moved on from actively learning this song.
Playing It With Other People
Few songs are as naturally suited to being played in a group as this one, and the coda is the reason why. Once the chord changes are solid, "Hey Jude" is one of the more forgiving songs to play alongside other guitarists or singers, since the outro does not depend on tight, note-for-note precision the way a lead guitar part in a rock song might. It depends on volume and voices building together, which a room full of imperfect singers achieves more easily than a single, technically flawless take.
If you are playing this at a gathering, a lesson, or with family, do not worry about getting every chord change from every player perfectly synchronized during the coda specifically. Slight looseness in a room full of people singing "na na na" together is closer to the spirit of the recording than a tightly rehearsed unison would be. Save the precision for practicing the verse and bridge changes on your own beforehand, and let the outro be the part where the song is genuinely meant to feel a little loose.
Full Chord Shape Reference
Every chord this song uses, gathered in one place. Strings are numbered 1 to 6, thinnest to thickest, and fingers are numbered 1 to 4, index to pinky.
| Chord | 6 (low E) | 5 (A) | 4 (D) | 3 (G) | 2 (B) | 1 (high E) |
|---|---|---|---|---|---|---|
| F (barre) | 1 (finger 1) | 3 (finger 3) | 3 (finger 4) | 2 (finger 2) | 1 (finger 1) | 1 (finger 1) |
| F (easy) | Muted | Muted | 3 (finger 3) | 2 (finger 2) | 1 (finger 1) | Muted or 1 |
| F7 | 1 (finger 1) | Open | 3 (finger 4) | 2 (finger 2) | 1 (finger 1) | 1 (finger 1) |
| C | Muted | 3 (finger 3) | 2 (finger 2) | Open | 1 (finger 1) | Open |
| C7 | Muted | 3 (finger 3) | 2 (finger 2) | 3 (finger 4) | 1 (finger 1) | Open |
| Bb (barre) | Muted | 1 (finger 1) | 3 (finger 2) | 3 (finger 3) | 3 (finger 4) | 1 (finger 1) |
| Bb (easy) | Muted | 1 (finger 1) | 3 (finger 2) | 3 (finger 3) | 3 (finger 4) | Muted |
| Dm | Muted | Muted | Open | 2 (finger 2) | 3 (finger 3) | 1 (finger 1) |
| Gm7 | 3 (finger 1) | 5 (finger 3) | 3 (finger 1) | 3 (finger 1) | 3 (finger 1) | 3 (finger 1) |
| Eb (barre) | Muted | 6 (finger 1) | 8 (finger 2) | 8 (finger 3) | 8 (finger 4) | 6 (finger 1) |
| Eb (easy) | Muted | Muted | 1 (finger 1) | 3 (finger 2) | 4 (finger 4) | 3 (finger 3) |
| D (capo 3) | Muted | Muted | Open | 2 (finger 1) | 3 (finger 3) | 2 (finger 2) |
| A (capo 3) | Muted | Open | 2 (finger 2) | 2 (finger 3) | 2 (finger 1) | Open |
| A7 (capo 3) | Muted | Open | 2 (finger 2) | Open | 2 (finger 1) | Open |
| G (capo 3) | 3 (finger 2) | 2 (finger 1) | Open | Open | Open | 3 (finger 4) |
Keep this table open on a second screen the first few times you run through the song. It is faster to glance at than scrolling back through each individual section once you already know which version of each chord you are using.
Frequently Asked Questions
What key is "Hey Jude" in?
F major. The verse and bridge stay entirely inside the key, and the outro briefly borrows an Eb chord from outside it for color before returning to F.
Do I need to know barre chords to play this song?
Not strictly. F and Bb both have no-barre substitutes covered in their own sections above, and a capo on the 3rd fret lets you play the entire song using only open D, A, A7, and G shapes instead.
Why does the outro use so many chords beyond the key?
It uses exactly one, Eb, borrowed from F Mixolydian, a closely related mode. That single borrowed chord is what gives the "na na na" loop its open, unresolved lift, which is part of why it works as a fade-out that can run for minutes without feeling like it is overstaying.
What is the difference between the easy bridge and the walkdown bridge?
The easy version (F7-Bb-Dm-Gm7-C7-F) uses standard chord shapes and gets the progression right. The walkdown version (F7-Bb-Bb/A-Gm-Bb/F-C-C7-F) adds a descending bass line under mostly static chord shapes, closer to how the harmony actually moves on the recording, but harder to play cleanly. Both are correct.
How long is the actual outro on the recording?
The full song runs 7 minutes and 11 seconds, and the "na na na" coda takes up the majority of that, fading out gradually rather than ending on a fixed number of repeats.
Who actually played the guitars on the record?
John Lennon played acoustic guitar and George Harrison played electric guitar on the original recording, with Paul McCartney on piano and bass and Ringo Starr on drums and tambourine, alongside a 36-piece orchestra arranged by George Martin.
Is this a good song for a beginner guitarist?
The chord vocabulary is small and mostly familiar, which makes it approachable. The two barre chords, F and Bb, are the real obstacle for a newer player, and both have easier substitutes covered above, so the song is realistic to learn well before either barre chord feels fully solid.
Do I need a capo to play "Hey Jude"?
No. The original recording uses no capo at all, played straight in F major. The capo-3 version covered in this post is an alternative for guitarists who want to avoid the F and Bb barre chords, not a requirement.
Why do C and C7 sound so similar?
They differ by a single note. C7 adds the flattened seventh degree of the scale on the 3rd fret of the G string, which gives it a slightly more unresolved, forward-leaning sound than plain C, useful for pulling the ear toward the next chord in the progression.
Can I play the whole song with the no-barre chord versions?
Yes. The no-barre substitutes for F, Bb, and Eb covered throughout this post carry the correct harmony for every section of the song. You lose a small amount of top-end brightness compared to the full barre versions, but nothing about the progression itself changes.
How is "Hey Jude" different from other songs written in the key of F?
Structurally, not much, the verse and bridge are both fairly standard diatonic progressions. What sets it apart is the length and construction of the outro, which spends several minutes on a simple three-chord loop with a full orchestra and crowd of voices building underneath it, something most songs in any key do not attempt.
Why did Paul McCartney write this song?
He wrote it in June 1968 to comfort Julian Lennon, John Lennon's young son, after John left the family for Yoko Ono. The working title was "Hey Jules," and McCartney later said he changed it to "Jude" simply because he thought it sounded better.
Is it true the orchestra sang and clapped on the recording?
Yes. During the session at Trident Studios, the orchestral musicians booked for strings, brass, and woodwinds were also asked to clap and sing along on the fadeout, and were paid extra for it. Most agreed, though at least one musician was reportedly unhappy about it.
Should I strum or fingerpick the verse?
Either works. Strumming is more direct and easier to keep time with early on. Fingerpicking sits closer to how understated the guitar is on the original recording and can make more room for a vocal, but it takes more independent finger control to keep even. Start with strumming if fingerpicking is new to you.
GuitarLowKey
Ready for fifteen focused minutes?
Open the web app and train the change that is blocking your song.