
'I Don't Wanna Die' by Alan Silvestri Guitar Chords
The G, C, Am and D chords behind Alan Silvestri's 'I Don't Wanna Die' from The Quick and the Dead, plus a fingerpicking pattern and the tone that makes it work.

"I Don't Wanna Die," the solo guitar cue Alan Silvestri wrote for The Quick and the Dead, is built from four chords in the key of G major: G, C, Am and D. No capo, standard tuning. It's a short, quiet instrumental piece, not a song with a vocal melody, and that's exactly why it works so well as a beginner-to-intermediate fingerstyle piece: four chords you probably already know, played slowly, with real attention to how they ring.
This post covers the chord shapes in full tables, why there's no single "official" tab for this one and what to do about that, a fingerpicking pattern that suits the piece's mood, a strummed fallback if you're not fingerpicking yet, the specific things that make it sound thin or rushed instead of cinematic, easier versions of each chord, and a practice routine built around getting four chords to actually sound like a film score rather than a chord chart.
"I Don't Wanna Die" at a Glance
| Detail | Value |
|---|---|
| Composer | Alan Silvestri |
| Film | The Quick and the Dead (1995), directed by Sam Raimi |
| Album | The Quick and the Dead: Original Motion Picture Soundtrack (Varèse Sarabande, 1995) |
| Scene | The death of Fee "the Kid" Herod |
| Key | G major |
| Chords | G, C, Am, D (Am7 and D7 also used as lighter variants) |
| Capo | None |
| Tuning | Standard (E A D G B E) |
| Feel | Slow, sparse, rubato rather than strict tempo |
| Instrumentation on the recording | Solo guitar, minimal accompaniment |
Two things to know before you touch the guitar. First, this is a film score cue, not a single with a published lead sheet, so what follows is built from the chords that ear-transcription sites consistently agree on, not a note-for-note transcription of the original recording. Second, the piece is short and the chords are simple on paper. What actually makes it hard is control: getting each chord to ring evenly, at a tempo that breathes rather than clicks, which is a different skill than memorizing four shapes.
Where This Cue Comes From
The Quick and the Dead is a 1995 western directed by Sam Raimi, starring Sharon Stone as a gunslinger competing in a quick-draw tournament in the town of Redemption, Gene Hackman as the town's tyrannical boss John Herod, Russell Crowe as a former outlaw turned preacher, and a young Leonardo DiCaprio as Fee "the Kid" Herod, a hot-headed young gunfighter who has entered the tournament convinced that John Herod is his father and hoping to earn his respect.
The Kid gets his shot at Herod in the film's climax, wounds him, and is then shot and killed by him. Herod refuses to take the dying Kid's hand or acknowledge him as his son, an act of cruelty that lands as the film's sharpest gut punch. "I Don't Wanna Die" is the cue that plays under that scene, and it's built around a solo guitar rather than the fuller orchestral writing Silvestri uses elsewhere in the score. A review from Movie Music UK, covering the soundtrack, describes it as "the guitar solo that accompanied the Kid's death scene," calling it "lovely, simple but emotionally direct," which lines up with what you hear: a spare, unhurried guitar part standing in for a moment the orchestra deliberately steps back from.
Silvestri's score for the film leans heavily on Ennio Morricone's spaghetti western scores, all whistled themes, sparse guitar and wide open space between phrases, and "I Don't Wanna Die" is the clearest example of that influence on the album: one instrument, one idea, played with restraint. That context matters for how you should approach playing it. This isn't a piece to strum through quickly. It's a piece where the space between the chords carries as much weight as the chords themselves.
Alan Silvestri is not primarily known as a guitar composer. Born in 1950 and trained at Berklee College of Music, he's built one of film music's longest-running director partnerships, scoring nearly every Robert Zemeckis feature since 1984, including the Back to the Future trilogy, Who Framed Roger Rabbit, Forrest Gump, Cast Away and The Polar Express, alongside other major scores like Predator, The Abyss and The Bodyguard. That body of work is almost entirely orchestral, built around big, brassy themes and full string sections. The Quick and the Dead, coming out the same year as several of those larger projects, is a rare case of Silvestri stripping his writing down to a single instrument for one of the film's most important beats, which is exactly why "I Don't Wanna Die" stands out from the rest of his catalog and why it translates so directly to solo guitar in the first place. You're not adapting an orchestral cue down to six strings here. The cue was already written for essentially one voice.
The Four Chords You Need
All four chords below are open, first-position shapes. If you've played guitar for more than a few weeks, you likely already know two or three of them.
G Major
G is the tonic, the chord the piece keeps returning home to.
| String | Fret | Finger |
|---|---|---|
| 6 (low E) | 3 | 2 (middle) |
| 5 (A) | 2 | 1 (index) |
| 4 (D) | Open | - |
| 3 (G) | Open | - |
| 2 (B) | Open | - |
| 1 (high E) | 3 | 3 (ring) |
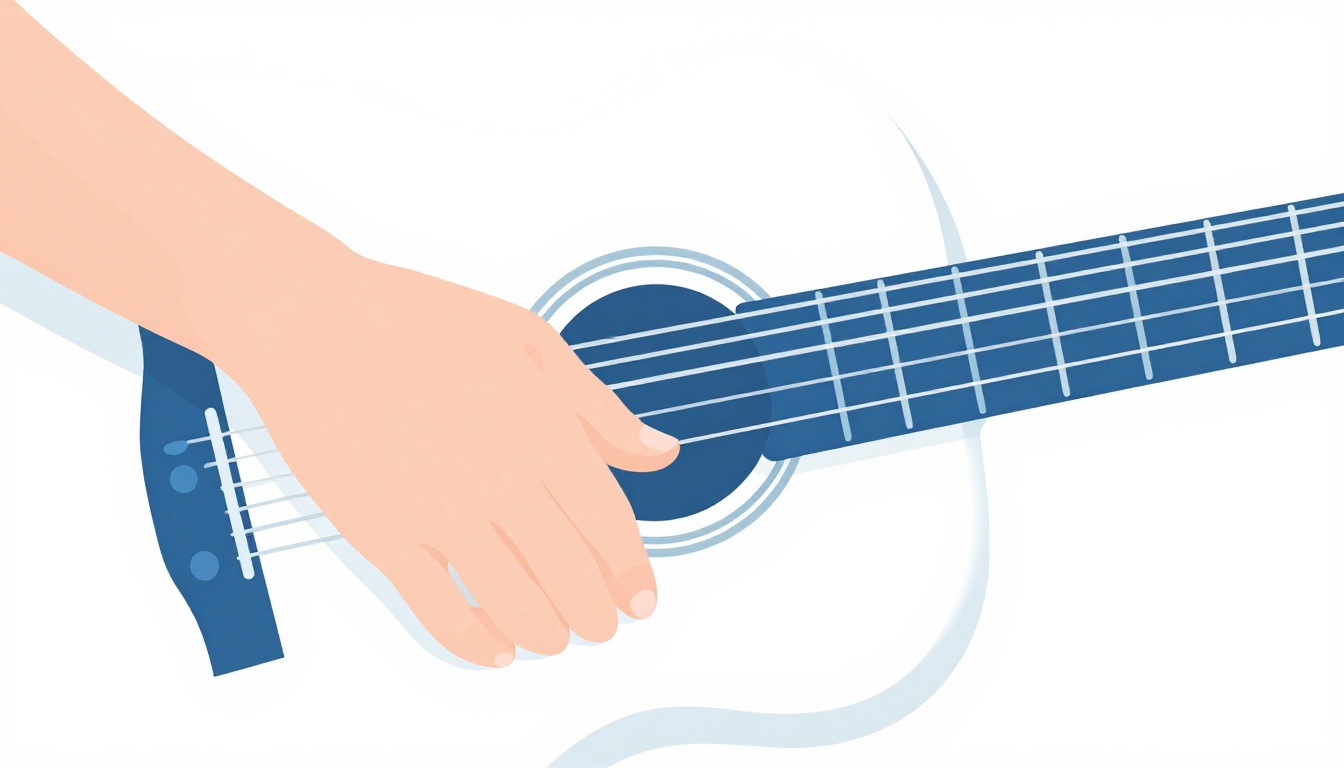
This is the three-finger "easy G," the version most beginners learn first. Index finger on the 5th string (A) at the 2nd fret, middle finger on the 6th string (low E) at the 3rd fret, ring finger on the 1st string (high E) at the 3rd fret. The 4th, 3rd and 2nd strings ring open. Every string gets played, which is part of why G sounds so full and grounded, and why it works as the piece's resting point.
C Major
| String | Fret | Finger |
|---|---|---|
| 6 (low E) | Muted | - |
| 5 (A) | 3 | 3 (ring) |
| 4 (D) | 2 | 2 (middle) |
| 3 (G) | Open | - |
| 2 (B) | 1 | 1 (index) |
| 1 (high E) | Open | - |
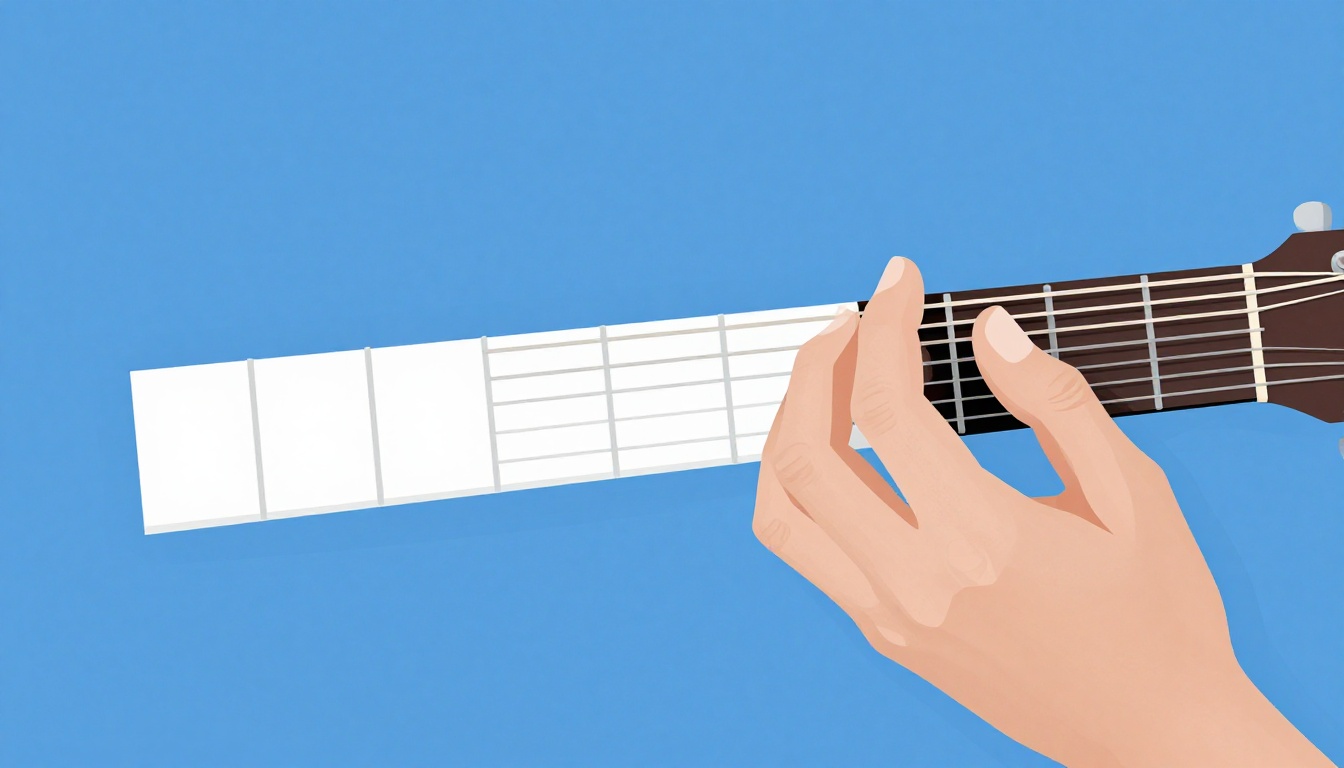
Ring finger on the 5th string (A) at the 3rd fret, middle finger on the 4th string (D) at the 2nd fret, index finger on the 2nd string (B) at the 1st fret. Leave the 3rd string (G) and 1st string (high E) open, and don't pick the 6th string, since it isn't part of the chord. If you're new to this shape and want the buzzing and muted-string causes broken down in detail, the full C chord guide covers it on its own.
A Minor
Am is the only minor chord in the set, and it's what gives the piece its unresolved, melancholy pull even though it lives in a major key.
| String | Fret | Finger |
|---|---|---|
| 6 (low E) | Muted | - |
| 5 (A) | Open | - |
| 4 (D) | 2 | 2 (middle) |
| 3 (G) | 2 | 3 (ring) |
| 2 (B) | 1 | 1 (index) |
| 1 (high E) | Open | - |
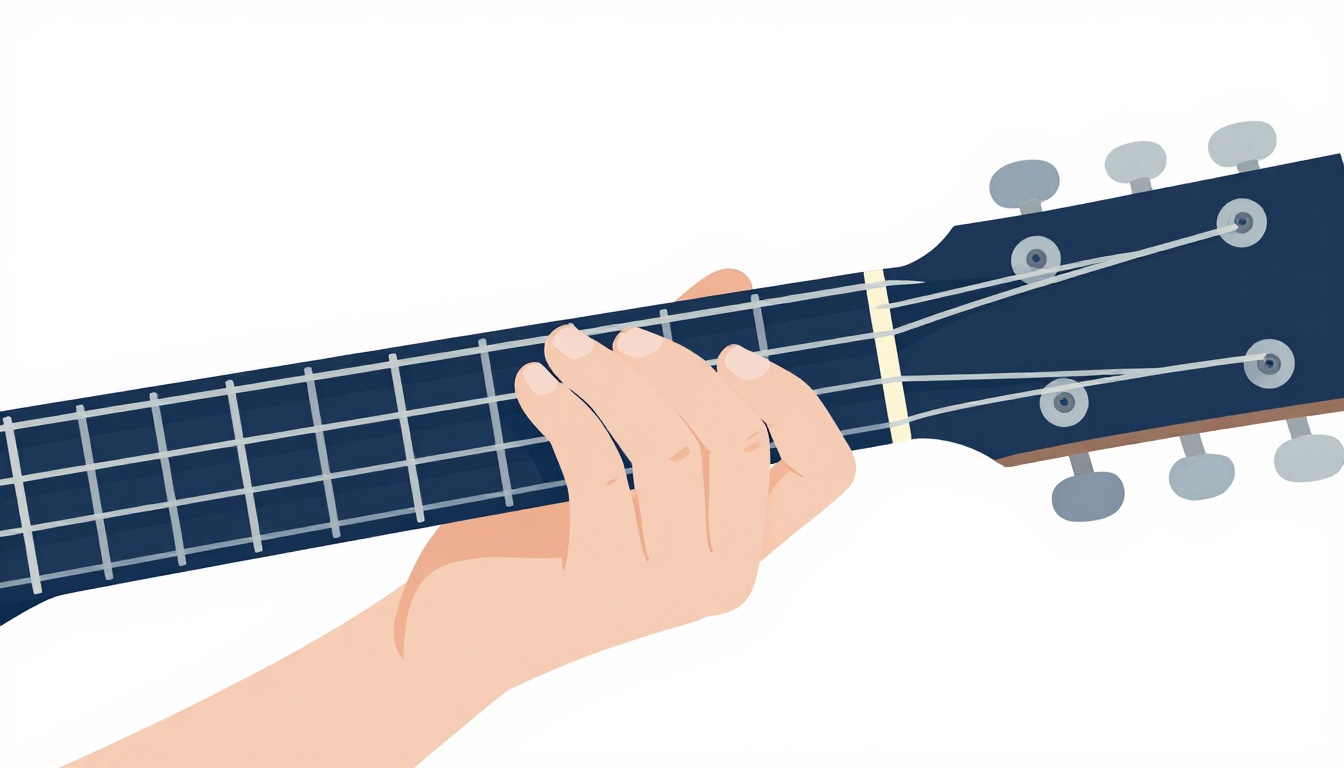
Index finger on the 2nd string (B) at the 1st fret, middle finger on the 4th string (D) at the 2nd fret, ring finger on the 3rd string (G) at the 2nd fret. The 5th string (A) rings open as the root, and the 1st string (high E) rings open on top.
D Major
| String | Fret | Finger |
|---|---|---|
| 6 (low E) | Muted | - |
| 5 (A) | Muted | - |
| 4 (D) | Open | - |
| 3 (G) | 2 | 1 (index) |
| 2 (B) | 3 | 3 (ring) |
| 1 (high E) | 2 | 2 (middle) |
Index finger on the 3rd string (G) at the 2nd fret, middle finger on the 1st string (high E) at the 2nd fret, ring finger on the 2nd string (B) at the 3rd fret. Those three fingers form a small triangle shape on the top three strings. The 4th string (D) rings open as the root, and the 6th and 5th strings are left out entirely.
The Am7 and D7 Variant
Some chord charts for this piece list Am7 and D7 instead of plain Am and D. Both are one-finger-lighter versions of the shapes above, not different chords in any way that changes how you'd play through the piece, and either pair works.
| Chord | Change from the plain version |
|---|---|
| Am7 | Lift the ring finger off the 3rd string (G), letting it ring open instead of fretted at the 2nd fret |
| D7 | Move the ring finger from the 2nd string (B) 3rd fret down to the 1st fret, keep the index on the 3rd string (G) 2nd fret and the middle finger on the 1st string (high E) 2nd fret |
Am7 in full:
| String | Fret | Finger |
|---|---|---|
| 6 (low E) | Muted | - |
| 5 (A) | Open | - |
| 4 (D) | 2 | 2 (middle) |
| 3 (G) | Open | - |
| 2 (B) | 1 | 1 (index) |
| 1 (high E) | Open | - |
D7 in full:
| String | Fret | Finger |
|---|---|---|
| 6 (low E) | Muted | - |
| 5 (A) | Muted | - |
| 4 (D) | Open | - |
| 3 (G) | 2 | 3 (ring) |
| 2 (B) | 1 | 1 (index) |
| 1 (high E) | 2 | 2 (middle) |
These softer, sevenths-flavored versions suit the piece's mood well, since the added notes (a G on Am7, an F# and C on D7) take a little of the edge off each chord without changing the underlying harmony. If you're building the piece from scratch, it's worth learning both the plain and seventh versions of Am and D and choosing by ear which one you prefer holding for a longer, ringing chord.
Why There's No Single "Official" Tab for This One
This is worth saying plainly before you go looking for a note-perfect transcription: "I Don't Wanna Die" is an instrumental film cue, not a song that was ever released with a lead sheet, guitar tab or lyric sheet. It exists as a recording on the 1995 soundtrack album and in the film itself. Everything available online, including the chord charts referenced for this post, comes from people listening to the track and working out the harmony by ear, the same way you'd work out a cover from a YouTube video.
That's not a knock on the material. Ear-transcribed chords for a simple, slow guitar cue like this one are reliable for the harmony (which chords, in which key), and the sites covering this piece agree closely: G, C, Am and D, in G major, no capo. Where they don't agree, and where no source claims certainty, is the exact bar-by-bar order the chords appear in and the precise rhythm of the original recording, since a film cue this short and rubato doesn't lend itself to a fixed, universally-cited structure the way a verse-chorus song does.
What that means practically: treat what follows as a workable arrangement built from the real, verified chords of the piece, meant to get you playing something that sounds like the cue and captures its mood, not as a claim that it reproduces the recording bar for bar. If you're working from the film or the soundtrack recording directly, use your ear to adjust the order and timing to match what you hear. That's a normal, honest way to learn a film cue, and arguably closer to how session guitarists themselves often work from a director's temp track.
A Workable Chord Progression
Here's a progression built from the four documented chords that sits naturally under a slow fingerstyle pattern and mirrors the kind of cyclical, unresolved movement common to reflective film themes:
G  -  Am  -  C  -  D
G  -  Am  -  C  -  G
In the key of G major, that's the I chord (G) moving to the ii chord (Am), up to the IV chord (C), and either resolving through the V chord (D) back to G, or settling straight back onto G without ever fully cadencing through D. Playing both endings back to back is a good way to hear the difference: the D ending pushes forward and wants to repeat, the G ending sits and rests. A film cue built around a death scene leans naturally toward the second, less resolved option more often than not.
Each chord gets one full bar (four beats, or four downward sweeps of a fingerpicking pattern) at a slow tempo, roughly 60 to 70 beats per minute if you count in quarter notes, though the point of this piece is less about hitting an exact tempo and more about letting each chord ring its full length before moving. Rushing the changes is the single fastest way to make this piece sound like a chord exercise instead of a film score.
A second, slightly more melancholy variation swaps the order so the piece dips into the minor chord earlier and lingers there:
G  -  C  -  Am  -  Am
D  -  C  -  G  -  G
Doubling the Am for a full extra bar before moving on gives the minor chord more room to sit, which some players prefer for the specific mood of the death scene, since it delays the return to G rather than resolving quickly. Try both orderings, the original and this variation, and use whichever one your ear prefers, or alternate between them if you're playing the piece more than once through. Neither is more "correct" than the other, since as covered above, no source publishes a definitive bar order for the original recording.
Fingerpicking Pattern for the Piece
A cue this spare works far better fingerpicked than strummed, since fingerpicking lets individual notes ring out and decay naturally, which is closer to what you hear in the recording than the flatter wall of sound a strum produces.
Use a simple thumb-and-three-finger pattern, sometimes written as P-I-M-A for thumb, index, middle and ring:
Beat:    1       2       3       4
Finger:  P       I       M       A
String:  bass    3rd     2nd     1st
On G, that means: thumb plucks the 6th string (low E, the root under this shape), index plucks the 3rd string (G), middle plucks the 2nd string (B), ring plucks the 1st string (high E). On C, shift the thumb to the 5th string, since that's the chord's root. On Am, the thumb again lands on the 5th string. On D, since the 4th string is the open root, the thumb moves up to that string.
Once each individual pluck feels even, let the notes overlap rather than stopping each one cleanly. Instead of plucking cleanly through the pattern and releasing, let your fretting hand hold the chord shape for the full bar so every plucked note keeps ringing into the next, building up a small chord of sustained notes rather than four separate plucks. That overlapping ring is most of what makes a simple fingerpicked pattern sound cinematic instead of mechanical.
A Slower, Six-Note Alternative
If the four-note pattern above feels too sparse once you're comfortable with it, try a six-note pattern that plucks the bass note twice per bar instead of once, giving the chord a gentler, rocking feel closer to a lullaby than a strict march:
Beat:    1     2     3     4     5     6
Finger:  P     I     M     P     I     A
String:  bass  3rd   2nd   bass  3rd   1st
The thumb repeats the bass note halfway through the bar, and the index finger repeats the 3rd string, while the middle and ring fingers each get one pass through the top two strings. This pattern takes a little longer to feel automatic than the four-note version, so don't move to it until the simpler pattern is solid, but it fills out the sound nicely on the chords you want to linger on longer, particularly the final G or Am of a phrase.
Keep Your Picking Hand Relaxed
A common problem once players start focusing on getting the notes even is that the picking hand tenses up, curling the fingers in tightly and picking with the fingertips locked at an angle instead of moving loosely from the knuckle. Tension in the picking hand transfers directly into the tone, producing a harder, more clipped sound that works against the piece's mood. Shake your picking hand out between repetitions if you notice it tightening, and aim for the lightest touch that still produces a clear note.
Adding a Simple Melody Note
Once the basic pattern feels solid, you can give the piece a little more of a film-cue character by letting your pinky add a single moving note on top of each chord, rather than just playing the same fixed shape four times through.
On G, try lifting the ring finger off the 1st string briefly and hammering it back on, so the high E string moves from open to fretted at the 3rd fret and back, a small pulse of movement on top of an otherwise static chord. On C, try adding your pinky to the 1st string at the 3rd fret partway through the bar, then lifting it back off, which briefly turns C into a fuller-sounding voicing before resolving back to the plain shape. These are small, optional touches, not new chords to memorize, and they're worth trying only once the plain four-chord version is solid, since the goal is a little extra motion on top of a steady foundation, not a distraction from it.
A simpler version of the same idea, if hammer-ons feel like too much at once: just let the highest string of whichever chord you're playing ring slightly longer than the others by plucking it a fraction of a second after the rest of the chord, rather than all at once. That small stagger mimics the way a single melodic voice would sit on top of a chordal accompaniment, which is closer to how a film composer thinks about a solo guitar cue than a strict, everything-at-once strum ever will be.
Playing the Progression in a Higher Position
The open-position chords above are the right starting point, but moving the same progression up the neck into barre shapes gives you a warmer, more compact voicing that some players find suits the piece's mood even better, since every note sits closer together and the overall range narrows.
| Chord | Shape used | Root fret |
|---|---|---|
| G | E-shape barre | 3rd fret |
| Am | Em-shape barre | 5th fret |
| C | A-shape barre | 3rd fret |
| D | A-shape barre | 5th fret |
Each of these is the same open chord shape you already know (E, Em, A) moved up the neck and barred with the index finger, a standard way of relocating any open chord to a new root note. G becomes an E-shaped barre chord with the index finger barring the 3rd fret. Am becomes an Em-shaped barre chord barring the 5th fret. C and D both use the A-shape, barred at the 3rd and 5th frets respectively.
This version is genuinely harder than the open-position chords covered earlier, since it depends on a clean barre across all six strings, and it isn't necessary to play the piece well. Treat it as a variation to reach for once the open-position version is comfortable and you want a different tone color, not a replacement for the easier shapes. The compact, closer-together voicing that barre chords produce can sound a touch more restrained and "chamber-like" than the wider-ringing open chords, which some players find closer to the recording's mood, though this is a matter of taste rather than a correction to the open-position version.
A Simpler Strummed Version
If fingerpicking isn't there yet, a slow, soft strum using the same four chords still captures the mood, just with less of the ringing detail. Use all downstrokes, no upstrokes, one per bar, and mute the strings with the side of your strumming hand right before each new chord change so the transition doesn't ring out messily. Play it quieter than you think you should. A loud strum turns this piece into a campfire chord progression. A quiet one keeps it sounding like underscore.
If you want a slightly fuller strummed texture without adding complexity, try a slow down-down-up-down pattern per bar instead of a single downstroke, keeping the volume soft throughout. Either way, the strummed version is a stepping stone toward the fingerpicked one, not a permanent substitute, since the piece's character comes from individual notes decaying, which strumming can only approximate.
Getting the Tone Right
Four correct chords played in time will still sound wrong if the tone is wrong. A few things make the difference between a chord exercise and something that sounds like it belongs under a film scene.
Play Closer to the Soundhole, Not the Bridge
Plucking near the soundhole produces a warmer, rounder tone with less attack, which suits a slow, reflective piece far better than the brighter, twangier tone you get plucking near the bridge. Move your picking hand slightly toward the neck from wherever you'd normally strum and listen to how much softer the same notes sound.
Let Chords Ring Their Full Length
Resist the urge to mute a chord early or snap straight into the next shape. The gaps and decay between chords are doing real emotional work in a piece like this. If a chord change takes you a beat longer than planned because you're letting the previous chord ring out, that's not a mistake, that's the piece breathing.
Use Dynamics, Not Just Volume
Play the first pass through the progression quietly, then let a second pass through the same four chords come in slightly louder, the way a film cue often swells once before receding again. You don't need to invent a new arrangement to do this. The same G, Am, C, D progression played at two different volumes tells a different emotional story each time.
Watch Your Fretting Hand Pressure
A chord fretted too hard sounds stiff and can pull the pitch sharp, especially on a piece this exposed where every note is audible on its own rather than buried in a strum. Fret only as hard as you need to for the note to ring clean, no harder.
Nylon or Steel Strings, Either Works
You'll get a slightly different color depending on which guitar you use, and neither is wrong for this piece. A nylon-string classical guitar has a warmer, rounder, faster-decaying tone that suits the piece's Morricone-adjacent character closely, while a steel-string acoustic rings longer and brighter, which can work just as well if you lean on the soft picking-hand touch and near-the-soundhole positioning covered above to soften the attack. If you happen to own both, it's worth trying the piece on each and comparing, since the difference in feel is bigger than the difference in what notes you're actually playing. If you only own one, don't treat this as a reason to go looking for another guitar. Technique closes most of the gap between the two.
Why It's Not Working
If you've got the four shapes down and it still doesn't sound right, it's almost always one of these, not a missing fifth chord.
The G Chord Buzzes on the Low E String
The most common cause is the middle finger landing too close to the 2nd fret wire instead of pressing down just behind the 3rd fret. Move your middle finger a few millimeters back toward the body of the guitar, closer to the fret wire itself, and press straight down rather than at an angle.
The High E String Goes Dead on G
This usually means your ring finger, fretting the 1st string at the 3rd fret, is accidentally leaning over and touching the 2nd string (B), muting it. Arch your ring finger more so only its tip contacts the string, and check that the 2nd string still rings clearly when you play the chord slowly, one string at a time.
C Sounds Muffled on the Open Strings
If the 3rd string (G) or 1st string (high E) sounds muted rather than open and ringing, one of your other fretting fingers is likely brushing against it without you noticing, usually the middle finger leaning too far over from the 4th string. Flatten your hand angle slightly and check each open string individually.
Am Sounds Thin or Buzzy on the Middle Strings
Am uses three fretted strings close together (4th, 3rd and 2nd), and a common problem is the index finger, on the 2nd string at the 1st fret, sitting flat instead of arched, which mutes the 1st string next to it. Arch the index finger so only its tip touches the 2nd string, leaving the 1st string free to ring open.
D Won't Ring Cleanly on All Three Fretted Strings
D asks three fingers to fit into a small triangle on adjacent strings, and it's easy for one finger to lean into its neighbor and choke a note. Fret one string at a time, in isolation, and confirm each one rings before you press all three at once. If the 2nd string (B) at the 3rd fret is the one going dead, it's almost always the middle finger (on the 1st string) leaning over and touching it.
The Whole Piece Sounds Rushed
This is a tempo and mindset issue, not a technique one. Because the chords are simple, it's tempting to move through them at a normal strumming-song pace. Slow down further than feels natural, closer to half the speed you'd play a folk song at, and resist filling every beat with motion. The silence between notes is part of the arrangement.
Every Chord Sounds the Same Volume and Weight
If you play through the entire progression at one flat dynamic level, it will sound correct but emotionally blank, more like a metronome exercise than underscore. This is less a fretting problem and more a listening one: as you play, actively decide which chord in each phrase should stand out and which should recede, the same way a film composer decides which note in a phrase the audience's ear should land on.
Easier Versions for Beginners and Small Hands
All four chords here are already among the first shapes most guitar teachers introduce, but if any of them are still a stretch, these lighter versions get you playing the piece sooner without losing its character.
| Chord | Easier version | What changes |
|---|---|---|
| G | Two-finger G | Skip the low E string entirely. Index on the 5th string (A) at the 2nd fret, ring on the 1st string (high E) at the 3rd fret. Let the 4th, 3rd and 2nd strings ring open, and don't play the 6th string at all. |
| C | Top-string C | Play only the top four strings. Index on the 2nd string (B) at the 1st fret, with the 4th, 3rd and 1st strings open. Skip the 5th and 6th strings entirely. |
| Am | Am7 | Covered above. Lifting the ring finger off the 3rd string removes one finger and one point of potential buzz, with barely any audible difference in this context. |
| D | Two-finger D | Index on the 3rd string (G) at the 2nd fret, middle on the 1st string (high E) at the 2nd fret, and leave the 2nd string (B) open instead of fretting it at the 3rd fret. This technically changes the chord's color slightly (adding a 2nd rather than the plain triad), but it's a common training-wheels version while your ring finger gets used to the stretch. |
None of these are "wrong" versions to keep permanently if they sound good to you. The two-finger G in particular is used by plenty of experienced players simply because it's faster to grab mid-song. Use the full versions above once your hand has the reach, but don't feel like the easier versions are a compromise you have to abandon.
Moving Between the Chords Without Stopping the Piece
Four simple chords are not the hard part of this piece. Moving between them without a gap in the sound is. A few habits make the transitions smoother.
Find the shared finger first. Between C and Am, the index finger stays on roughly the same area of the 2nd string, just shifting from the 1st fret to fretting the 4th and 3rd strings with different fingers while the index resets to the 2nd string 1st fret in both chords, so anchor on that rather than lifting your whole hand and starting over. Between G and D, none of the fingers share a string, but keeping your hand low and compact, rather than lifting fingers high off the fretboard between chords, cuts the transition time significantly.
Practice the changes in isolation, away from the picking pattern. Get comfortable moving G to Am to C to D and back to G as a pure chord-change drill, with no picking at all, just muted chunks on the beat, before you try to layer the fingerpicking pattern on top. Trying to learn both at once usually means neither one gets solid.
Let the last note of the old chord and the first note of the new chord overlap slightly rather than cutting off cleanly. This is a small thing that makes a large difference in how connected the piece sounds. A tiny bit of blur between chords, rather than a hard stop and restart, is closer to how the actual recording breathes.
Anchor your thumb on the back of the neck rather than letting it drift. A wandering thumb is one of the quieter causes of slow chord changes, since your fingers end up compensating for an unstable base instead of moving independently. Keep your thumb roughly behind your first or second finger, low on the neck rather than creeping over the top, and let your fingers do the traveling while the thumb stays relatively still. This becomes more noticeable on this piece than on a strummed song, because the slow tempo gives you nowhere to hide a shaky change the way a fast strum pattern would.
Finding the Pulse Without a Metronome
Film cues like this one are rarely played to a strict click, which is part of why no source lists a single agreed tempo for this piece. That's disorienting if you've mostly learned songs with a fixed beats-per-minute, but it's a normal way for underscore to work, since the guitar is following the emotional shape of a scene rather than a drummer.
A practical way to internalize this without a metronome telling you what to do: count a slow four in your head as you play each chord, but let the count stretch slightly longer on the chord that feels like it should hold, usually the Am or the final G of a phrase, and compress slightly on a chord that feels like it's moving toward something else. This isn't sloppiness. Rubato, playing slightly ahead of or behind a strict beat for expressive effect, is a real and deliberate technique, and a piece built around a death scene is exactly the kind of material where a strict, metronomic pulse works against the mood rather than for it.
If that feels too abstract at first, it's still worth practicing the progression with a metronome initially, just to build the underlying sense of even timing. Once the changes are automatic and every chord rings cleanly at a steady tempo, turn the metronome off and reintroduce small stretches and compressions deliberately. Rubato only sounds intentional once the steady version underneath it is solid. Played before that, it just sounds unsteady.
Why the Same Four Chords Carry So Much Weight
In the key of G major, G is the I chord, Am is the ii chord, C is the IV chord and D is the V chord. That's not a coincidence or a simplification specific to this piece. The I, IV, ii and V chords are the harmonic backbone of nearly all major-key music, the four chords a huge share of western music is built from in some order, because they cover the tonic (home), the subdominant (movement away from home) and the dominant (tension that wants to resolve) in the smallest possible set.
What makes "I Don't Wanna Die" work with only these four is restraint, not novelty. The piece doesn't need a fifth or sixth chord to feel complete, because the tension between Am's minor color sitting inside an otherwise major-key progression is enough on its own to carry the scene's weight. That's worth internalizing beyond this one piece: simple, well-known chords played with real control and dynamics will always beat a more complex progression played mechanically.
Practice Routine
A short, focused routine gets this piece under your fingers faster than repeatedly playing it start to finish and hoping it improves.
- Isolate each chord (5 minutes). Form G, hold it, check every string rings by playing them one at a time slowly. Repeat for C, Am and D. Fix any dead or buzzing strings before moving on.
- Drill the changes with no picking pattern (5 minutes). Mute the strings with your fretting hand between chords if needed, and move G to Am to C to D to G on a slow, steady beat, focused purely on the transition speed.
- Add the fingerpicking pattern on a single chord (5 minutes). Loop the P-I-M-A pattern on G alone until the four plucks feel even and the notes overlap rather than sound choppy.
- Combine pattern and changes at half speed (10 minutes). Play the full G, Am, C, D progression with the fingerpicking pattern, slower than feels necessary, and only speed up once every chord rings clean at the slow tempo.
- Play it with the film scene in mind (5 minutes). This sounds unusual as a practice step, but it matters. Play the progression through twice, once quietly and once with a little more presence, thinking about restraint rather than showing off the pattern. This is the step that turns a technically correct run-through into something that actually sounds like the cue.
Fifteen or twenty minutes a day with this routine, focused on control rather than speed, is enough to have the piece sounding settled within a couple of weeks.
Watching the Scene While You Learn It
Because this is a cue written to picture, watching the scene it accompanies, rather than just listening to the isolated track, gives you information a chord chart never will: where the phrase breathes, where it holds, and where it recedes under dialogue or silence. If you have access to the film, watch the duel and its aftermath once with your guitar down, paying attention only to where the music sits relative to the action, then pick the guitar back up and try to match that same pacing in your own playing. You're not trying to sync note-for-note with the film. You're borrowing its sense of timing, which is a more reliable guide for a rubato piece like this one than counting beats ever will be.
A Two-Week Progression
If you'd rather follow a longer plan than a single session's routine, spread the steps above across roughly two weeks: spend the first three or four days on chord shapes and transitions alone, with no picking pattern at all, until every change is clean at a slow, steady tempo. Move to the fingerpicking pattern on a single chord for the next few days, only adding the full progression once the pattern itself feels automatic on one shape. In the second week, combine pattern and progression, starting well under tempo and only speeding up once every chord rings clean, and spend the final few days on dynamics and rubato, the part most players skip straight past in favor of just getting through the notes. Rushing this order, especially trying to add expression before the mechanics are solid, is the most common reason a simple piece like this takes longer to sound right than it should.
Frequently Asked Questions
What movie is "I Don't Wanna Die" from? It's from The Quick and the Dead, a 1995 western directed by Sam Raimi and starring Sharon Stone, Gene Hackman, Russell Crowe and Leonardo DiCaprio. The track is on the film's soundtrack album, composed by Alan Silvestri and released by Varèse Sarabande in 1995.
Is there an official published guitar tab for this piece? No. It's an instrumental film score cue, not a song released with a lead sheet or tab. The chords covered in this post come from ear-transcription chord sites and reflect the harmony consistently, not a bar-by-bar official transcription.
Do I need a capo? No. Every source covering this piece plays it in standard tuning with no capo, using open G, C, Am and D shapes.
Is the original recording fingerpicked or strummed? Based on how the cue is described, a spare, restrained solo guitar part under a death scene, and how the piece sits harmonically, fingerpicking gets you much closer to the mood than strumming. This post covers both, but treat fingerpicking as the primary approach.
What scene does this piece play during? It underscores the death of Fee "the Kid" Herod, played by Leonardo DiCaprio, in the film's climactic duel, a scene in which John Herod, who the Kid believes is his father, refuses to acknowledge him even as he dies.
Is "I Don't Wanna Die" the same as the "Redemption" theme from the same score? No. "Redemption" is a separate cue that opens the soundtrack album and serves as a recurring theme tied to Sharon Stone's character. "I Don't Wanna Die" is a distinct, shorter guitar cue tied specifically to the Kid's death.
Why does this piece feel sad even though it's mostly major chords? Three of the four chords, G, C and D, are major, but Am, the minor ii chord, is where the progression spends real time and where it often lands to close a phrase. A minor chord inside a mostly major progression is a common way to write music that feels bittersweet rather than simply happy or simply sad, and it's a big part of why this piece carries the weight it does with so little harmonic material.
Can beginners actually play this, or is it more advanced than it looks? The chords themselves, G, C, Am and D, are genuinely beginner-level and are usually among the first shapes any new guitarist learns. What takes longer to develop is the control: clean transitions, even fingerpicking, and the restraint to play it slowly and quietly rather than rushing through familiar shapes. A beginner with solid basic chords can learn this piece. A beginner brand new to the guitar should spend a few weeks on the individual chords first.
Did Alan Silvestri play the guitar on the recording himself? That detail isn't confirmed in any of the sources covering the score, and film composers typically write and conduct a cue rather than perform every instrument on the recording session themselves. Treat the specific session guitarist as unconfirmed rather than assuming either way.
Does the piece stay on these four chords the whole way through, or does it modulate? Every source covering the harmony of this cue lists the same four chords, G, C, Am and D, without mentioning a key change. Given how short and restrained the piece is, a modulation would be unusual, and nothing in the available chord transcriptions suggests one. Treat it as staying in G major throughout unless your own ear, listening closely to the film or the soundtrack recording, tells you otherwise.
GuitarLowKey
Ready for fifteen focused minutes?
Open the web app and train the change that is blocking your song.