
Oceans Guitar Chords (Where Feet May Fail) by Hillsong United
Oceans guitar chords for Hillsong United's Oceans (Where Feet May Fail): the Bm, A, D, G chart, a no-barre Bm, the chorus, and the bridge build.

The most common chord chart for "Oceans (Where Feet May Fail)" by Hillsong United uses four chords: Bm, A, D, and G. The verse cycles through Bm, A, and D, the chorus opens up with G, D, and A, and the famous bridge leans on Bm and G before resolving through D and A. Fuller charts add A/C# and D/F#, two slash chords that thicken the bass line without changing which chord you are actually playing. Everything below covers the easy version, the fuller chart, a no-barre way to play Bm, the whole song structure, and how to build the dynamics that made this song's bridge famous.
The Easy Version: Bm, A, D, and G
If you already know an open A, D, and G, the only new shape here is Bm, a barre chord. Here is each shape, string by string. Strings are numbered 1 to 6, thinnest to thickest, and fingers use standard numbering: 1 is your index finger, 2 is your middle finger, 3 is your ring finger, 4 is your pinky.
B Minor (Bm)
| String | Fret | Finger |
|---|---|---|
| 6 (low E) | Muted | - |
| 5 (A) | 2 | 1 (index, barre) |
| 4 (D) | 4 | 3 (ring) |
| 3 (G) | 4 | 4 (pinky) |
| 2 (B) | 3 | 2 (middle) |
| 1 (high E) | 2 | 1 (index, barre) |
Your index finger lies flat across strings 5 and 1 at the 2nd fret while your other three fingers stack a shape on top of it, the same shape an open A chord uses moved up two frets. This is the one shape in the whole song that takes real barre-chord strength, and the section further down on a no-barre alternative is worth reading before you spend weeks fighting this exact voicing.
A Major
| String | Fret | Finger |
|---|---|---|
| 6 (low E) | Muted | - |
| 5 (A) | Open | - |
| 4 (D) | 2 | 1 (index) |
| 3 (G) | 2 | 2 (middle) |
| 2 (B) | 2 | 3 (ring) |
| 1 (high E) | Open | - |
D Major
| String | Fret | Finger |
|---|---|---|
| 6 (low E) | Muted | - |
| 5 (A) | Muted | - |
| 4 (D) | Open | - |
| 3 (G) | 2 | 1 (index) |
| 2 (B) | 3 | 3 (ring) |
| 1 (high E) | 2 | 2 (middle) |
G Major
| String | Fret | Finger |
|---|---|---|
| 6 (low E) | 3 | 2 (middle) |
| 5 (A) | 2 | 1 (index) |
| 4 (D) | Open | - |
| 3 (G) | Open | - |
| 2 (B) | Open | - |
| 1 (high E) | 3 | 3 (ring) |
Three of these four shapes, A, D, and G, are common open chords most guitarists meet in their first few months. Bm is the outlier, and it is also the reason this song has a reputation for being harder than its chord count suggests. That reputation is really about one chord, not four.
Song Basics at a Glance
Before the section-by-section breakdown, here is what you are working with.
| Detail | Value |
|---|---|
| Full title | Oceans (Where Feet May Fail) |
| Artist | Hillsong UNITED |
| Lead vocalist | Taya Smith |
| Writers | Matt Crocker, Joel Houston, Salomon Ligthelm |
| Album | Zion (2013) |
| Original key | D major |
| Capo | None needed to match the original key |
| Easy chords | Bm, A, D, G |
| Fuller chart chords | Bm, A, D, G, A/C#, D/F# |
| Time signature | 4/4 |
| Tempo | Around 126 to 132 beats per minute, depending on the version |
Because the song's own key is D major and the standard chart already uses open D-shape chords, you do not need a capo to sound like the recording. That puts this song in a slightly different spot than a lot of worship songs written in guitar-unfriendly keys: the hard part here is one specific shape, not the key itself.
The Story Behind "Oceans (Where Feet May Fail)"
Joel Houston, Matt Crocker, and Salomon Ligthelm wrote "Oceans" during the recording of Hillsong United's 2013 album Zion. Houston has described the song plainly: "It's really a song about stepping into the unknown, about faith and raw trust in God." The lyric draws directly on the Gospel account of Peter climbing out of a boat to walk toward Jesus on the Sea of Galilee, and losing his nerve partway across, the "where feet may fail" of the title is Peter's moment of doubt, not a throwaway phrase.
The vocal belongs to Taya Smith, who was working a retail job and considering a career in secular music when Hillsong United producer Michael Guy Chislett called her in. She recorded her vocal for "Oceans" over the course of just a few days during the Zion sessions, a fast turnaround for a song that would go on to become one of the most performed worship songs of the decade.
That performance history is not a small claim. "Oceans" spent a record 61 non-consecutive weeks at number one on Billboard's Hot Christian Songs chart, was named Billboard's number one Christian song of the 2010s, and won the 2014 Dove Award for Song of the Year. None of that chart success changes how you finger a Bm chord, but it explains why this particular song, out of thousands of worship songs written in the same decade, is the one still showing up in nearly every church's set list and nearly every beginner's search history.
What the Lyrics Are About, Section by Section
Knowing what each part of the song is actually saying changes how you play it, since the dynamics this song asks for track the lyric's own arc rather than following a generic quiet-verse, loud-chorus template.
The verses stay with Peter at the edge of the boat, the moment before he steps out onto the water, uncertain and facing "the great unknown." That is why a heavy strum feels wrong here even before you know any music theory behind it: the words are still in the moment of hesitation, not yet the moment of trust, and the chords under them, opening on the vi chord rather than the I chord, are doing the same harmonic work the lyric is doing emotionally.
The chorus is a direct address, a declaration of trust made in the middle of the doubt the verse just described, "I will call upon Your name" rather than a statement that the doubt has already resolved. That is part of why the chorus is fuller than the verse but still not the loudest part of the song, it is a decision being made in real time, not a victory lap.
The bridge goes further than either the verse or chorus, asking for something harder than the trust the chorus already declared, a request to be taken deeper rather than kept safe at the surface. That is the lyrical reason the bridge repeats as long as it does and builds as far as it does. It is not filler between the last chorus and the end of the song, it is the point the whole song has been building toward, which is exactly why the dynamics section further down treats getting that build right as more important than any individual chord in it.
The Verse Chords
The verse cycles through three chords, Bm, A, and D, followed by A and G.
| Section | Chords |
|---|---|
| Verse (repeated) | Bm - A - D, then A - G |
Let each chord ring for close to a full bar. This song builds slowly by design, moving from a spare, restrained verse toward a much fuller chorus and an even fuller bridge, and a verse strummed at chorus volume erases that arc before it has a chance to develop. Keep your strumming hand light and let the chord changes breathe rather than chopping each one short.
The Bm to A change is the one worth isolating early. Your whole hand has to release the barre and reshape into an open chord, which is a bigger physical move than most verse-to-verse transitions ask for. Practicing just that single change, Bm to A and back, before running the full verse pays off more than repeating the whole progression from the top every time you stumble.
The Chorus
The chorus opens the harmony up with G, D, and A, cycling through that loop before turning back around through Bm and A/C#.
| Section | Chords |
|---|---|
| Chorus (main loop, played three times) | G - D - A |
| Chorus (turnaround back to the verse or next chorus) | Bm - A/C# - D - G |
The three-times-through G-D-A loop is where most of the chorus's melody sits, and it is also the most forgiving stretch of the whole song for your fretting hand, since none of those three chords ask for a stretch past the 2nd fret. Save your energy for the turnaround, where Bm reappears and A/C# asks for a quick, accurate pinky placement right after it.
Dynamically, the chorus is allowed to open up beyond the verse, fuller strumming, more sustain, more volume, without yet reaching the peak the bridge is building toward. Treat it as the midpoint of the song's dynamic arc, not the destination.
How the Whole Song Fits Together
Seeing the full structure in order makes the song far easier to play start to finish. Live and recorded arrangements of "Oceans" vary more than most worship songs, largely because the bridge is often repeated many times as a band builds intensity, so treat this as a reliable map rather than a fixed script.
| Order | Section | Chords |
|---|---|---|
| 1 | Intro | Bm - A - D - A - G, played softly |
| 2 | Verse 1 | Bm - A - D, then A - G (repeated) |
| 3 | Chorus | G - D - A (x3), then Bm - A/C# - D - G |
| 4 | Verse 2 | Bm - A - D, then A - G (repeated) |
| 5 | Chorus | G - D - A (x3), then Bm - A/C# - D - G |
| 6 | Instrumental build | Bm - A - D - A - G |
| 7 | Bridge (repeated, building) | Bm - G - D - A |
| 8 | Breakdown (often sparse, sometimes unaccompanied) | Bm - G, played quietly |
| 9 | Final chorus (fullest dynamic) | G - D - A (x3), then Bm - A/C# - D - G |
| 10 | Outro | Bm - A - D - A - G, fading |
The single biggest structural difference between this song and a typical three-and-a-half-minute worship song is the bridge. It is not a short four-bar detour before the last chorus, it is the emotional center of the arrangement, often repeated well past what the chord chart alone would suggest, which is exactly why the dynamics section further down treats it as its own subject rather than a footnote.
How This Song Sits in the Key of D
Naming the chords by their role in the key explains why this specific set keeps showing up together. In the key of D major, D is the I chord (home base), G is the IV chord, A is the V chord, and Bm is the vi chord. Written that way, the verse and chorus are both variations on a I-IV-V-vi pool of chords, just entered in a different order each time.
What stands out is that the song never opens on D, its own I chord. The intro and verse both start on Bm, the vi chord, before ever touching D. Starting on the vi chord instead of the I chord is a common way to open a song on a more unsettled, minor-leaning color, which fits a verse about stepping into "the great unknown" better than starting on a fully resolved major chord would. The chorus and bridge do eventually lean into the major chords, G, D, and A, as the lyric moves from uncertainty toward trust, and the harmony's slow drift from minor-leaning to major-leaning tracks the lyric's own arc closely enough that it is worth noticing as you play it, not just as a piece of trivia.
The Fuller Chord Chart: A/C# and D/F#
Look at more than one chord chart for this song and you will find two chords that do not appear in the easy version: A/C# in place of plain A at the end of the chorus, and D/F# in some fuller charts in place of plain D. Neither is required to play the song correctly. Both are a smoother, slightly more polished reading of the same chords.
A/C# Instead of A
A/C# replaces A's own root note in the bass with C#, its third, creating a note that walks stepwise into the G that usually follows it rather than jumping straight from A down to G.
| String | Fret | Finger |
|---|---|---|
| 6 (low E) | Muted | - |
| 5 (A) | 4 | 4 (pinky) |
| 4 (D) | 2 | 1 (index) |
| 3 (G) | 2 | 2 (middle) |
| 2 (B) | 2 | 3 (ring) |
| 1 (high E) | Open | - |
This shape asks your pinky to reach down to the 4th fret of the 5th string while your other three fingers hold the rest of an ordinary A shape. It takes some finger independence to land cleanly, and plain A is a complete substitute anywhere this chart calls for A/C#.
D/F# Instead of D
D/F# is a plain D major chord with F#, its own third, moved into the bass instead of D. If slash-chord notation is new to you, the Dm/A chord guide covers exactly how the naming works, chord name first, bass note second, using a different chord as the example. The logic is identical here.
| String | Fret | Finger |
|---|---|---|
| 6 (low E) | 2 | 1 (index) |
| 5 (A) | Muted | - |
| 4 (D) | Open | - |
| 3 (G) | 2 | 2 (middle) |
| 2 (B) | 3 | 4 (pinky) |
| 1 (high E) | 2 | 3 (ring) |
The only change from plain D is fretting the 6th string at the 2nd fret with your index finger instead of leaving it muted, which puts F# underneath the chord and smooths out the bass line moving into whatever comes next.
A No-Barre Way to Play Bm
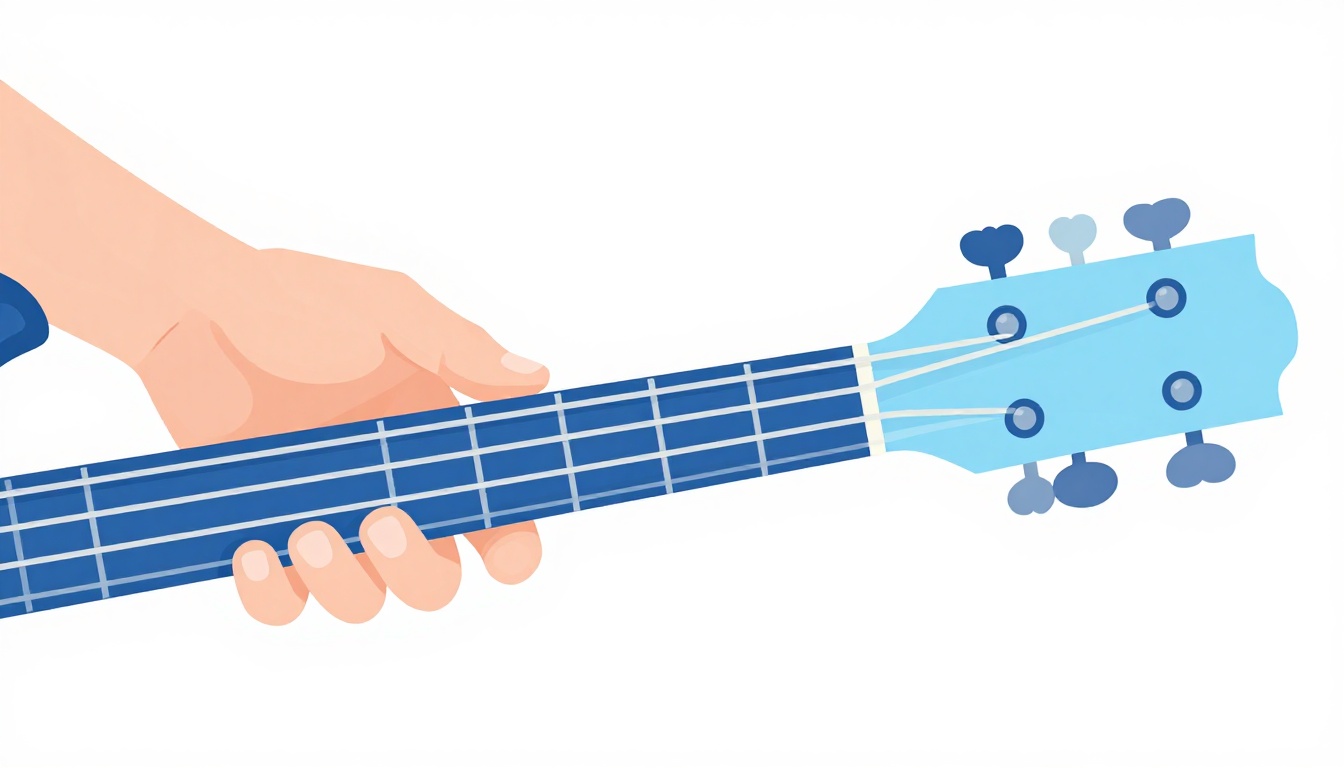
Bm is the shape most beginners get stuck on in this song, and there is a genuinely useful shortcut: you can play the notes of Bm without a barre at all, using only the top four strings.
| String | Fret | Finger |
|---|---|---|
| 6 (low E) | Muted | - |
| 5 (A) | Muted | - |
| 4 (D) | 4 | 4 (pinky) |
| 3 (G) | 4 | 3 (ring) |
| 2 (B) | 3 | 2 (middle) |
| 1 (high E) | 2 | 1 (index) |
This voicing uses the same three notes, B, D, and F#, as the full barre version, just without the index finger flattening across all six strings. Each finger gets its own string, angled slightly so the neighboring strings stay muted rather than ringing. It sounds thinner than the full barre chord since it drops the doubled bass note, but in a song this reliant on rhythm and dynamics rather than a big, ringing low end, that trade-off is barely noticeable, and it lets you keep playing the song while your hand builds the strength a true barre chord asks for.
Playing With a Capo (and Other Keys)
Because the original recording sits in D major and the standard chart already uses open D-shape chords, you do not need a capo to match it. A capo becomes useful for two different reasons: fitting the song to a singer's vocal range, or avoiding the Bm barre chord entirely.
Shifting the Key for a Singer
Moving the capo up raises the key while every chord shape in this post, Bm, A, D, G, A/C#, and D/F#, stays exactly the same. Only the fret the capo sits on changes.
| Capo Fret | Key You Hear |
|---|---|
| No capo | D (original key) |
| 2nd fret | E |
| 3rd fret | F |
| 5th fret | G |
| 7th fret | A |
The relationship between the chords never changes. Bm is still the vi chord, D is still the I chord, G is still the IV chord, and A is still the V chord, all moving up together by however many semitones the capo does. Once the song is comfortable in one key, it is comfortable in any of these keys just by sliding the capo.
Avoiding the Barre Entirely: Capo 7
There is a second, different use for a capo here: playing entirely different, easier open shapes that land back on the exact same pitches as the original, barre-free. Put a capo on the 7th fret and play an open Em shape where the chart calls for Bm, a D shape where it calls for A, a G shape where it calls for D, and a C shape where it calls for G. Every one of those is a shape most players already know, and none of them needs a barre.
| Capo 7, You Play | It Sounds Like |
|---|---|
| Em | Bm |
| D | A |
| G | D |
| C | G |
| D/F# | A/C# |
This is a genuinely useful trick, not a compromise you eventually graduate out of. Plenty of guitarists who can play a clean barre chord still reach for a capo on a song like this one, simply because open chords ring out fuller and are faster to switch between than their barred equivalents.
Why Your Chords Are Buzzing or Sound Dead
Most of the buzzing and dead strings in this song trace back to one of a small handful of causes.
Your Barre Isn't Sealing Every String
A Bm barre chord fails most often because the index finger isn't pressing every string it crosses with even pressure. The strings closest to your hand's natural arch, usually the 4th and 3rd strings under the middle of your palm, are the ones that buzz first. Roll your index finger slightly onto its side rather than laying it fully flat, and use the bony edge of the finger rather than its soft underside for more even pressure with less overall grip strength.
Your Thumb Is Creeping Over the Top of the Neck
A thumb that climbs up and over the top of the fretboard, a habit a lot of players fall into on open chords, becomes a real problem on a barre chord. It reduces the counter-pressure your hand needs to seal the barre and often flattens your other fingers in the process. Keep your thumb centered on the back of the neck, roughly opposite your middle finger, whenever Bm comes up.
A/C#'s Pinky Stretch Is Landing on the Wrong Fret
A/C# asks your pinky to reach to the 4th fret of the 5th string while your other three fingers hold an ordinary A shape a full two frets closer to the nut. If the pinky lands even slightly behind or ahead of that fret, the bass note goes sharp, flat, or buzzes outright. Fret it deliberately, right behind the fret wire, rather than reaching for it at speed the first few times you practice the change into A/C#.
The Slash Chord's Bass Note Isn't Cutting Through
Both A/C# and D/F# depend on a single low note ringing clearly underneath the rest of the chord. If that note is muted, weakly fretted, or lost under the rest of the strum, the slash chord just sounds like a slightly muddier version of the plain chord and stops doing the job it was written for. Pick the bass note on its own after fretting the shape and listen for it specifically before strumming the full chord.
The G Chord's Stretch Is Muting a Neighboring String
G asks three fingers to spread across four strings, from the 6th down to the 1st. If your index finger, reaching for the 5th string, isn't arched enough, its underside can lean into the open 4th string beside it and choke part of the chord's sustain. Isolate G on its own, strumming slowly and listening for every string ringing clearly, before assuming a buzz elsewhere in the song is coming from a different chord.
Easier Versions for Beginners
If Bm is the single thing standing between you and playing this song, you have two real options rather than one. The no-barre four-string version further up this post keeps you in the original key with no capo, at the cost of a slightly thinner sound. The capo 7 option lets you play entirely open chords, Em, D, G, and C, at the cost of carrying a capo. Neither is a lesser version of the song, and most players eventually pick whichever one fits how they already play rather than treating one as the "correct" answer.
For A/C#, an easier substitute than the pinky stretch is plain A. The difference is a smoother bass line into G, not a different chord, so plain A is never a wrong answer in this progression.
For D/F#, plain D is a complete substitute any time reaching the 6th string with your index finger is throwing off the rest of your hand shape. The bass note is the only thing that changes between the two, and plain D carries the harmony just as fully on its own.
None of these substitutions are a permanent compromise. They are a way to keep playing the whole song while your hand builds the strength and independence the fuller voicings ask for.
Changing Between Chords Without Losing the Beat
The shapes in this song are not the hardest part. The speed of the changes is, particularly Bm to A in the verse, since your hand has to release a barre and reshape almost entirely in the space of a single beat.
Anchor on your ring finger for that change. In the no-barre Bm voicing, your ring finger sits on the 3rd string. In A, it sits on the 3rd string too, just one fret closer to the nut. That single finger barely has to move, and building the change around it rather than resetting your whole hand from scratch is the fastest way to make Bm to A feel automatic.
The A to D change is friendlier still. Your index finger moves from the 4th string in A to the 3rd string in D, a one-string shift, while your other fingers slide into place around it.
D to A, moving in the other direction inside the verse, mirrors that same one-string logic in reverse. And A to G, the change that opens the chorus, is the one worth practicing slowly at first, since none of your fingers stay on the same string between the two shapes, an honest full hand reset rather than a shortcut move.
A Basic Strumming Pattern for Verse, Chorus, and Bridge
There is no single official strumming pattern for this song, and most guitarists who play it settle into something close to the following without ever writing it down. Use it as a starting point rather than a rule, and adjust it to whatever band or recording you are playing along with.
| Section | Pattern (D = down, U = up) | Feel |
|---|---|---|
| Verse | D - - - D U - - | Sparse, mostly downstrokes, plenty of space |
| Chorus | D - D U - U D U | Fuller, steady eighth-note motion |
| Bridge (quiet passes) | D - - - - - - - | One soft downstroke per chord, or none at all |
| Bridge (peak) | D - D U - U D U | Same as the chorus pattern, played at full volume |
The verse pattern leaves deliberate gaps rather than filling every beat, which matches the restrained, unresolved feel of the lyric at that point in the song. The chorus pattern is busier and more continuous, giving the section forward motion without becoming aggressive. Notice that the bridge doesn't get its own unique pattern, it borrows the verse's sparseness for its quiet passes and the chorus's fuller pattern for its peak, which is another way of saying the bridge's difficulty really is about when you switch between patterns you already know, not about learning a new one.
Practice each pattern against a metronome on a single chord before applying it to the full progression. A strumming pattern that falls apart the moment a chord change is added is worth isolating on its own before you try to combine both skills at once.
Fingerpicking the Verse Instead of Strumming
A quieter, more restrained sound suits the verse of this song particularly well, since the lyric is still working through doubt and uncertainty at that point rather than resolving into the chorus's fuller sound. A simple thumb-and-fingers pattern gets you there without a complicated fingerstyle arrangement.
| Beat | Right-hand finger | String |
|---|---|---|
| 1 | Thumb (bass note) | Lowest string the chord actually uses |
| 2 | Index | 3rd string (G) |
| 3 | Middle | 2nd string (B) |
| 4 | Ring | 1st string (high E) |
Play the thumb note first, then roll the remaining three fingers upward in order, letting each note ring into the next rather than plucking them all at once. For Bm, the thumb lands on the fretted 5th string. For A, the thumb lands on the open 5th string. For D, the thumb lands on the open 4th string. For G, the thumb lands on the fretted 6th string.
This pattern works especially well under the verse, where the harmony is doing the work and a busier strum would compete with the vocal line rather than support it. Switching to a fuller strum for the chorus, and eventually the bridge, creates the same dynamic contrast a full band gets from adding instruments, built entirely from your right hand's technique.
The Bridge Build: How to Play the Dynamics That Made This Song Famous
The bridge is the part of this song most chord charts underserve, because on paper it is only four chords, Bm, G, D, and A, repeated. What the chart cannot show is that this bridge is built almost entirely around dynamics rather than new harmonic material, and getting the dynamics right matters more here than in any other section of the song.
Live and recorded arrangements typically repeat this four-chord loop many times, starting quiet, often with just a bass note or a single sustained chord, and building gradually toward a full-band peak before dropping back down, sometimes to near silence, and building again. That shape, quiet, build, peak, drop, is the actual structure of the bridge far more than any specific chord sequence is.
Practically, that means your job on guitar is not to memorize a longer chord progression, it is to control your dynamics deliberately across repeats you may not be able to predict in advance if you are following a band or worship leader live. Start any repeat of the bridge on the quiet end, whether that means a single low note per chord, a soft fingerpicked pattern, or laying out completely and letting a keyboard or vocal carry the section alone. Add volume and fuller strumming only as the section actually builds, watching the leader or listening to the rest of the band rather than escalating on a fixed schedule.
This is also the section most worth muting your strings on. Palm-muted strumming, resting the side of your strumming hand lightly across the strings near the bridge of the guitar, gives you a percussive, quieter texture that still keeps time clearly, which is far more useful during a slow build than either full silence or full volume. Releasing the mute is a natural, physical way to signal the section opening up, and it reads clearly to anyone playing alongside you.
Full Chord Shape Reference
Every chord this song uses, gathered in one place. Strings are numbered 1 to 6, thinnest to thickest.
B Minor (Barre)
| String | Fret | Finger |
|---|---|---|
| 6 (low E) | Muted | - |
| 5 (A) | 2 | 1 (index, barre) |
| 4 (D) | 4 | 3 (ring) |
| 3 (G) | 4 | 4 (pinky) |
| 2 (B) | 3 | 2 (middle) |
| 1 (high E) | 2 | 1 (index, barre) |
B Minor (No Barre)
| String | Fret | Finger |
|---|---|---|
| 6 (low E) | Muted | - |
| 5 (A) | Muted | - |
| 4 (D) | 4 | 4 (pinky) |
| 3 (G) | 4 | 3 (ring) |
| 2 (B) | 3 | 2 (middle) |
| 1 (high E) | 2 | 1 (index) |
A Major (Open)
| String | Fret | Finger |
|---|---|---|
| 6 (low E) | Muted | - |
| 5 (A) | Open | - |
| 4 (D) | 2 | 1 (index) |
| 3 (G) | 2 | 2 (middle) |
| 2 (B) | 2 | 3 (ring) |
| 1 (high E) | Open | - |
D Major (Open)
| String | Fret | Finger |
|---|---|---|
| 6 (low E) | Muted | - |
| 5 (A) | Muted | - |
| 4 (D) | Open | - |
| 3 (G) | 2 | 1 (index) |
| 2 (B) | 3 | 3 (ring) |
| 1 (high E) | 2 | 2 (middle) |
G Major (Open)
| String | Fret | Finger |
|---|---|---|
| 6 (low E) | 3 | 2 (middle) |
| 5 (A) | 2 | 1 (index) |
| 4 (D) | Open | - |
| 3 (G) | Open | - |
| 2 (B) | Open | - |
| 1 (high E) | 3 | 3 (ring) |
A/C#
| String | Fret | Finger |
|---|---|---|
| 6 (low E) | Muted | - |
| 5 (A) | 4 | 4 (pinky) |
| 4 (D) | 2 | 1 (index) |
| 3 (G) | 2 | 2 (middle) |
| 2 (B) | 2 | 3 (ring) |
| 1 (high E) | Open | - |
D/F#
| String | Fret | Finger |
|---|---|---|
| 6 (low E) | 2 | 1 (index) |
| 5 (A) | Muted | - |
| 4 (D) | Open | - |
| 3 (G) | 2 | 2 (middle) |
| 2 (B) | 3 | 4 (pinky) |
| 1 (high E) | 2 | 3 (ring) |
A Practice Routine for This Song
Start with A, D, and G alone if any of them still need work, since none of the rest of this practice routine will feel solid until those three are automatic. Once they are, spend dedicated time on Bm on its own, away from the song entirely, before ever trying to change into or out of it at tempo.
A realistic first week looks like this.
| Days | Focus |
|---|---|
| 1 to 2 | Bm alone, both the barre and no-barre versions, no other chords involved |
| 3 to 4 | Bm to A and A to D, isolated, slow tempo |
| 5 | Full verse (Bm - A - D - A - G) at a reduced tempo |
| 6 | Add the chorus (G - D - A, then Bm - A/C# - D - G) |
| 7 | Full song at tempo, including a deliberate quiet-to-loud pass through the bridge |
Do not treat day 7 as a finish line. It is the first time you are allowed to play the whole song slowly and imperfectly, not the point where it needs to already sound finished. If you are building this into a short daily habit rather than one long session, the homepage has more on structuring focused fifteen-minute practice blocks that actually stick over time.
Playing It Solo, With a Band, or Leading a Group
Alone, with just a guitar and a voice, the no-barre Bm version or the capo 7 version both carry the whole song without ever needing the full barre chord. That is a complete way to play it, not a placeholder waiting for the "real" version.
With a full band, the bridge is where your role changes the most. A drummer and bass player are usually the ones driving the section's dynamic build, and your job as the guitarist is to track that build rather than lead it, staying underneath the mix on the quiet passes and matching everyone else on the loud ones rather than setting your own volume independently.
Leading a group of singers on your own, the capo 7 option is worth defaulting to over the barre version, since open chords are both easier to keep in tune under pressure and faster to change between cleanly, both of which matter more than usual when you are also responsible for keeping a room of people together through an unpredictable, extended bridge.
If a comparison point helps, the Heart of Worship chord guide covers a similar-era worship ballad built from a small pool of chords, though that song's dynamic range is far narrower than this one's, which makes "Oceans" a useful next step once a simpler worship ballad feels comfortable.
Playing It on Acoustic Versus Electric Guitar
The recording leans on electric guitar textures, reverb and sustain that let a single chord hang in the air far longer than an acoustic guitar naturally will. That doesn't make an acoustic guitar the wrong instrument for this song, it changes what you lean on to get a similar effect.
On acoustic, the fingerpicking pattern covered earlier does more of that sustaining work than a strum can, since each note is picked individually and allowed to ring rather than struck and immediately re-struck. Leaving more space in your strumming pattern, letting a chord ring out fully rather than muting it early to prepare for the next strum, gets you closer to that electric-guitar sustain than strumming harder or faster does.
On electric, even a modest amount of reverb or delay from an amp or a basic pedal goes a long way toward the sound most people associate with this song, since the recording itself relies heavily on that kind of space. If you don't have access to effects, a clean tone played with a light touch and the same generous, unhurried pattern still carries the song correctly, the effects shape the atmosphere, they don't change which chords you're playing or when.
Neither instrument is more correct for practicing or performing this song. Choose based on what you have and what the setting calls for, and treat the dynamics guidance throughout this post as the part that matters most regardless of which one you pick up.
Common Mistakes Beyond the Chords
A few issues show up repeatedly with this song that have nothing to do with fingering a wrong shape.
Playing the Bridge at One Fixed Volume
The single most common mistake on this song is treating the bridge like any other four-chord loop and strumming it the same way from the first repeat to the last. The bridge's entire purpose is the build, and flattening that build into one steady volume removes the exact thing that makes this song's bridge recognizable.
Rushing Into the Barre Before It's Ready
Trying to play Bm at full song tempo before it is solid in isolation usually means fighting the chord through the whole song rather than actually playing it. Give the isolated practice in the routine above its full week before expecting Bm to hold up inside the verse at tempo.
Ignoring the Quiet Sections
If a breakdown or a quiet pass through the bridge is part of the arrangement you are playing, strumming through it at your usual volume erases the moment the section exists to create. Whether that means laying out completely, palm-muting, or simply strumming far more softly, restraint is the point of that section, not another verse.
Treating Every Chorus Identically
Worship songs performed live rarely repeat a chorus at exactly the same volume every time. A final chorus, arriving right after the bridge's peak, is often played fuller than the ones before it. Building in some dynamic growth across repeated choruses, rather than playing every pass through the song at one fixed volume, matches how the song is actually used far more often than a flat, unchanging arrangement does.
Frequently Asked Questions
What key is "Oceans (Where Feet May Fail)" in?
The original recording is in D major. The standard chord chart, built around Bm, A, D, and G, already matches that key with no capo required.
Do I need to know a barre chord to play this song?
Not necessarily. A no-barre version of Bm, using only the top four strings, plays the same notes without a barre. A capo on the 7th fret with open Em, D, G, and C shapes is a second barre-free option that also matches the original key.
What are the easiest chords to start with?
A, D, and G. All three are common open chords. Bm is the one shape in this song that takes extra dedicated practice, whichever version of it you choose to learn.
What is the difference between A and A/C# in this song?
A/C# moves A's own third, C#, into the bass instead of the root note, creating a smoother, stepwise bass line into the G that usually follows. Plain A is a complete substitute anywhere A/C# appears.
Why does the bridge feel harder than the chord chart suggests?
Because the difficulty in the bridge is almost entirely about dynamics, not chords. The same four-chord loop, Bm - G - D - A, repeats through a long, often unpredictable build from quiet to loud, and playing that build convincingly takes more attention than learning four chords does on its own.
How fast is this song?
Around 126 to 132 beats per minute in 4/4 time, depending on the specific recording or arrangement, though the song's overall feel is shaped far more by its dynamic build than by its metronome tempo.
Is this a hard song for a beginner?
The chord count is low, but the Bm barre chord and the extended, dynamic bridge both push this past a true first-song pick. It is a strong choice once A, D, and G are solid and you are ready for your first real barre chord.
Who wrote "Oceans (Where Feet May Fail)"?
Matt Crocker, Joel Houston, and Salomon Ligthelm wrote it during the recording of Hillsong United's 2013 album Zion. Taya Smith sang the lead vocal. The song went on to spend a record 61 non-consecutive weeks at number one on Billboard's Hot Christian Songs chart and won the 2014 Dove Award for Song of the Year.
Do I need a capo for this song?
No. The song's own key already matches the standard Bm-A-D-G chart. A capo becomes useful only if you are shifting the key for a singer's range, or if you are using the capo 7 trick to avoid the Bm barre chord with open shapes instead.
Why do some chord charts online show completely different chords, like Am or Em, for this song?
Those charts have simply transposed the song into a different key, usually to sidestep the Bm barre chord one way or another. An Am-based chart with no capo plays the song a full step lower than the original recording. An Em-based chart at capo 7 lands back on the original pitch using open shapes instead of a barre. Neither is wrong, they are different solutions to the same Bm problem this post covers directly.
Should I mute the low E and A strings on every chord?
Only where the chart marks them as muted. D, A, and the no-barre Bm voicing all leave the 6th string, and often the 5th, unplayed, since those strings don't belong to the chord and would add a note that clashes with it. Resting the side of your fretting hand's thumb or index finger lightly against those strings, without actually fretting them, is enough to stop them from ringing if your pick or strumming hand brushes past them.
GuitarLowKey
Ready for fifteen focused minutes?
Open the web app and train the change that is blocking your song.