
How to Play the A# Guitar Chord (Every Shape, No Buzzing)
The A# guitar chord in every shape: the barre most players use, an easier two-finger start, a capo trick that skips the barre, and the fixes for the buzz.

To play the A# chord on guitar, barre your index finger across the top five strings at the 1st fret (mute the low E string), then place your middle finger on the 3rd fret of the D string, your ring finger on the 3rd fret of the G string, and your pinky on the 3rd fret of the B string. Strum from the A string down through the high E string. That is the shape almost every player reaches for, and this post covers everything around it: an easier two-finger starting point, the full six-string barre further up the neck, a capo trick that skips the barre entirely, why it buzzes, and every chord built on the same root, A#m, A#7, and A#maj7.
| String | Fret | Finger |
|---|---|---|
| 6 (low E) | Muted | - |
| 5 (A) | 1 | 1 (barre, root) |
| 4 (D) | 3 | 2 (middle) |
| 3 (G) | 3 | 3 (ring) |
| 2 (B) | 3 | 4 (pinky) |
| 1 (high E) | 1 | 1 (barre) |
What "A#" Means, and Why It's the Same Chord as Bb
A# (A sharp) is the note one half step, one fret, above A. On a guitar neck, a sharp and the flat that sits at the exact same fret are the same pitch, just spelled two different ways. A# and Bb are what music theory calls enharmonic equivalents: identical strings, identical frets, identical sound, different name. You will see this chord written as A# in some songbooks and Bb in others, and neither is wrong.
The name that gets used usually follows the key signature of the surrounding song. Keys built around sharps, such as B major or F# major, tend to spell this chord A#. Keys built around flats, such as F major, Bb major, or Eb major, call it Bb. In practice, Bb is the far more common spelling in printed sheet music and chord charts, mostly because Bb major and the keys around it come up more often than A# major does. If you are reading a chart that says Bb, everything in this post still applies, the shapes are identical.
| Chord tones | Note names |
|---|---|
| Root | A# (or Bb) |
| Major 3rd | C## (or D) |
| Perfect 5th | E# (or F) |
Notice the 3rd is written as C##, not D, when the chord is spelled with sharps. That looks unusual because C## and D are the same key on the guitar, but correct chord spelling keeps every letter name, A, C, and E, exactly once, so the chord looks and functions correctly on paper even though your fingers do not care either way. For the rest of this post, the plain letter names (A#, D, F) are used, since that is how you will actually see this chord written and how it is easiest to read at a glance.
String names and numbers, so the tables above make sense
Every fret and finger listed in this post refers to the six strings by both number and name, so it helps to have this settled before going further.
| String number | Name | Standard tuning pitch |
|---|---|---|
| 6 | Low E | E |
| 5 | A | A |
| 4 | D | D |
| 3 | G | G |
| 2 | B | B |
| 1 | High E | E |
Strings are numbered from thinnest to thickest, so the 1st string is the high E string nearest the floor when the guitar is in playing position, and the 6th string is the thick low E string nearest the ceiling. Standard tuning, low to high, is E-A-D-G-B-E. Fret numbers count from the nut, the strip of material at the very top of the neck where the strings first make contact, so "the 3rd fret" means the third space down the neck, not the third metal wire. Finger numbers follow the usual convention: 1 is the index finger, 2 is the middle finger, 3 is the ring finger, and 4 is the pinky.
Why A# Has No Open-String Shape
Every easy chord you already know, C, G, D, A, and E, works because at least a few of the six open strings happen to land on notes that belong to the chord. An open G chord uses the open D, G, and B strings for free, and only needs three fretted notes to complete the shape. A# major is built from A#, D, and F. None of the six open strings, E, A, D, G, B, E, is one of those three notes on its own (the open D string is a coincidence that only helps once you are already fretting elsewhere), so there is no way to build a full A# chord using only open strings. Every practical version of this chord has to be built mostly or entirely from fretted notes.
This is exactly the same problem F, Eb, and G# run into, and for the same reason: none of those roots line up cleanly with the open strings either. A# tends to arrive as a surprise the first time a song calls for it, usually after a player already has C, G, D, A, and E under their fingers and assumes every chord will be that straightforward.
The Root 5 Barre Shape, Finger by Finger
The shape in the opening table is the one most players reach for first, because it sits low on the neck where the frets are wider and the string tension is more forgiving than higher up, and because it only asks you to barre five strings instead of six.
Build it in this order. Start with your fretting hand off the guitar entirely.
- Lay your index finger flat across the top five strings at the 1st fret. That covers the A, D, G, B, and high E strings. The low E string is deliberately left out, mute it by letting the underside of your index finger rest against it, or simply avoid it with your strumming hand.
- Add your middle finger on the D string at the 3rd fret.
- Add your ring finger on the G string at the 3rd fret, right beside your middle finger.
- Add your pinky on the B string at the 3rd fret, completing a row of three fingers across the 3rd fret.
- Strum from the A string down through the high E string. Five strings total.
The three fingers at the 3rd fret can also be played as a single flattened ring finger doing a mini barre across the D, G, and B strings, which some players find easier than isolating three separate fingers in a tight space. Either fingering produces the identical sound, use whichever your hand finds more natural.
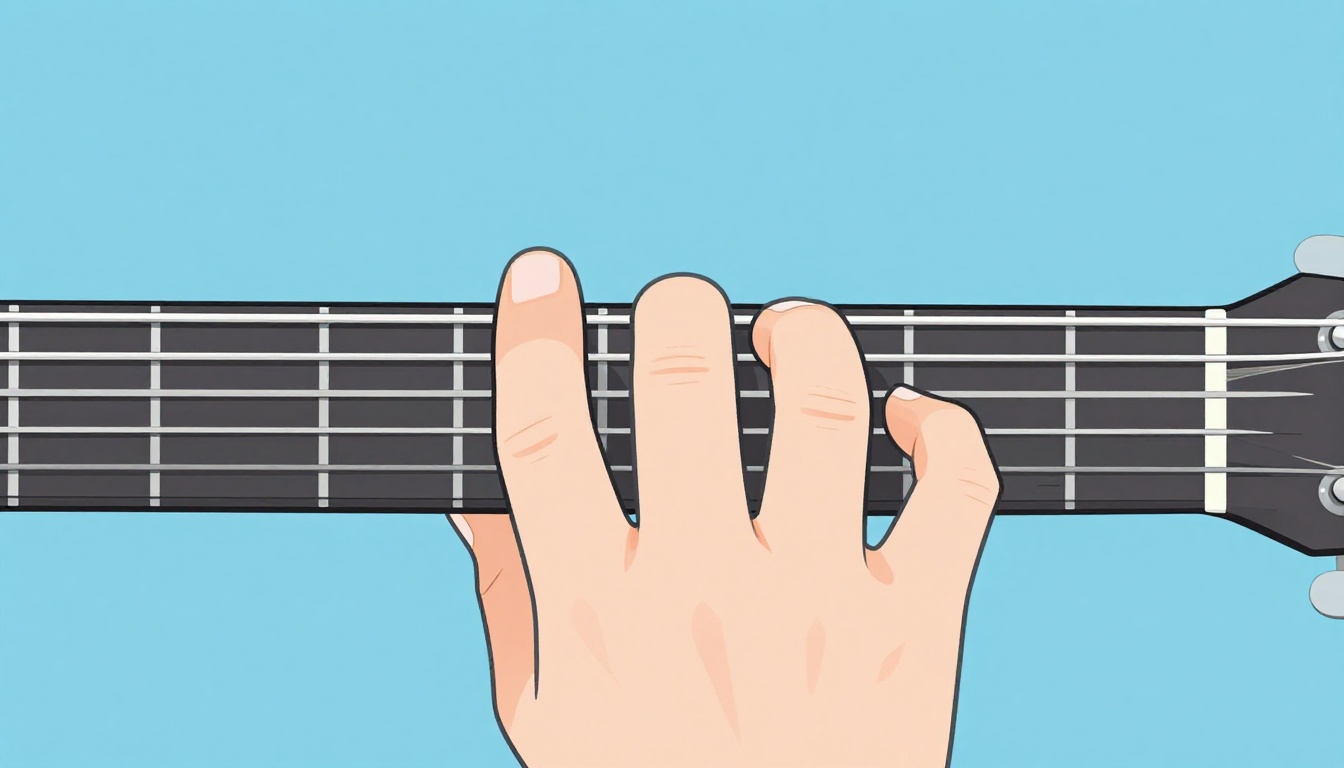
This shape is exactly the open A major chord (x02220) slid up one fret with a barred index finger standing in for the open strings. Every fret you slide that same shape to changes the chord, and at fret 1 the root note lands on A#.
The Root 6 Barre Shape Further Up the Neck
The second common shape roots the chord on the low E string instead of the A string, using the same finger pattern guitarists use for the open E major chord. This version plays all six strings and sits at the 6th fret.
| String | Fret | Finger |
|---|---|---|
| 6 (low E) | 6 | 1 (barre, root) |
| 5 (A) | 8 | 3 (ring) |
| 4 (D) | 8 | 4 (pinky) |
| 3 (G) | 7 | 2 (middle) |
| 2 (B) | 6 | 1 (barre) |
| 1 (high E) | 6 | 1 (barre) |
Barre your index finger flat across all six strings at the 6th fret. Then add your ring finger on the A string at the 8th fret, your pinky right beside it on the D string, also at the 8th fret, and your middle finger on the G string at the 7th fret, one fret behind the other two. Strum all six strings.
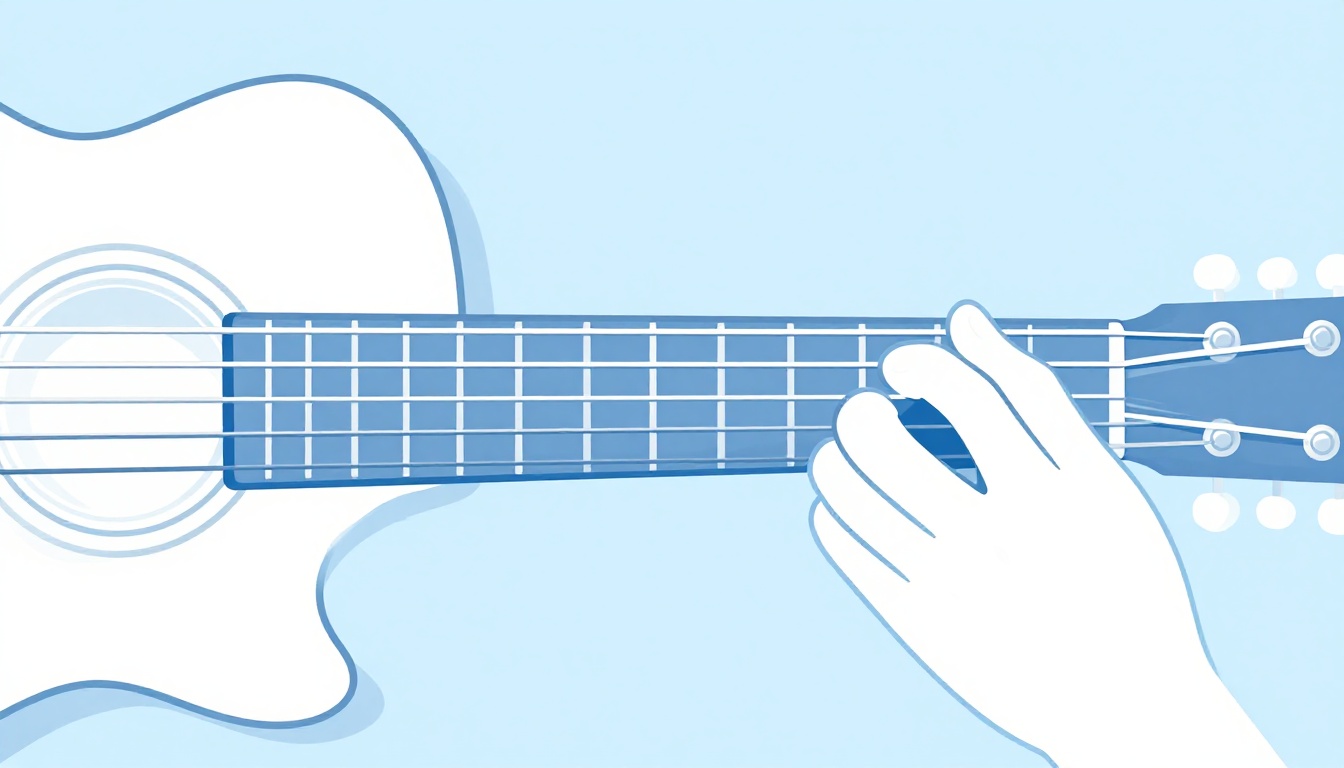
This shape uses more of the neck's range and gives you a fuller, lower sound than the root 5 version, since it includes the low E string as a bass note. The trade-off is that it sits six frets higher up the neck, which some players find slightly harder to reach comfortably depending on hand size and where they are used to playing. Both shapes are the same chord, use whichever fits the moment, the song you are playing, or simply whichever your hand currently plays cleaner.
An Easier Way In: the Two-Finger and Three-Finger Versions
If a five-string barre is still out of reach, there are two smaller versions of A# that skip barring altogether. Neither is a lesser or "fake" version of the chord, both are the same three notes, A#, D, and F, just voiced with fewer strings.
The two-finger version uses only the bottom three strings.
| String | Fret | Finger |
|---|---|---|
| 6 (low E) | 1 | 1 (index) |
| 5 (A) | 1 | 2 (middle) |
| 4 (D) | Open | - |
Press your index finger on the low E string at the 1st fret and your middle finger right beside it on the A string, also at the 1st fret. Leave the D string open. Strum only these three strings. This gives you the full triad, F on the low E string (the 5th), A# on the A string (the root), and D on the open D string (the 3rd), with only two fingers and no barre.
The three-finger version uses the top three strings instead, useful when a song needs a brighter, higher-pitched voicing.
| String | Fret | Finger |
|---|---|---|
| 3 (G) | 3 | 2 (middle) |
| 2 (B) | 3 | 3 (ring) |
| 1 (high E) | 1 | 1 (index) |
Press your index finger on the high E string at the 1st fret, and your middle and ring fingers together on the G and B strings at the 3rd fret. Strum from the G string upward. This voicing contains the same three notes, F, A#, and D, arranged higher on the neck.
Both of these are genuinely useful, not just training wheels. Thinner, partial voicings like these are common in real playing whenever a full barre would be more sound than a passage actually needs, quick chord stabs, light strumming, or fast-moving progressions where a full barre would slow your hand down.
Using Your Thumb to Make the Barre Easier
There is a technique some players use on the root 6 shape that is worth knowing about even though it will not work for everyone: wrapping your thumb over the top of the neck to fret the low E string directly, instead of barring it with your index finger.
If your guitar has a slim enough neck and your hand is large enough to reach comfortably, you can rest your thumb over the top edge of the fretboard and press the low E string at the 6th fret with it, freeing your index finger to only worry about the B and high E strings (which sit on the same fret) rather than covering all six strings. This is sometimes called a "thumb-over" or "cowboy" grip, and it shows up constantly in blues and rock playing.

This is not something to force. Wide, thick necks and smaller hands make it genuinely uncomfortable or impossible, and there is nothing wrong with sticking to a full index-finger barre instead. It is a tool worth trying once your hand has some barre chord experience, not a requirement for playing A# correctly.
The Capo Shortcut: Playing A# with an Open A Shape
If a full barre chord is still out of reach for your hand, there is a genuinely useful workaround that most chord charts do not mention: clip a capo onto the 1st fret and play an open A major chord shape. Because a capo shifts every note up by however many frets it covers, an open A shape played behind a capo on the 1st fret sounds exactly as A#, using nothing but three fingers and no barre at all.
| String | Fret (counted from the capo) | Finger |
|---|---|---|
| 6 (low E) | Muted | - |
| 5 (A) | Open | - |
| 4 (D) | 2 | 1 (index) |
| 3 (G) | 2 | 2 (middle) |
| 2 (B) | 2 | 3 (ring) |
| 1 (high E) | Open | - |
Clip the capo on so it sits just behind the 1st fret wire, pressing firmly enough that every string rings clearly when picked open. Then finger the shape exactly as you would an open A major chord: three fingers pressed together across the D, G, and B strings two frets up from the capo, with the A string and high E string left open. Mute or simply avoid the low E string.
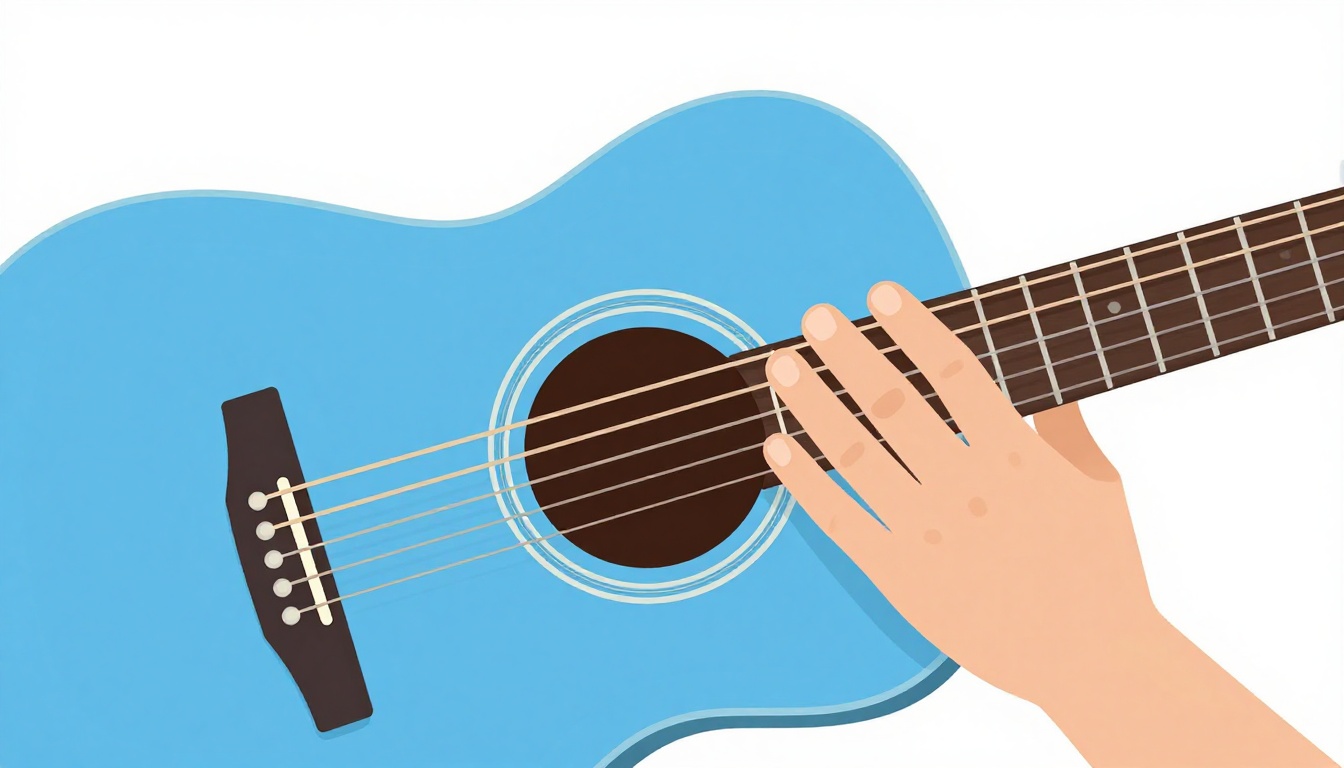
This is not a compromise or a beginner cheat you will need to unlearn later. This particular trick is genuinely popular with working guitarists, especially when playing alongside horn or wind instruments, since Bb major and the keys around it are common for those instruments but awkward for open guitar chords. Capoing the 1st fret and using open A, D, and E shapes is one of the standard ways guitarists cover that ground without barring through an entire song.
A capo does exactly what your index finger does in a barre chord: it presses down every string at once at a single fret, raising the pitch of each open string by however many frets it covers. Play an open A chord with no capo and you get A major. Add a capo at the 1st fret and every note in that same A shape rises by one semitone, which turns A into A#, C# into D, and E into F, exactly the three notes A# is built from. The only real trade-off is that you need a capo with you, and the voicing is different (a different note doubled, no low bass note on the 6th string) from the full barre shapes above.
Why Your A# Chord Is Buzzing or Not Ringing
This is the section that actually decides whether you keep working on this chord or give up on it. A barre chord that buzzes or goes dead on certain strings almost always traces back to one of five specific, fixable causes. Work through them one at a time.
Your index finger is too flat
If your index finger lies completely flat against the fretboard, the soft, fleshy part of the finger absorbs pressure unevenly across its length, and whichever string sits under the thinnest or least-pressured section of the finger buzzes or dies. This is the single most common reason a barre chord sounds incomplete.
Roll your index finger slightly onto its outer edge, the side closer to your thumb. The edge of the finger is bonier and firmer than the pad, and it distributes pressure more evenly across all the strings it covers with less overall effort from your hand.

Your thumb is riding too high on the neck
Check where your thumb sits on the back of the neck. If it has crept up so it is visible over the top edge, peeking out above the fretboard, it is pulling your whole hand into a position where your fingers come down flatter than they should. Bring your thumb back down to roughly the middle of the back of the neck, generally somewhere behind your index or middle finger. This alone fixes a surprising amount of barre chord buzz, because it changes the angle everything else works from.
Your fingers at the 3rd fret are crowding each other
On the root 5 shape especially, your middle, ring, and pinky fingers sit close together on adjacent strings at the same fret. It is easy for one of them to lean slightly and mute the string next to the one it is meant to fret. Pick each fretted note individually and listen. If the D string sounds fine but the G string is dead, your ring finger likely needs to arch more or shift its contact point slightly. Angling each finger closer to vertical, coming down on the very tip rather than the pad, gives the neighboring fingers more room to avoid each other.
The 1st fret is fighting you
The 1st fret is the hardest fret on the guitar for a barre chord, full stop, because string tension is highest right at the nut end of the neck. If the root 5 shape at fret 1 buzzes when the same shape further up the neck would not, that is not a sign you are doing something wrong, it is simply the hardest possible position for this exact technique. Building strength on this specific fret takes longer than it does at, say, fret 6 or 8, and that is normal.
You're not pressing hard enough yet
Sometimes every element of technique is correct, the finger is rolled, the thumb is positioned well, the angle is right, and the chord still buzzes because the hand simply has not built the specific strength a barre chord demands yet. This is common and temporary. Barre chords require sustained pressure across multiple strings at once, which is a different demand than fretting a single note, and that strength builds with repetition, not instantly. If everything else checks out and it still buzzes, the fix is time, not a technique adjustment.
Getting Your Wrist and Hand Position Right
Beyond the finger-by-finger fixes above, your overall wrist and arm position sets the baseline for how much pressure actually reaches the strings versus how much gets lost to an inefficient angle.
Keep your wrist slightly bent outward, away from the neck, rather than collapsed inward toward it. A wrist that collapses inward, so your palm nearly touches the back of the neck, forces your fingers into a flatter angle and makes it much harder to get the arch each finger needs. Your elbow should hang relatively naturally at your side rather than pinning tightly against your ribs, which restricts the whole arm's ability to rotate into position.
It also helps to check your guitar's position generally. If the neck is angled too low, close to horizontal, gravity works against your fretting hand's ability to press efficiently. Tilting the headstock up somewhat, whether you are sitting or standing, tends to make barre chords noticeably easier to hold, and it matters more for A# than for most chords, since the 1st fret already asks for more force than higher frets do.
Building the Strength to Hold a Barre Chord
If you are new to barre chords in general, not just this one, it is worth knowing that the strength and finger independence they require is trained, not something your hand either has or does not. A few concrete things speed that up.
Practice the barre alone before adding the other fingers. Lay your index finger across the top five strings at any comfortable fret, not necessarily the 1st, and pick through each string one at a time, adjusting pressure and position until every one rings clearly, with no other fingers involved yet. This isolates the hardest part of the shape and lets you focus entirely on it, without also fighting the extra difficulty of fret 1.
Hold shorter than you think you need to. Fretting a barre chord for two or three seconds at a time, resetting, and doing it again trains the specific muscles involved without exhausting your hand before it has built any capacity. Long, forced holds when the hand is not ready tend to build tension and bad habits rather than strength.
Move the barre around, and start higher up the neck. If fret 1 feels impossible right now, practice the identical shape at fret 5 or 6 instead, where the string tension is lower and success comes faster, then work your way back down toward fret 1 as your hand gets stronger. There is nothing wrong with building the skill somewhere easier before applying it to A#'s harder position.
Expect weeks, not days. Most players report a noticeable jump in barre chord control within two to four weeks of short, regular practice, not because the chord itself changes but because the hand's strength and muscle memory catch up. If your hand hurts sharply (not just tired) while attempting a barre, stop and rest, sharp pain is your hand telling you to back off, dull fatigue is normal.
Does Your Guitar's Setup Make A# Harder Than It Needs to Be?
If you have worked through every technique fix above and A# still buzzes no matter what your hand does, the problem may not be your technique at all. It is worth ruling out the guitar itself before assuming the fault is entirely yours, especially for a chord that sits right at the unforgiving 1st fret.
String height (action). Every guitar has strings sitting some distance above the frets, called the action. Higher action means every finger, especially a barre, needs more force to press a string all the way down to the fret. A guitar with high action can make a barre chord genuinely, physically harder than the identical chord on a guitar with lower action, no matter how good your technique is. If barre chords feel dramatically harder on your guitar than they look in videos of other players, high action is a common, fixable culprit, and it is generally worth having a guitar technician check and adjust, since doing it yourself without the right tools risks damaging the instrument.
String gauge. Thicker strings need more force to fret than thinner ones. Beginners are sometimes handed a guitar strung with heavier strings than necessary, which makes every chord, barre chords especially, harder than it needs to be while you are still building hand strength. Lighter gauge strings are easier to press down, at some cost to tone and volume, and many new players find them a reasonable trade while their hands develop.
Electric versus acoustic. Electric guitars are typically strung with lighter strings and set up with lower action than acoustic guitars, partly because their thinner, narrower necks and different string tension make it practical to do so. If you are learning A# on an acoustic and finding it noticeably harder than you expected, that is a real, physical difference, not just a perception, electric guitars are generally easier to barre chord on, especially for a beginner hand.
New strings versus old strings. Old strings that have lost their brightness also tend to feel stiffer and less responsive under the fingers over time as grime builds up in the windings, which can make fretting, barre chords included, feel more effortful than it should. If your strings have been on the guitar for many months of regular play, that is worth ruling out too.
None of this means technique does not matter, it still does, and most players' barre chord struggles are genuinely about hand position and pressure rather than the instrument. But if you have checked your finger angle, thumb position, and pressure carefully and A# still will not ring clean, a quick look at the guitar itself is a reasonable next step before assuming your hand is the only variable.
A#m: the Minor Version
Swap the major 3rd for a minor 3rd and A# major becomes A#m, built from A#, C#, and F. It uses the same barre family as the major shape, but with the middle finger's note pulled back.
| String | Fret | Finger |
|---|---|---|
| 6 (low E) | Muted | - |
| 5 (A) | 1 | 1 (barre, root) |
| 4 (D) | 3 | 3 (ring) |
| 3 (G) | 3 | 3 (ring, same mini-barre) |
| 2 (B) | 2 | 2 (middle) |
| 1 (high E) | 1 | 1 (barre) |
Barre your index finger across the top five strings at the 1st fret, just as with the major shape. Then lay your ring finger flat across the D and G strings at the 3rd fret, and place your middle finger on the B string at the 2nd fret, one fret behind the ring finger. This is the exact same shape most players learn for Bm, just one fret lower. If you already know Bm, A#m in this shape is simply Bm slid down by one fret.
A#7: the Dominant Seventh Version
A#7 adds a minor 7th, G#, on top of the A# triad, giving it the tense, unresolved pull that makes dominant seventh chords useful at the end of a blues turnaround or leading back into a I chord.
| String | Fret | Finger |
|---|---|---|
| 6 (low E) | Muted | - |
| 5 (A) | 1 | 1 (barre, root) |
| 4 (D) | 3 | 3 (ring) |
| 3 (G) | 1 | 1 (barre) |
| 2 (B) | 3 | 4 (pinky) |
| 1 (high E) | 1 | 1 (barre) |
Barre your index finger across the top five strings at the 1st fret. Add your ring finger on the D string at the 3rd fret and your pinky on the B string at the 3rd fret, leaving the G string ringing on the barre alone. This is the open A7 shape (x02020) slid up one fret, the same relationship the plain A# major shape has to open A major.
A#maj7: the Major Seventh Version
A#maj7 adds a major 7th, A, instead of the flattened 7th A#7 uses, giving it a smoother, jazzier color that A#7's tension does not have.
| String | Fret | Finger |
|---|---|---|
| 6 (low E) | Muted | - |
| 5 (A) | 1 | 1 (barre, root) |
| 4 (D) | 3 | 3 (ring) |
| 3 (G) | 2 | 2 (middle) |
| 2 (B) | 3 | 4 (pinky) |
| 1 (high E) | 1 | 1 (barre) |
Barre your index finger across the top five strings at the 1st fret. Add your middle finger on the G string at the 2nd fret, your ring finger on the D string at the 3rd fret, and your pinky on the B string at the 3rd fret. This is the open Amaj7 shape (x02120) slid up one fret. The one-fret difference between this shape and A#7 above, the G string moving from fret 1 to fret 2, is the entire difference between the two chords, and it is worth playing them back to back to hear it.
Bb/A: A Related Slash Chord Worth Knowing
If you see "Bb/A" in a chord chart, that is not a typo or a different chord entirely, it is A# (Bb) major with the note A placed underneath it as the bass note instead of the root. It comes from the same family as everything on this page but uses its own distinct shape, leaving the A string open rather than fretted. It has its own full write-up, including why it is really a Bbmaj7 voicing in disguise and why it is often easier to play than the plain barre versions above, in the Bb/A guitar chord guide.
A# vs Bb: Which Name to Use and Why Sources Disagree
There is no rule that forces a chord chart to pick one spelling over the other, and you will run into both regularly. A rough pattern is worth knowing even if it is not a hard law: music written by or for guitarists, tab sites, and rock or pop songbooks skew toward sharps generally, while music transcribed from piano, band, or orchestral scores, and anything in a flat-heavy key, skews toward Bb specifically, since Bb major is a genuinely common key for brass and woodwind instruments.
If you are handed a chart that mixes the two, seeing Bb in one place and A# in another for what is clearly the same chord, that is not an error to puzzle over, your hands do the identical thing either way.
Where A# Sits in a Key
A# (Bb) rarely shows up on its own, it is usually one chord inside a progression built around a key, and knowing which keys it belongs to helps you predict what other chords are likely to sit alongside it.
| Key | A#'s (Bb's) role | Other common chords in that key |
|---|---|---|
| A# (Bb) major | I (the tonic, "home" chord) | Dm/D#m, F, Gm/G#m |
| F major | IV | F, Gm, A#/Bb, C |
| Eb major | V | Eb, Fm, Gm, Ab, A#/Bb |
| G minor | VI | Gm, A#/Bb, Cm, D |
If you come across A# or Bb in a song and want to guess what else might be in the progression, checking whether the surrounding chords match one of these families is a faster route than guessing at random.
Chord Progressions That Use A#
A few genuinely common progression patterns, built from standard music theory rather than any single song, show how A# tends to get used in practice.
In the key of Bb major itself, a I, IV, V progression gives you Bb, Eb, F, one of the most fundamental major-key movements across almost every genre. A I, vi, IV, V gives you Bb, Gm, Eb, F, the classic '50s progression transposed into this key.
As the IV chord in F major, A#/Bb often appears in a I, IV, V pattern: F, Bb, C, an extremely common movement in folk, country, and rock.
As the V chord in Eb major, A#/Bb commonly leads a ii, V, I movement: Fm, Bb, Eb, a progression borrowed directly from jazz harmony but common in other genres too, where the ii chord sets up tension that the V chord resolves through the I.
These are patterns, not prescriptions, plenty of music uses A# outside of them entirely. But if you are trying to work out a song by ear and you have found A#, checking whether the next chord fits one of these families is a reasonable first guess.
A# Compared to the Chords It Gets Confused With
A handful of chord names look or sound close enough to A# that they are worth telling apart clearly, especially if you are reading a chart quickly and want to be sure you are grabbing the right shape.
A# versus A#m. The only difference is the third: A# major uses D (a major third above the root), A#m uses C# (a minor third above the root). One note changes, and the emotional character of the chord changes with it, bright and settled versus darker and unresolved.
A# versus A#dim. A#dim (A# diminished) shares its root and major third's neighbor territory but is actually built from a minor third and a flattened fifth, A#, C#, and E, giving it a tense, unstable quality quite different from a standard major chord. Diminished chords are used far less often, generally as a brief passing chord rather than a chord a song settles into.
A# versus A#7. A#7 takes the full A# triad and adds a fourth note, G#, a minor seventh above the root. It sounds noticeably more unresolved than plain A#, useful specifically for the tension it creates before resolving to another chord.
A# versus A#maj7. A#maj7 also adds a fourth note on top of the triad, but a major seventh (A) instead of A#7's minor seventh (G#). It has a smoother, more polished sound than A#7's bluesy tension, common in jazz, soul, and softer pop arrangements.
The pattern across all of these: the difference between chords that share most of a name usually comes down to one single note, most often the third (major versus minor) or an added extension (a 7th on top). Once you can hear that one-note difference, telling related chords apart by ear gets considerably easier.
Changing Between A# and Other Chords Smoothly
Knowing the shape is rarely the hard part once you have put in the practice above, the hard part is getting into and out of it at tempo without a dead beat while your hand repositions. A few specific transitions come up often enough to be worth practicing on their own.
Moving from A# to F (in root 5 shapes, this means sliding the entire barre, fingers included, from fret 1 to fret 8, since F major uses the identical shape as an open A major chord slid up) is a bigger jump, but the hand shape barely changes, only the position on the neck does, and both the barre and the extra fingers move together as a unit.
Moving from A# to Eb is a smaller slide if you are using root 6 shapes, since Eb sits at fret 11 and A# sits at fret 6 in that shape family, still a five-fret jump, but a single rigid hand movement rather than a change in finger pattern.
Moving from A# to Gm (the I to vi movement common in Bb major progressions) using root 6 shapes means sliding from A#'s fret 6 major barre to Gm's fret 3 minor barre, a shape change as well as a position change, which is why this particular transition benefits from slow, isolated practice more than most.
Moving from the capo'd A shape into another open chord is generally the fastest of all these transitions, since you are working with familiar open-position fingerings rather than sliding a barre, which is part of why the capo trick is worth learning even if you can already play the full barre shapes.
In all of these, the fix for a messy change is almost never "practice the individual chords more." It is practicing the change itself, in isolation, slowly, over and over, until the specific motion between those two exact shapes is memorized on its own.
Playing A# in a Fingerpicking Pattern
Not every use of A# is a strummed barre chord. In fingerstyle playing, you fret the same shapes covered above and simply pluck the strings individually or in a set pattern rather than strumming across all of them at once, which changes what you need from the chord.
A common basic pattern, using the root 5 barre shape, plucks the A string (root, A#) with your thumb first, then the D, G, and B strings in sequence with your remaining fingers, skipping the low E string entirely since it is muted in that shape anyway, then reversing back down. Because a fingerpicked chord sustains each note individually rather than all at once in a single strum, any string that is buzzing or muted becomes far more obvious than it would in a fast strum, where a weak note can hide inside the overall sound. This makes fingerpicking a genuinely useful diagnostic tool even if you mostly plan to strum: play the shape fingerstyle first, slowly, and you will hear exactly which string, if any, still needs work.
The root 6 shape works the same way, starting the thumb on the low E string (the root in that shape) instead of the A string. The capo'd A shape is particularly friendly to fingerpicking, since it uses the same plucking pattern most players already know from the open A chord, the capo does not change the pattern at all, only the pitch.
Common Mistakes Beyond Buzzing
A few habits show up often enough in players working on A# specifically that they are worth naming directly.
Trying to learn the root 5 barre at fret 1 before the hand has any barre chord experience at all. Fret 1 is the hardest position on the neck for this technique, so if A# is your very first barre chord, consider practicing an easier barre shape higher up the neck first, or lean on the capo trick above while your hand builds general barre strength.
Strumming through a change before the new chord shape is actually formed. This produces a scratchy, unclear strum right on the beat where the chord changes, which is often mistaken for a strumming problem when it is really a timing problem in the fretting hand. Slowing the whole progression down until the chord is fully formed before the strum arrives fixes this faster than practicing the strum pattern alone.
Assuming a barre chord needs maximum force. More pressure than necessary tires the hand fast and does not actually produce a cleaner sound past a certain point, since buzzing is almost always a positioning problem, not a strength problem, once your hand has built baseline strength at all.
Confusing A#7 and A#maj7 because they look similar on paper. They differ by exactly one fret on the G string, but they sound and function very differently, and swapping one for the other in a jazz or blues progression changes the character of the whole passage.
A Practice Routine for A#
Something concrete to do today, rather than a vague instruction to "practice more."
Spend the first few minutes on the barre alone, no other fingers, picking through the top five strings one at a time at the 1st fret until each rings cleanly, adjusting your index finger's angle and your thumb position as you go. Then add the middle, ring, and pinky fingers and repeat the same string-by-string check.
Next, fret the full chord and strum it slowly four times, resting your hand completely between each strum. This teaches your hand to form the shape from scratch repeatedly, rather than holding it continuously, which better matches how the chord actually gets used in a song.

Then pick one transition, A# to F is a good first choice since the shape barely changes, only the position on the neck does, and practice moving between the two chords slowly, at a tempo slow enough that every note rings cleanly on both sides of the change. Speed comes later, accuracy first.
Finally, if the full barre is still not cooperating, spend the last few minutes on the two-finger version or the capo trick instead, so the session ends with a version of the chord that actually sounds right. Ending on something that works, rather than something that still buzzes, matters more for staying motivated than it might seem.
Ten to fifteen minutes of this, most days, moves faster than longer, less frequent sessions, mostly because your hand needs repeated short exposure to build the specific strength a barre chord asks for, not one long grinding session.
Frequently Asked Questions
Is A# the same as Bb?
Yes. A# and Bb are two names for the same pitch, and the full chord, A# major and Bb major, uses the identical three notes and the identical shapes on the guitar. Which name shows up in a chord chart depends on the key of the song and the instrument the chart was originally written for, not on anything different about how you play it.
Can you play A# without a barre chord?
Yes, in a few ways. The two-finger version (low E and A strings, both at the 1st fret, D string open) needs no barre at all. There is also a capo trick, clip a capo on the 1st fret and play an open A major chord shape behind it, and it sounds as A#.
What is the easiest A# shape for a beginner?
For most beginners, either the two-finger version or the capo trick is the easiest starting point, since both avoid barring entirely. Once you are comfortable with barre chords generally, the root 5 shape at the 1st fret is the one most charts assume, even though fret 1 is genuinely one of the harder barre positions on the neck.
Why is A# harder to play than chords like C or G?
Because none of A#'s three notes, A#, D, and F, line up with any of the guitar's six open strings, so there is no easy open-chord version. Every practical shape has to be built from fretted notes, and the most common version also happens to sit at fret 1, the hardest fret on the neck for a barre chord due to higher string tension near the nut.
What is A#7, and how is it different from A#?
A#7 adds a fourth note, a minor 7th (G#), on top of the plain A# triad. It has a more tense, bluesy sound and is common at the end of a turnaround or leading back into another chord, rather than being used as a chord a song settles into for long.
Do I need a capo to play A# properly?
No, a capo is a shortcut, not a requirement. The full barre shapes work on any guitar with no capo at all. The capo trick exists specifically to make the chord accessible before your hand has built barre chord strength, or as a genuinely faster option if a song sits comfortably in open A, D, and E shapes with the capo already on for other reasons.
Why do some chord charts show A# at a completely different fret than others?
Because A# is a movable barre shape, it can technically be played using either the root 5 pattern (rooted at fret 1) or the root 6 pattern (rooted at fret 6), and both produce the correct chord. Different charts and different apps sometimes default to different shapes, neither is more correct than the other.
Is A# a common chord in songs?
It shows up less often than chords like C, G, or Am, mostly because fewer songs in guitar-friendly keys call for it directly. But spelled as Bb, it is extremely common, particularly in songs written in F major, Bb major, or Eb major, or anywhere a horn section is involved.
If a full barre chord still feels out of reach while you work on A#, it is worth building general chord-shape confidence on easier ground first. The open C chord uses no barre at all and is a good place to build the finger independence that makes barre chords like this one click faster once you come back to them.
GuitarLowKey
Ready for fifteen focused minutes?
Open the web app and train the change that is blocking your song.