
The Standard F Chord on Guitar (Full Barre and Easier Shapes)
The standard full barre F chord shape, three easier no-barre versions, why it buzzes fret by fret, and how to change into F without stopping the song.

The standard F chord on guitar is a full barre shape: lay your index finger flat across all six strings at the 1st fret, then add your middle finger on the 3rd string (G) at the 2nd fret, your ring finger on the 5th string (A) at the 3rd fret, and your pinky on the 4th string (D) at the 3rd fret. Strum all six strings. It is the same shape as an open E chord, slid up one fret and barred with your index finger where the nut used to do the work.
That single sentence is the whole answer, and it is also the reason almost every guitar player remembers the day they finally got F to ring clean. It is usually the first chord a beginner meets that cannot be faked with open strings, which makes it feel like a wall even though the shape itself is nothing you have not already played in a different form. Everything below this point is what the shape table cannot tell you: which finger goes where and why, what to do when one string cuts out, the three real alternatives that do not need a barre at all, and how to get in and out of the shape fast enough to keep a song moving.
The Standard F Chord Shape
This is the version most guitar teachers mean when they say "the F chord": an E-shape barre chord rooted on the 6th string, played in first position.
| String | Fret | Finger |
|---|---|---|
| 6 (low E) | 1 | 1 (index, barre) |
| 5 (A) | 3 | 3 (ring) |
| 4 (D) | 3 | 4 (pinky) |
| 3 (G) | 2 | 2 (middle) |
| 2 (B) | 1 | 1 (index, barre) |
| 1 (high E) | 1 | 1 (index, barre) |
Every string in this chord is fretted or barred. Nothing rings open and nothing is muted on purpose, which is exactly what makes it demanding: your index finger has to hold down three strings cleanly (the low E, the B, and the high E) while your other three fingers each take one string of their own, and your thumb has to sit behind the neck with enough counter-pressure to make the whole thing possible.
Notice the shape underneath it. Lift your index finger off and look at what is left: middle finger on the G string at fret 2, ring finger on the A string at fret 3, pinky on the D string at fret 3. That is an open E chord, just missing the open strings that the nut normally provides. Barring the 1st fret with your index finger replaces the nut and moves the whole chord up a semitone, from E to F. This is why F is usually the first barre chord anyone learns: it is not a new shape, it is a shape you already know, held in a new way.
Why F Is a Barre Chord and Not an Open Chord
Guitars are tuned E-A-D-G-B-E from the low string to the high string, and the open strings give you E, A, D, G, B and E for free without pressing anything. F major needs the notes F, A and C, and F is not one of the open strings, so there is no way to get a full, ringing F chord using open strings the way you can with C, G, D, A or E. The nearest open-string-friendly option is to fret every string yourself, and the barre is simply the most efficient way to do that with four fingers instead of six.
This is also why F sits later in most beginner courses than C, G, D, A, E and Am. Every other early chord uses at least one open string to do part of the work. F asks your hand to do all of it, and that is a genuine jump in difficulty, not a sign you are behind.
The Notes in an F Major Chord
F major is built from F, A and C: the root, the major 3rd and the perfect 5th of the F major scale. In the six-string barre shape above, those three notes repeat across the strings like this:
| String | Note | Role |
|---|---|---|
| 6 (low E), fret 1 | F | Root |
| 5 (A), fret 3 | C | 5th |
| 4 (D), fret 3 | F | Root (octave) |
| 3 (G), fret 2 | A | 3rd |
| 2 (B), fret 1 | C | 5th |
| 1 (high E), fret 1 | F | Root (octave) |
That is three roots, two 5ths and one 3rd. The 3rd is what makes it sound major rather than minor, and it only appears once in the whole chord, on the G string. If your middle finger lifts even slightly off that note, the chord stops being clearly major and starts sounding hollow, which is one of the more common reasons F "doesn't sound right" even when nothing is obviously buzzing.
Playing the Barre, Finger by Finger
Build the chord in this order rather than trying to land all four fingers at once.
Step 1: Set the barre first
Lay your index finger flat across all six strings right up against the 1st fret wire, not on top of it and not in the middle of the fret space. Roll your finger slightly onto its outer edge rather than the flat pad. The edge of the finger is bonier and presses more evenly than the pad, which is softer and dips between the strings.
Step 2: Add the other three fingers behind it
With the barre held, place your middle finger on the G string at fret 2, your ring finger on the A string at fret 3, and your pinky on the D string at fret 3. Arch these three fingers so only the very tips touch the strings. If any of them lean over and brush the string next to it, that neighboring string will go dead.
Step 3: Check your thumb
Your thumb should sit on the back of the neck, roughly opposite your first or second finger, pointing more or less straight up. A thumb that creeps over the top of the neck or sits too low pulls your palm forward and reduces the leverage your index finger needs to barre cleanly.
Step 4: Strum and listen string by string
Play the chord slowly, then pick each of the six strings one at a time. Every one should ring clearly. Whichever one does not is the one to fix, and the next section tells you why each string fails and how to fix it.
Why the Full Barre Is Genuinely Hard
Two mechanical facts make the barre chord harder than any open chord, and knowing them removes some of the mystery.
First, the 1st fret has the widest string spacing and the highest string tension of any fret on the neck, because it is closest to the nut. Every fret above it is slightly easier to barre for exactly this reason, which is why some teachers introduce barre technique higher up the neck before bringing it down to fret 1.
Second, your index finger is doing the job that four fingers, or the nut, would normally split between them. It has to apply even pressure across six strings of different thickness and tension using one joint, while the rest of your hand still has to build three more fingers on top of it. This is a strength and coordination problem, not a talent problem, and it responds directly to repetition.
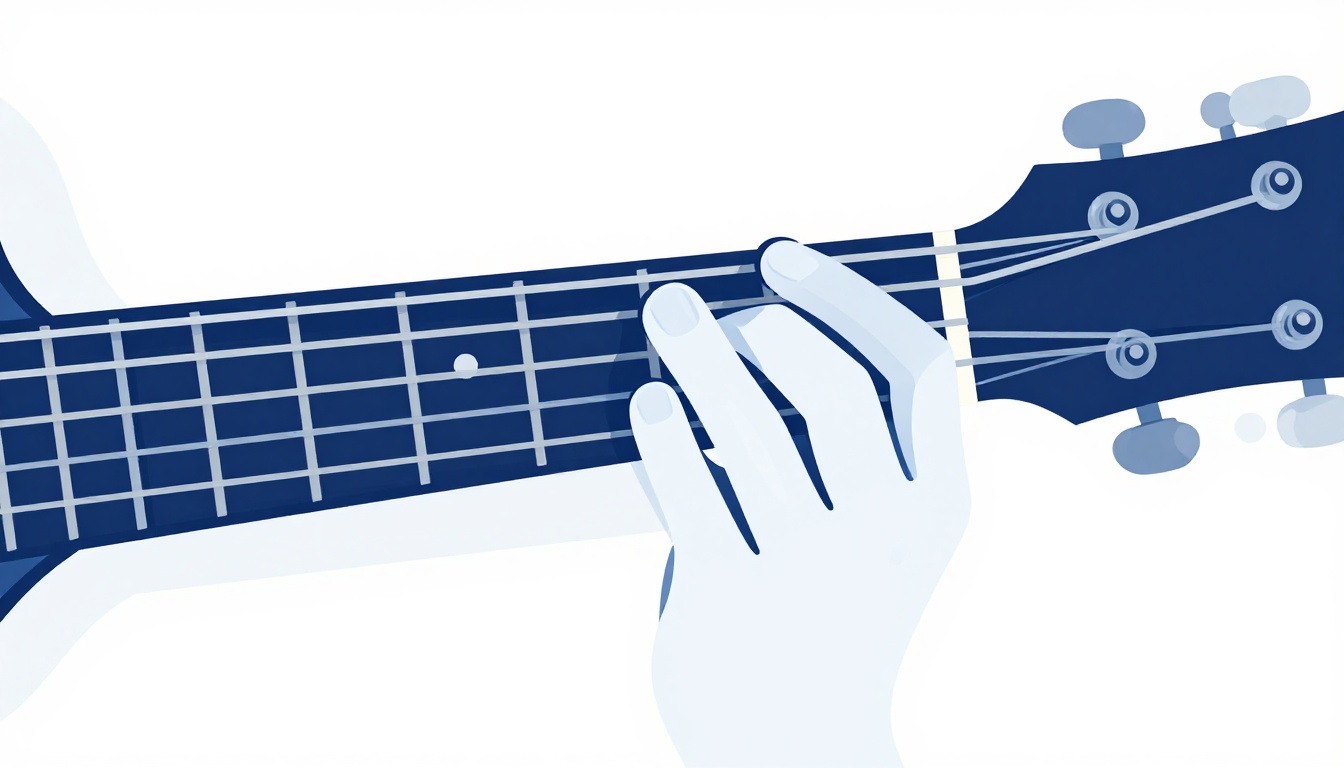
Why the Barre F Chord Buzzes or Goes Silent
Work through these string by string. Almost every buzzing F chord traces back to one of these six causes.
The low E string is muted or buzzing
This is usually a thumb problem, not an index finger problem. If your thumb is too low on the back of the neck or wrapped over the top, your palm cannot roll your hand far enough forward to let the index finger press the 6th string with even pressure. Move your thumb up so it sits roughly behind the gap between your first and second fingers, and check that your wrist is not collapsed inward.
The B string cuts out
The B string sits directly under your ring finger's fingertip once that finger is arched onto the A string at fret 3. If the ring finger is flat rather than arched, its underside brushes the B string and kills it. Arch the ring finger more and check that only its tip is touching the A string.
The high E string buzzes
This is almost always the very tip of the index finger's barre losing contact right where it crosses the high E string, usually because the finger is bowing or the pressure tapers off toward the pinky side of the hand. Make sure the barre finger stays straight along its length and that you are pressing with the full edge, not just the base of the finger nearest your palm.
The D or A string sounds dead or choked
This means your ring finger and pinky are landing too close to each other, or one of them is leaning onto the neighboring string. Since both land on fret 3 on adjacent strings, give each one its own clear angle: ring finger straight down onto the A string, pinky arched onto the D string, with a visible gap between the two fingertips.
The G string sounds thin or out of tune
Your middle finger is the only one carrying the 3rd of the chord, and if it presses too far back from the fret wire, the note will sound sharp, dull, or fretted out. Move it right up against the 2nd fret wire rather than in the middle of the fret space.
Everything buzzes a little, all the time
If every string sounds slightly choked no matter how you adjust your fingers, the barre itself is not fully seated. Check that your index finger sits close to the fret wire rather than in the middle of the 1st fret's space, and increase the pressure gradually rather than trying to force it all at once, which tires your hand and makes the buzz worse, not better.
How Your Guitar's Setup Affects the F Chord
Not every buzz is a finger problem. Before you assume your technique is at fault, it is worth ruling out the guitar itself, especially if every chord you play, not just F, has started buzzing more than it used to.
Action that is too low
Action is the height of the strings above the frets. If it has crept lower over time, the strings sit closer to the frets and buzz more easily under any fretted chord, and a full barre, which already presses hard on six strings at once, shows the problem first. A guitar tech can raise the action at the bridge or the nut if this turns out to be the cause.
Too much or too little neck relief
The neck should have a very slight forward bow, not be perfectly straight and not be back-bowed. Too little relief brings the strings close enough to the frets in the middle of the neck to buzz on almost anything fretted there, which includes the barre. This is adjusted with the truss rod and is worth a professional setup rather than a DIY attempt if you have not done it before.
Old or worn strings
Strings that have gone dull and grooved from wear do not sit against the frets as cleanly as fresh ones, and they buzz more easily under pressure. If your F chord buzzes but your strings are also old and have not been changed in months, try a fresh set before concluding your technique is the problem.
Humidity swings
Wood moves with humidity, and a neck that has picked up too much or too little moisture can develop exactly the kind of relief problems described above. If buzzing appeared suddenly after a season change, a big temperature shift, or moving the guitar somewhere new, humidity is worth considering before you assume your hand got worse.
None of this means you should blame the guitar first. Most beginner F chord buzz is genuinely technique, and the string-by-string causes covered earlier fix the vast majority of cases. But if you have worked through every finger position carefully and the buzz will not go away, a quick setup check rules out the guitar as the culprit.
The Mini Barre F Chord (Top Four Strings)
If the full six-string barre is still out of reach, this version uses the same shape but only barres two strings instead of six, which is far less demanding on your hand.
| String | Fret | Finger |
|---|---|---|
| 6 (low E) | Not played | - |
| 5 (A) | Not played | - |
| 4 (D) | 3 | 3 (ring) |
| 3 (G) | 2 | 2 (middle) |
| 2 (B) | 1 | 1 (index, mini barre) |
| 1 (high E) | 1 | 1 (index, mini barre) |
Your index finger only has to flatten across two strings, the B and high E, instead of all six. Your middle and ring fingers sit in the same place as the full barre version. Strum only the top four strings, and either avoid the low E and A strings with your strumming hand or lightly rest your fretting-hand fingers back against them to mute them if your pick catches them by accident.
This shape still contains the root, 3rd and 5th of F major, so it is a genuine F chord, not a simplification that changes the sound. It is a smaller version of the same idea, not a different idea.
The Easy No-Barre F Chord
This version drops the barre completely and uses four fingers, each on its own string, which makes it a good starting point if barring anything at all still feels out of reach.
| String | Fret | Finger |
|---|---|---|
| 6 (low E) | Not played (mute) | - |
| 5 (A) | 3 | 3 (ring) |
| 4 (D) | 3 | 4 (pinky) |
| 3 (G) | 2 | 2 (middle) |
| 2 (B) | 1 | 1 (index) |
| 1 (high E) | Not played (mute) | - |
Only strum strings 2 through 5, the middle four strings. Mute the low E and high E strings so they do not ring open, which would clash badly with the F chord underneath. A simple way to do this is to let the side of your ring finger rest lightly against the low E string and the tip or side of your index finger rest against the high E string, just enough contact to stop them vibrating without pressing them down.
This shape is genuinely easier because every finger has exactly one job. Nobody is arching over a neighbor or holding three strings down at once. The tradeoff is that it uses only four strings, so it sounds thinner than the full barre version, and it is not the shape you want to keep using forever, because it does not transfer up the neck the way a barre chord does.
An Easier-Sounding Alternative: Fmaj7
Fmaj7 is not a simplified F chord, it is a different chord that shares F's root and often works in the same spot in a song, and it happens to be one of the easiest-sounding chords near F on the neck.
| String | Fret | Finger |
|---|---|---|
| 6 (low E) | Not played | - |
| 5 (A) | Not played | - |
| 4 (D) | 3 | 3 (ring) |
| 3 (G) | 2 | 2 (middle) |
| 2 (B) | 1 | 1 (index) |
| 1 (high E) | Open | - |
No barre, three fingers, each on its own fret and string, with the high E string ringing open on top. This is a genuinely different chord from F major, since it adds the note E, the major 7th, which gives it a softer, more open sound than the plain triad. It is not a substitute you can drop into every song that calls for F, since it changes the harmony, but where a songwriter has actually written Fmaj7, or where you are arranging your own version of a song and it fits, it is a useful chord to have under your fingers that shares almost nothing technically with the barre chord above it.
Small Hands and Short Fingers
If your ring finger and pinky are close together in length, the full barre's fret-3 stretch across the D and A strings is the part that will feel cramped, not the barre itself. Two adjustments help more than brute force does.
Rotate your whole hand very slightly so your fingers approach the strings from more of an angle rather than straight on, which gives your ring finger and pinky a little more room to land without colliding. Also check your thumb position again: a thumb that is too high, near the top edge of the neck, closes the angle between your fingers and the fretboard and makes any stretch feel tighter than it needs to be. Dropping the thumb slightly lower on the back of the neck often frees up more space than it seems like it should.
If the full barre is still not happening today, the mini barre and no-barre versions above are not consolation prizes. They are correct versions of the same chord, and plenty of recordings use exactly these smaller voicings on purpose.
A Higher-Up-the-Neck Version: The A-Shape Barre
Once the E-shape barre at fret 1 feels solid, this second full barre shape is worth knowing, because it gives you the same F chord from a different open-chord shape, further up the neck.
| String | Fret | Finger |
|---|---|---|
| 6 (low E) | Not played | - |
| 5 (A) | 8 | 1 (barre, root) |
| 4 (D) | 10 | 3 |
| 3 (G) | 10 | 4 |
| 2 (B) | 10 | 2 |
| 1 (high E) | 8 | 1 (barre) |
This is an open A chord shape, barred with your index finger at the 8th fret so the root note on the A string lands on F. Your index finger barres the top five strings at fret 8 while your middle, ring and pinky fingers fill in the fret 10 notes on the D, G and B strings. The low E string is not part of this shape, so either avoid it while strumming or mute it with the underside of your index finger.
Many players find this version's stretch easier than the fret-1 E-shape barre, since frets further up the neck are closer together and string tension is slightly lower. It will not replace the open-position F chord for most beginner songs, but it is useful once you start moving barre shapes around the neck for other chords too.
The Capo Trick, and Why It Is a Workaround, Not a Shortcut
A capo lets you avoid playing an F shape at all by clamping the neck and using an easier open-chord shape somewhere else. Three common options:
| Capo position | Shape you play | Sounds as |
|---|---|---|
| 1st fret | Open E shape | F |
| 3rd fret | Open D shape | F |
| 5th fret | Open C shape | F |
Each of these works because a capo shortens the string length exactly the way a barre finger does, just with a clamp instead of a finger. Capo at the 1st fret and play an open E shape and you get an F chord, because that is precisely what your index finger is doing when it barres fret 1 in the standard shape.
The catch is that every other chord in the song has to move with the capo too. If a song goes F, Bb, C and you capo at the 1st fret to dodge the F barre, you now need to find the E-shape equivalents of Bb and C as well, which is its own small puzzle. A capo is a genuinely useful tool for specific songs and specific keys, but it postpones learning the barre rather than replacing the need for it, since barre chords keep showing up in other keys with no open-string escape route at all.
The Barre Shape Is Movable: What Else You Get for Free
The single biggest payoff of learning the F barre chord is not F itself, it is the shape. Because nothing in this chord relies on an open string, you can slide the exact same finger pattern up or down the neck and get a different major chord at every fret, with the note under your index finger's barre telling you which one.
| Fret | Chord |
|---|---|
| 1 | F |
| 2 | F#/Gb |
| 3 | G |
| 4 | G#/Ab |
| 5 | A |
| 6 | A#/Bb |
| 7 | B |
This is why barre chords are worth the effort beyond any one song: F is the hardest version of this shape, at the widest, most tension-heavy part of the neck, and every other position on this list is a small variation on effort you have already built, not a new problem to solve. B major, seven frets up, is the same shape again once your hand is ready for it, and if Bb is what you need next, there is an easier voicing that skips the barre entirely, the same way the versions earlier in this post let you skip it for F.
Common Mistakes Beyond Finger Placement
A few habits slow down barre chords even when every finger is technically in the right place.
Squeezing too hard. More pressure is not the fix for buzzing once your fingers are correctly placed. Excess grip tires your hand fast and often makes the barre finger flatten and lose contact rather than hold it. Aim for the least pressure that keeps every string ringing, not the most you can manage.
Holding your breath. It sounds unrelated to guitar, but tensing your whole upper body while your hand works through a hard shape is common, and it makes everything, including your fretting hand, tighter than it needs to be.
Practicing only at full speed. Trying to slam into the F chord shape from a standing start every time trains your hand to fail the same way repeatedly. Build it in the three steps described earlier, barre first, then the other three fingers, until the sequence is automatic, and only then work on speed.
Giving up after one clean strum. One good strum does not mean the shape is learned. Play it, release your hand completely off the neck, and rebuild it from scratch. That reset is what actually builds the muscle memory, not repeated strumming of a chord your hand never fully let go of.
Watching your hand instead of feeling it. It is natural to stare at your fretting hand while you build a new shape, but relying on your eyes forever means you will always need to look down mid-song to change into F, which breaks your strumming rhythm every time. Once the shape is roughly familiar, spend part of your practice building it with your eyes closed or looking away, so your hand learns the position by feel.
Fixing every string at once. When a chord buzzes on two or three strings, it is tempting to shift your whole hand around hunting for a position where everything suddenly works. It rarely does. Isolate one buzzing string at a time, using the causes listed earlier, fix that one finger, then move to the next. Chasing the whole chord at once usually just moves the buzz from one string to another.
How to Know You Have Actually Got It
A few concrete checkpoints tell you when the F chord has moved from "something I can eventually get to ring" to "something I can rely on in a song."
You can form the full barre shape from a resting hand and get a clean strum on the first try, most of the time, not just occasionally. You can hold the shape for four slow strums in a row without any string dying partway through. You can change into F from at least one other chord, commonly C, G or Am, without a visible pause or a broken strumming pattern. And you can do all of this without looking down at your fretting hand for the whole change.
None of these need to happen on the same day, and there is no fixed timeline that applies to everyone. But they are a more useful measure of progress than "does it sound perfect yet," because a chord that meets these four checkpoints will hold up inside a real song even on the days it is not sounding its absolute best.
Electric vs Acoustic: Does It Matter for Learning F?
If you own both, or are deciding which to practice barre chords on, electric guitars are generally the more forgiving choice while you are first building the barre. Electric strings are typically lighter gauge and sit under less tension than acoustic strings, and electric necks are usually slimmer, both of which reduce how hard your hand has to work to get the same clean result. None of this changes the shape or the theory, F is F on either instrument, but if your hand is struggling specifically with the physical effort of the barre rather than the finger placement, an electric guitar (even unplugged) can make early reps noticeably less punishing.
This is not a reason to switch instruments if an acoustic is what you have and play. The barre chord you build on a harder-to-fret acoustic transfers completely to an electric, and plenty of players learn F on acoustic from day one with no issue. It is simply worth knowing that if the shape feels unusually brutal and you have access to an electric, the guitar itself may be part of what you are fighting, not just your hand.
Changing Between F and Other Chords
The shape is rarely the hard part after the first week. The hard part is arriving at F, or leaving it, without a gap in the strumming.
From C to F: your middle finger stays close to the same string (moving from the B string to the G string), which gives your hand a small anchor point. Practice this change on its own, slowly, before putting it in a song.
From G to F: this is a bigger jump because your whole hand has to relocate down to fret 1 to 3 while also forming the barre. Slow this one down more than feels necessary at first.
From Am to F: your ring finger and middle finger are already doing similar jobs on nearby strings in both shapes, which makes this one of the more forgiving F transitions to practice early.
From F to Bb: since Bb is the same E-shape barre moved up one fret, once F is solid, Bb is the same shape one fret higher rather than a new chord to learn.
From F to Dm: your index finger stays on the same fret in both shapes, so keep the barre where it is and move your other three fingers, rather than lifting your whole hand off the neck and starting over.
In every case, the fix is the same: isolate the two-chord change on its own, away from a full song, and repeat it slowly until your hand finds the second shape without your eyes checking it first. Speed comes from repetition of the change itself, not from playing the song faster and hoping the chord change keeps up.
F Chord vs Fm Chord
F major and F minor share the same barre shape and the same root note, and the only difference is one finger. In F major, your middle finger sits on the G string at fret 2. Flatten your first finger's barre to also cover that note instead, or move that one note down to fret 1, and the 3rd of the chord drops by a semitone, from A to Ab, which turns the chord minor. If you already have the F major barre comfortable, the Fm chord is a small adjustment away rather than a shape to learn from nothing.
Where F Fits in a Key
F major is the IV chord in the key of C major, which is why F shows up constantly alongside the C chord, G and Am in beginner songbooks. It is also the I chord, the tonic, in the key of F major itself, where the other chords built from the F major scale are Gm, Am, Bb, C, Dm and Edim. Knowing this matters practically: if a song is in C and modulates or borrows a chord, F is one of the first places that borrowed chord tends to come from, so recognizing F by ear becomes useful well beyond any single song.
| Degree | I | ii | iii | IV | V | vi | vii° |
|---|---|---|---|---|---|---|---|
| Key of C major | C | Dm | Em | F | G | Am | Bdim |
| Key of F major | F | Gm | Am | Bb | C | Dm | Edim |
Both rows matter for the same reason. In the key of C, F is the chord that lifts a progression away from home before G pulls it back, which is the C-F-G-C pattern behind an enormous number of beginner songs. In the key of F, F is home base, and C becomes the chord that creates the pull back to it, which is why F and C keep showing up as a pair regardless of which key a song is actually in.
Progressions and Songs to Practice the F Chord With
The F chord shows up constantly once you know to listen for it, often in three-chord songs built around C, F and G, or in progressions that lean on F as a IV chord. Rather than jumping straight into a full song, look for one built mostly around chords you already know, with F appearing once or twice per verse rather than on every line. That gives you repeated, low-pressure reps of the change into and out of F without the rest of the song falling apart if one strum buzzes.
A few generic progressions worth looping on their own before you attach them to any specific song:
- C, F, G, C. The most common home for F in the key of C. Practice this as a slow, even loop, one chord per bar, until the F does not disrupt the timing of the bar after it.
- F, G, Am, C. Starts on F instead of arriving at it, which is a different feel in your hand since you are leaving the barre shape rather than building into it.
- F, C, G, C. Puts F right at the start of the phrase, so your hand has to form the barre from a dead stop, which is exactly the skill the reset drill earlier in this post is training.
Loop each of these slowly on a metronome or drum loop before trying them inside an actual song. The goal of the loop is a clean, on-time change every single pass, not speed. Speed follows naturally once the change stops needing conscious thought.
Building Barre Strength Away From a Song
The strength and coordination a barre chord needs can be trained outside of playing full songs, which takes pressure off any one practice session to produce a perfect result.
The reset drill. Rest your fretting hand flat on your leg, away from the guitar. Count down from five, and on "one," bring your hand up and form the full F barre shape as cleanly as you can. Strum once, check the sound, then take your hand back off the guitar completely and reset. Repeat, gradually shortening the countdown as it gets more automatic. This trains your hand to find the shape from nothing, which is exactly what a song demands mid-strum.
Practice the barre higher up the neck first. Frets 5 through 9 have closer string spacing and lower tension than fret 1, which makes a clean barre noticeably easier to achieve there. Barre any fret in that range with just your index finger, no other fingers added yet, and get comfortable with a clean six-string barre before bringing the same barre back down to the harder position at fret 1.
Short, daily contact beats occasional long sessions. The muscles and finger independence a barre chord relies on respond to frequency more than duration. A few focused minutes every day builds the shape faster than one long session once a week, and it is far less likely to leave your hand sore.
A Practice Routine for the F Chord
Five minutes a day, done deliberately, beats twenty minutes of drifting.
- Isolation reps (2 minutes). Build the barre shape from nothing, strum once, release your hand completely off the strings, and rebuild it. Repeat for two minutes. Do not chase speed yet, chase a clean strum every single time.
- String-by-string check (1 minute). Once the shape is formed, pick all six strings one at a time and note which one is weakest today. It will not always be the same string, and that is normal.
- One change, on repeat (1 minute). Pick a single change, C to F or Am to F, and go back and forth slowly, focused on landing the new shape without an audible gap.
- A verse, slow (1 minute). Take a song section you know that uses F once or twice, and play it under tempo. Speed is the last thing you add, not the first.
Come back the next day and start from step 1 again, even if yesterday went well. Barre chord strength and finger memory both fade fast without daily contact, and short, repeated sessions build both faster than occasional long ones.
Fingerpicking the F Chord
Everything above assumes strumming, but F holds up just as well under a fingerpicking pattern, and the smaller versions of the chord are often the more natural fit for it. Fingerpicking rarely needs all six strings ringing at once the way a full strum does, so the mini barre or the four-finger no-barre version frequently sound just as complete as the full barre chord once you are picking individual strings rather than sweeping across all of them.
A simple starting pattern is thumb on the low root note, then index, middle and ring fingers picking the D, G and B strings in sequence, landing on the high E last. On the full barre shape, your picking-hand thumb naturally falls on the low E string, giving the pattern a clear, grounded root note under the rest of the chord. On the no-barre version, where the low E is muted rather than played, move your thumb to the A string instead and let that carry the bass note of the pattern.
Fingerpicking also forgives buzzing more than strumming does, since a slightly weak note gets picked cleanly on its own rather than buried in a fast downstroke across six strings at once. If the full barre F chord is still inconsistent under a strum, practicing it fingerpicked first is a reasonable way to build confidence with the shape before asking it to survive a faster strumming pattern.
Muting the Strings You Are Not Playing
Both the mini barre and no-barre versions of F rely on deliberately not playing certain strings, and doing that cleanly is its own small skill separate from fretting the chord.
With your fretting hand, the simplest method is contact muting: let a finger you are already using rest lightly against the string you want silent, without pressing it down to a fret. In the no-barre F chord, the side of your ring finger against the low E string and the underside of your index finger against the high E string both work this way, using fingers that are already busy elsewhere on the chord.
With your picking or strumming hand, the more reliable method for strummed chords is simply narrowing your strumming arc so the pick or your fingers physically do not reach the strings you want left out. This takes more control than swinging through all six strings, but it is worth building deliberately, since relying on fretting-hand muting alone tends to fail the moment you strum harder than usual.
FAQ
Is there more than one correct way to play the F chord? Yes. The full six-string barre, the mini barre on the top four strings, and the four-finger no-barre version are all genuine F major chords, not simplifications of one "real" version. Which one you use depends on the song, your hand, and how far along the barre is.
Why does my F chord sound muted even though I'm pressing hard? Pressing harder usually is not the fix. Muted strings almost always come down to finger placement, an arched finger that has gone flat, or a thumb position that is not giving your hand enough leverage. Work through the string-by-string causes above rather than adding more grip.
How long does it take to learn the F barre chord? It varies widely by player, but consistent short daily practice, even five minutes, tends to produce a clean barre faster than occasional long sessions. Hand strength and finger independence for barre chords build gradually and respond well to daily repetition.
Can I skip the barre chord and just use the capo trick forever? For a specific song in a specific key, yes, a capo genuinely works. But barre shapes reappear constantly in other keys where there is no open-string workaround, so most players end up learning the barre eventually rather than avoiding it indefinitely.
Why does F feel so much harder than the chords I already know? Because it likely is, mechanically. F is usually the first chord a beginner meets that uses no open strings at all, so your hand has to do all the work that the guitar's open tuning normally shares with you. That is a real jump in difficulty, not a sign of doing something wrong.
Does the F chord ever get easier, or do I just get used to the buzz? It gets easier. The buzz is not something to tune out, it is feedback pointing at one specific correctable cause each time. As barre strength and finger placement improve, the buzz becomes rarer and eventually stops being something you think about at all.
Is the mini barre or no-barre version "cheating"? No. Both are correct F major chords built from the same three notes, just voiced across fewer strings. Many recorded songs use smaller F voicings on purpose because they suit the arrangement, not because the player could not manage a full barre.
What is the difference between F and F7 in a song? F7 adds one note (Eb) to the F major triad, which gives it a bluesier, less settled sound that usually wants to resolve somewhere. If a song calls for an F7 chord instead of plain F, using the major triad in its place will sound close but noticeably flatter, since that added note is doing real work in the progression.
Should I learn the barre F chord or the no-barre version first? Learn the shape that lets you play through a song without stopping, even if that is the no-barre or mini barre version at first. Once changing into and out of F no longer breaks your rhythm, start layering the full barre back in during your isolated practice reps, separate from the song, until it is ready to replace the smaller version.
Why does my hand hurt after practicing the F chord? Mild fatigue in your fretting hand is normal for a new, physically demanding shape. Sharp pain, or pain that lingers well after you stop playing, is not, and is usually a sign of excess tension, either gripping harder than necessary or holding the shape for too long without releasing your hand. Rest, and reduce both the grip and the length of each practice rep if this happens.
Do I need special strings or a special guitar to play F cleanly? No. A normal, reasonably set-up guitar with strings in decent condition is enough. What actually varies from guitar to guitar is string gauge and action, covered earlier, and either can make the barre feel easier or harder without anything being wrong. If you have ruled out technique and setup and F still will not ring, a professional setup check is worth the visit before you consider buying anything new.
GuitarLowKey
Ready for fifteen focused minutes?
Open the web app and train the change that is blocking your song.